Author

Lena Blaze

Browsing

How delicious is that, crispy cauliflower from the oven

Discover the joy of turning a simple head of cauliflower into a crispy, golden delight with this easy-to-follow recipe. Perfect as a healthy snack, a savory side dish, or a tasty appetizer, this crispy oven-baked cauliflower is sure to impress with its delicious flavor and satisfying crunch. If you find yourself loving this recipe, don’t hesitate to share your thoughts in the comments!

Ingredients:

1 head of cauliflower

Salt, to taste

A pinch of nutmeg

For the Batter:

50g wheat flour

A dash of sweet paprika powder

2 eggs

40g butter, melted

2 cloves garlic, minced

A bit of grated nutmeg

A pinch of salt

Preparation:

Prep the Cauliflower:
Rinse the cauliflower head thoroughly under cold water.

Carefully break it down into florets.

In a large pot of boiling water seasoned with salt and a pinch of nutmeg, cook the cauliflower florets until al dente. This should take about 5-7 minutes.

Remove the florets with a slotted spoon and let them steam dry or pat dry with a kitchen towel to remove excess moisture.

Prepare the Batter:

In a mixing bowl, whisk together the eggs and melted butter until frothy.

Add in the minced garlic, salt, paprika, a touch of nutmeg, and gradually sift in the wheat flour. Stir everything together until you achieve a smooth, consistent batter.

Coat the Cauliflower:

Once the cauliflower florets have cooled slightly and are manageable to touch, dip and roll them in the prepared batter. Make sure each floret is evenly coated.

Bake:

Preheat your oven to 190°C (375°F) with the setting on both upper and lower heat.

Arrange the batter-coated cauliflower florets on a greased baking tray, ensuring they are spaced out evenly.

Bake in the preheated oven on the middle rack for about 20 minutes, or until the florets are golden brown and crispy.

Serve:

Once done, remove the tray from the oven and let the cauliflower cool for a few minutes before serving. This allows the florets to crisp up even further.

Enjoy your crispy oven-baked cauliflower as is, or pair it with your favorite dipping sauce for an extra flavor kick. Whether you’re serving this to guests, enjoying it as a nutritious snack, or adding it as a side to your main meal, this cauliflower recipe is a delicious way to incorporate more veggies into your diet. Don’t forget to share your experience and any personal twists you added to the recipe in the comments below

Ingredients
2 lbs. Laura’s Lean 96% ground beef
8 oz. dry elbow macaroni (I use Barilla Plus elbows or whole wheat)
1 small onion, chopped
3 garlic cloves or 1 Tbsp, minced
2 (15 oz.) cans tomato sauce
1 can (16 oz.) dark red kidney beans, drained
1 can (4 oz.) diced fire roasted green chilies
1 can (14.5 oz.) diced petite tomatoes, undrained
1 and 1/2 tsp chili powder
1 tsp cumin
1 tsp salt
1/4 tsp black pepper
1 cup shredded reduced fat cheese ( I use Velveeta shreds)
Green onions, fat free sour cream or plain yogurt, or additional cheese for garnish
Instructions
Fill a large 5-quart Dutch oven or stockpot with water and cook macaroni according to package directions. Drain and set pasta aside.
Return pot to stove on medium-high heat. Spray the Dutch oven or stockpot with non stick cooking spray. Add the ground beef and cook for about 5 minutes, breaking up the meat with a spatula. Once meat is cooked, drain excessive liquid, if needed.
Add onion and garlic. Cook onions and garlic until onions are soft.
Add tomato sauce, tomatoes, green chilies, kidney beans, chili powder, cumin, salt, and pepper. Bring to a simmer, occasionally stirring. Cook for about 15 minutes.
Combine the cooked pasta and cheese to the meat and beans. Cook for another minute or until well combined and the cheese is melted.
Serve with your favorite toppings such as: fat free sour cream, sliced onions, or additional cheese.
Makes 8 servings and 5-8 points eacH

Introduction: Embark on a culinary journey with our WEIGHT WATCHER Skinny One Pot Mac and Cheese, a culinary creation that combines the indulgence of classic macaroni and cheese with the health-conscious twist of a skinny recipe. This one-pot wonder not only promises a comforting symphony of flavors but also ensures a seamless, hassle-free cooking experience. Join us as we unravel the art of crafting this delectable dish, complete with meticulous measurements, step-by-step instructions, and invaluable nutritional insights.

Ingredients:

For the Mac and Cheese:

  • 2 cups whole wheat elbow macaroni
  • 2 cups cauliflower florets, finely chopped
  • 2 cups low-fat shredded sharp cheddar cheese
  • 1 cup skim milk
  • 1 cup chicken or vegetable broth
  • 1/2 cup fat-free Greek yogurt
  • 1/4 cup grated Parmesan cheese
  • 1 tablespoon Dijon mustard
  • 1 teaspoon garlic powder
  • Salt and black pepper to taste

For the Topping:

  • 1/2 cup whole wheat breadcrumbs
  • 1 tablespoon olive oil
  • 1/4 cup chopped fresh parsley (optional for garnish)

Instructions:

  1. Prep the Cauliflower:
    • Finely chop the cauliflower florets, creating a rice-like consistency. This ingenious addition enhances the creaminess of the mac and cheese while introducing a nutritional boost.
  2. Cook the Macaroni:
    • In a large, deep skillet or pot, combine the whole wheat elbow macaroni, finely chopped cauliflower, skim milk, and chicken or vegetable broth. Bring to a gentle boil and then simmer, stirring occasionally, until the macaroni is cooked al dente.
  3. Create the Cheesy Sauce:
    • Gradually stir in the low-fat shredded sharp cheddar cheese, Greek yogurt, grated Parmesan cheese, Dijon mustard, and garlic powder. Continue stirring until the cheeses melt, and the sauce becomes smooth and velvety.
  4. Season to Perfection:
    • Season the mac and cheese with salt and black pepper to taste. The Dijon mustard adds a subtle tanginess, elevating the overall flavor profile.
  5. Prepare the Topping:
    • In a separate bowl, combine whole wheat breadcrumbs with olive oil, creating a crunchy and golden topping for the mac and cheese.
  6. Bake to Golden Perfection:
    • Sprinkle the breadcrumb mixture evenly over the mac and cheese. Transfer the skillet or pot to a preheated oven and broil for 2-3 minutes or until the topping achieves a golden brown hue.
  7. Garnish and Serve:
    • Optional: Garnish the mac and cheese with freshly chopped parsley for a burst of freshness and color. Serve hot, savoring the aroma and visual appeal of this culinary masterpiece.

Nutritional Information:

  • Serving Size: 1 cup
  • Calories: 320
  • Total Fat: 12g
  • Saturated Fat: 6g
  • Cholesterol: 30mg
  • Sodium: 480mg
  • Total Carbohydrates: 35g
  • Dietary Fiber: 5g
  • Sugars: 3g
  • Protein: 18g

Weight Watchers (WW) SmartPoints: 9 per serving

Culinary Insights:

  • Cauliflower Infusion: The finely chopped cauliflower not only adds nutritional value but also enhances the creaminess of the mac and cheese without compromising texture.
  • Greek Yogurt Magic: The addition of fat-free Greek yogurt contributes to the richness of the sauce, infusing a delightful tanginess.
  • Breadcrumb Crunch: The whole wheat breadcrumb topping adds a satisfying crunch while maintaining a health-conscious element.

Conclusion: Our WEIGHT WATCHER Skinny One Pot Mac and Cheese stands as a testament to the marriage of comfort and nutrition. At just 9 SmartPoints per serving, this dish invites you to relish the iconic flavors of macaroni and cheese while embracing a mindful approach to wellness. Elevate your dining experience with this culinary symphony that brings together wholesome ingredients, ingenious techniques, and a touch of creativity. Embrace the joy of guilt-free indulgence as you savor each spoonful of this delectable mac and cheese, a masterpiece that proves health-conscious eating can be a truly epicurean delight.

Delicious Weight Watchers Pasta with Lean Ground Beef, Veggies, and Creamy Mozzarella Sauce

Welcome to a hearty and healthy meal that is perfect for those following the Weight Watchers program. This Weight Watchers-friendly pasta with lean ground beef, sautéed vegetables, and a creamy mozzarella sauce offers an indulgent, flavorful dinner without compromising on your health goals. With a rich mix of whole-grain pasta, lean protein, and a homemade creamy sauce, this recipe combines comfort with nourishment, all while keeping your WW points in check.

Whether you’re cooking for yourself, a family, or meal prepping for the week ahead, this recipe can easily become a go-to favorite. Plus, it’s simple to make, with easy-to-find ingredients and just a few key steps to follow. The rich flavors of bell peppers, onions, and garlic complement the savory beef and melty cheese perfectly, giving you a satisfying and filling meal. The best part? You won’t have to feel guilty about enjoying this dish because it’s made with weight-conscious substitutions that make it lower in calories and Weight Watchers points.

Let’s get started on how to make this creamy, satisfying, and Weight Watchers-approved pasta!


Why This Weight Watchers Pasta Recipe Works

This pasta recipe is not only delicious but also nutritious. By using healthy ingredients like lean ground beefwhole wheat pasta, and unsweetened almond milk, this dish is designed to provide you with a balanced meal that is lower in calories, fats, and carbohydrates compared to traditional pasta recipes. Here’s why this recipe is a great option for your healthy lifestyle:

  • Lean Ground Beef: Opting for 96% lean ground beef or steak strips significantly reduces the fat content, while still providing a good amount of protein. The lean meat keeps the recipe filling and satisfying without being overly greasy or high in calories.
  • Whole-Wheat or Low-Carb Pasta: Whole-wheat pasta is packed with fiber, which helps with digestion and keeps you feeling fuller for longer. If you’re following a low-carb lifestyle, you can substitute regular pasta with a low-carb pasta option like zucchini noodles, shirataki noodles, or any of your favorite alternatives. This keeps the dish light while providing a rich texture.
  • Almond Milk and Reduced-Fat Mozzarella: To keep the sauce creamy yet low in calories, unsweetened almond milk is used as a base. It’s a great non-dairy, low-calorie alternative to regular milk, while still offering that creamy texture. Reduced-fat mozzarella cheese adds flavor without overwhelming the dish with excess fat or calories.
  • Bell Peppers and Onions: These vegetables are packed with essential vitamins, minerals, and antioxidants, adding both flavor and color to the dish. Plus, they provide a natural sweetness when sautéed, helping to balance the savory flavors of the beef and cheese.

By making these smart substitutions, this Weight Watchers pasta recipe maintains the essence of a comforting, indulgent meal, while keeping it light on calories and points.


Ingredients for Weight Watchers Pasta

  • 1 lb lean ground beef (96% lean) or steak strips (alternative for more flavor)
  • 1 green bell pepper, diced
  • 1 red bell pepper, diced
  • 1 medium onion, diced
  • 2 cloves garlic, minced
  • 8 oz whole-wheat or low-carb pasta (such as rigatoni or penne)
  • 1 cup reduced-fat shredded mozzarella cheese
  • 1 cup unsweetened almond milk (or other low-fat milk alternative)
  • 1 tbsp all-purpose flour (for thickening the sauce)
  • Salt and pepper to taste
  • Olive oil spray (for cooking)

Step-by-Step Instructions for Weight Watchers Pasta

Step 1: Boil the Pasta

Start by boiling your pasta according to the package instructions. Be sure to cook it until it’s al dente. After cooking, drain the pasta and set it aside. Make sure to save a small cup of pasta water in case you need it later to thin the sauce.

Step 2: Brown the Lean Ground Beef

While the pasta is cooking, heat a non-stick skillet over medium heat. Spray the skillet with olive oil spray and add your lean ground beef (or steak strips). Cook the meat, breaking it up with a spatula or spoon as it browns. Stir occasionally until the beef is fully cooked and browned. Once done, remove the beef from the skillet and set it aside.

Step 3: Sauté the Vegetables

In the same skillet, add a bit more olive oil spray if necessary. Add the diced green bell pepperred bell pepper, and onion. Sauté for about 5-7 minutes, or until the vegetables become tender and fragrant. Add the minced garlic during the last 2 minutes of sautéing to release its aroma and flavor. The vegetables should be soft and slightly caramelized at this point, providing a rich base for the sauce.

Step 4: Make the Creamy Sauce

In a small bowl, whisk together 1 cup of unsweetened almond milk and 1 tablespoon of flour. This mixture will thicken as it cooks, creating a creamy sauce for the pasta. Pour the almond milk mixture into the skillet with the sautéed vegetables. Stir well and cook the mixture over medium heat, continuing to stir as the sauce thickens. This should take about 3-5 minutes.

Step 5: Combine Beef, Pasta, and Cheese

Once the sauce has thickened to your liking, return the cooked beef to the skillet and stir it into the sauce. Add the drained pasta to the skillet as well, and toss everything together until the pasta is evenly coated in the creamy sauce. Stir in the 1 cup of reduced-fat mozzarella cheese, mixing until the cheese has melted completely and the sauce becomes smooth and creamy. Season with salt and pepper to taste.

Step 6: Serve and Garnish

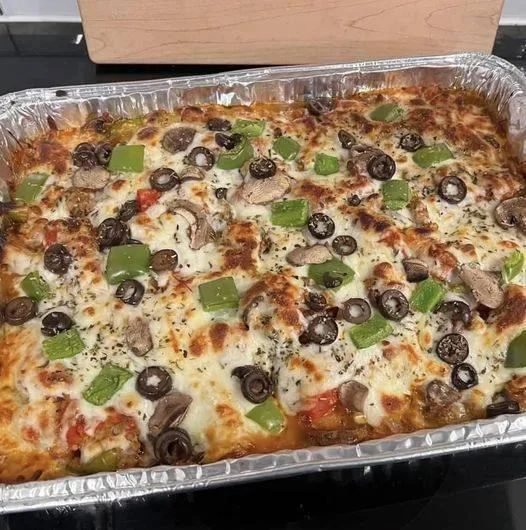
Serve the pasta warm, garnished with fresh parsley or additional seasonings, if desired. The melted mozzarella cheese creates a creamy texture, while the bell peppers, onions, and beef add a savory balance of flavors. This dish is rich and satisfying, but light enough to stay within your Weight Watchers points.


Nutritional Information (Per Serving)

Here’s the breakdown of the nutrition for one serving of this Weight Watchers pasta recipe. Note that this recipe makes 4 servings.

  • Calories: 350 kcal
  • Protein: 30g
  • Fat: 12g
    • Saturated Fat: 4g
  • Carbohydrates: 36g
    • Fiber: 7g
    • Net Carbs: 29g
  • Sugar: 8g (from vegetables and almond milk)
  • Sodium: 350mg
  • Cholesterol: 45mg
  • Vitamin A: 20% DV
  • Vitamin C: 90% DV (due to the bell peppers)
  • Calcium: 15% DV (from mozzarella cheese)
  • Iron: 15% DV

This Weight Watchers pasta recipe provides a great balance of proteinfiber, and healthy fats, while still being a low-calorie, high-nutrient meal that won’t break your point budget.


Weight Watchers Points Breakdown (Per Serving)

For those following the Weight Watchers program, here’s how this pasta recipe stacks up in terms of points:

  • WW Freestyle: 7 points per serving
  • WW Green: 7 points per serving
  • WW Blue: 7 points per serving
  • WW Purple: 7 points per serving

Each serving is relatively moderate in points, which makes it an ideal choice for a hearty meal that doesn’t derail your WW goals. It is also customizable, as you can adjust the pasta portion size, lean meat, or even add extra veggies to further reduce the points.


Storage Tips

If you have leftovers, store them in an airtight container in the refrigerator for up to 3 days. You can easily reheat this dish in the microwave or on the stovetop. If the sauce has thickened too much, just add a splash of almond milk or water to thin it out.

This dish can also be frozen for longer storage. To freeze, allow it to cool completely, then transfer it to a freezer-safe container. When ready to eat, thaw overnight in the refrigerator and reheat thoroughly.


Customizing This Recipe

  1. Vegetarian Version: Swap out the ground beef for lentilstofu, or chickpeas for a vegetarian version. These plant-based proteins are high in fiber and will keep the dish filling and satisfying.
  2. Dairy-Free: Use a dairy-free cheese alternative in place of the reduced-fat mozzarella, and ensure that your almond milk is unsweetened.
  3. Low-Carb: If you prefer to make this dish low-carb, swap the whole-wheat pasta for zucchini noodles or another low-carb pasta alternative. You can also use a smaller amount of pasta for fewer carbs and bulk up the dish with additional veggies.

Conclusion

This **Weight Watchers Pasta with Lean Beef and Creamy Mozzarella

Title: Savory Delight: Crustless Pizza Bake for a Guilt-Free Indulgence

Introduction: Embark on a culinary journey with our Crustless Pizza Bake, a tantalizing creation that captures the essence of traditional pizza without the added carbs. Perfect for those embracing a low-carb lifestyle or seeking a gluten-free alternative, this recipe seamlessly blends robust flavors and wholesome ingredients. Dive into the layers of savory goodness, where each bite is a celebration of cheesy delight and satisfying textures. Let’s explore the art of crafting this guilt-free indulgence that brings the spirit of pizza to your table without compromising on taste.

Ingredients:

  1. Ground Turkey (1 lb):
    • Opt for lean ground turkey as the protein base, ensuring a healthier alternative while maintaining the rich taste of traditional pizza.
  2. Bell Peppers (Assorted Colors, 1 cup, diced):
    • Infuse a burst of color and essential vitamins into your pizza bake with an assortment of bell peppers, adding both flavor and visual appeal.
  3. Onion (1, finely chopped):
    • Elevate the savory profile with finely chopped onions, providing a subtle sweetness that complements the other ingredients.
  4. Mushrooms (1 cup, sliced):
    • Introduce earthy and umami notes with sliced mushrooms, creating a satisfying texture within the pizza bake.
  5. Garlic (3 cloves, minced):
    • Enhance the overall flavor profile with minced garlic, adding a aromatic touch that elevates the dish.
  6. Tomato Sauce (1 cup):
    • Choose a high-quality tomato sauce as the base, ensuring a robust flavor that forms the essence of the pizza experience.
  7. Italian Seasoning (1 tbsp):
    • Infuse your bake with the classic Italian flavors by incorporating a well-balanced Italian seasoning blend.
  8. Mozzarella Cheese (1 1/2 cups, shredded):
    • Embrace the gooey goodness of mozzarella cheese, creating that irresistible stretch and richness characteristic of a pizza.
  9. Parmesan Cheese (1/2 cup, grated):
    • Add a layer of sharpness and depth with grated Parmesan cheese, enhancing the overall cheesy delight.
  10. Eggs (2):
    • Bind the ingredients together with eggs, contributing to the structure and cohesion of the pizza bake.
  11. Salt and Pepper to taste:
    • Season your creation with a pinch of salt and pepper, ensuring a well-balanced and savory experience.

Instructions:

  1. Preheat and Prepare:
    • Preheat your oven to 375°F, creating the ideal environment for the pizza bake to achieve golden perfection. Grease a baking dish to prevent sticking.
  2. Cook Ground Turkey:
    • In a skillet, cook the lean ground turkey until browned, breaking it into crumbles. Drain excess fat for a lighter result.
  3. Saute Vegetables:
    • In the same skillet, sauté diced bell peppers, chopped onions, sliced mushrooms, and minced garlic until tender and fragrant.
  4. Combine Ingredients:
    • In a large bowl, combine the cooked ground turkey, sautéed vegetables, tomato sauce, Italian seasoning, and salt and pepper. Mix well to ensure even distribution of flavors.
  5. Add Cheeses and Eggs:
    • Incorporate shredded mozzarella, grated Parmesan, and beaten eggs into the mixture. Stir until the cheeses are evenly distributed.
  6. Bake to Perfection:
    • Transfer the combined mixture to the greased baking dish, spreading it out evenly. Bake in the preheated oven for 25-30 minutes or until the top is golden brown and the edges are bubbling.
  7. Cool and Serve:
    • Allow the crustless pizza bake to cool slightly before slicing into satisfying portions. Serve with a sprinkle of fresh herbs for an extra burst of flavor.

Crustless Pizza Bake

Ingredients

1 jar RAO’s marinara

3 cups mozzarella cheese

1 lb. Ground Italian sausage – or meat combo of choice

1 green pepper chopped

Mushrooms

Onions
Instructions

Basically use the toppings of your choice.

Pour 1/2 cup marinara in the bottom of a 9×13 baking dish.

Mix all toppings in a bowl with 1 cup Mozzarella and 1 cup marinara.

Pour topping mixture into pan.

Top with the last 2 cups of mozzarella.

Bake at 400 for 20 minutes.

Broil for an additional 3-5 minutes if desired.

Enjoy! 

Zero Point Crustless Pumpkin Pie

Introduction: Embrace the flavors of fall with our Homemade Crustless Pumpkin Pie recipe, a delectable treat that captures the essence of the season without the guilt of a traditional pie crust. This Zero Point wonder is perfect for autumn gatherings or cozy nights in, offering a burst of pumpkin spice goodness in every bite. Simple to prepare and utterly satisfying, this recipe is sure to become a staple in your dessert repertoire.

Ingredients:

Prepare to embark on a journey of culinary delight with the following ingredients:

1 (15 oz) can 100% canned pumpkin purée
1/3 cup zero point brown sugar substitute – such as Lakanto Golden Monkfruit Sweetener
1 teaspoon cinnamon
1/2 teaspoon nutmeg
1/2 teaspoon vanilla extract
1 teaspoon pumpkin spice
2 large eggs or 1/2 cup liquid egg substitute
8 oz. unsweetened almond milk, premier protein, unsweetened coconut milk, or Carbmaster no sugar added milk
Preparation:

Preheat and Prepare: Preheat your oven to 375 degrees Fahrenheit. Spray a 9-inch pie dish with nonstick cooking spray, ensuring easy release once the pie is baked to perfection.
Mixing Magic: In a large mixing bowl, combine the canned pumpkin purée, zero point brown sugar substitute, cinnamon, nutmeg, vanilla extract, pumpkin spice, and eggs (or liquid egg substitute). Mix until all ingredients are well combined, forming a smooth and luscious filling.
Pour and Bake: Pour the pumpkin mixture into the prepared pie dish, spreading it evenly to ensure even baking. Place the dish in the preheated oven and bake for 40-45 minutes, or until a knife inserted in the center comes out clean. The aroma of pumpkin spice will fill your kitchen, signaling that your pie is nearing perfection.
Cool and Serve: Once baked to golden perfection, remove the pie from the oven and let it cool for 10 minutes before serving. This brief cooling period allows the flavors to meld and the pie to set, ensuring a perfect slice every time.
Storage Suggestions: Store any leftovers in the refrigerator for up to a week, although we doubt there will be much left to store once your family and friends taste this irresistible creation.
Nutritional Information:

Smartpoints for crustless pie:
GREEN: Zero Smartpoints if using liquid egg substitute or 1 Smartpoints per slice if using whole eggs
BLUE/PURPLE: Zero SmartPoints per slice
Conclusion: In conclusion, our Homemade Crustless Pumpkin Pie is a celebration of all things autumn, from its warm spices to its velvety texture. Whether enjoyed as a guilt-free dessert or a decadent snack, this recipe is sure to delight your taste buds and leave you craving more. So, gather your ingredients, preheat your oven, and prepare to indulge in a slice of fall bliss. Happy baking!

An easy recipe for a homemade crustless pumpkin pie. This Zero Point Crustless Pumpkin Pie recipe is perfect for fall-it’s so good-you won’t regret making this for your next family gathering!

PREP TIME5 minutes

COOK TIME45 minutes

ADDITIONAL TIME5 minutes

TOTAL TIME55 minutes

Ingredients
1 (15 oz) can 100% canned pumpkin purée
1/3 cup zero point brown sugar substitute – I use Lakanto Golden Monkfruit Sweetener
1 tsp cinnamon
1/2 tsp nutmeg
1/2 tsp vanilla extract
1 tsp pumpkin spice
2 large eggs or 1/2 cup liquid egg substitute
8 oz. unsweetened almond milk, premier protein, unsweetened coconut milk, or Carbmaster no sugar added milk
Instructions
Preheat oven to 375 degrees.
Spray a 9-inch pie dish with nonstick cooking spray.
In a large mixing bowl, combine all ingredients and mix until all ingredients are well combined.
Pour into prepared pie dish.
Bake for 40-45 minutes or until knife inserted in the center comes out clean.
Remove from oven and let it cool for 10 minutes before serving.
Store in the fridge for up to a week.
0-1 PersonalPoints™ per slice
*This number shows the PersonalPoints™ range. The points will vary based on your individualized plan.

Notes
Smartpoints for crustless pie: GREEN: Zero Smartpoints if using liquid egg substitute or 1 Smartpoints per slice if using whole eggs BLUE/PURPLE: Zero SmartPoints per slice

Weight Watchers Loaded Greek Chickpea Salad

Weight Watchers Loaded Greek Chickpea Salad

Ingredients:

  • 2 cups cooked chickpeas, drained and rinsed
  • 1 cucumber, diced
  • 1 cup cherry tomatoes, halved
  • 1/2 red onion, finely chopped
  • 1/2 cup Kalamata olives, sliced
  • 1/2 cup crumbled feta cheese
  • 1/4 cup fresh parsley, chopped
  • 1/4 cup extra-virgin olive oil
  • 2 tablespoons red wine vinegar
  • 1 teaspoon dried oregano
  • Salt and pepper to taste

Instructions:

  1. In a large mixing bowl, combine the cooked chickpeas, cucumber, cherry tomatoes, red onion, Kalamata olives, feta cheese, and fresh parsley.
  2. In a small bowl, whisk together the olive oil, red wine vinegar, dried oregano, salt, and pepper. Pour the dressing over the salad ingredients.
  3. Gently toss the salad until all the ingredients are well coated with the dressing.
  4. Allow the salad to marinate in the refrigerator for at least 30 minutes to let the flavors meld together.
  5. Before serving, give the salad a final toss and adjust the seasoning if necessary.
  6. Serve chilled and enjoy this nutrient-packed Greek chickpea power salad as a satisfying and healthy meal.

Title: Wholesome Mediterranean Delight: Weight Watchers-Friendly Loaded Greek Chickpea Salad

Introduction: Embark on a culinary journey with our Weight Watchers-Friendly Loaded Greek Chickpea Salad – a nutrient-packed powerhouse that seamlessly blends vibrant flavors and health-conscious ingredients. This refreshing salad, brimming with chickpeas, crisp vegetables, and a medley of Greek-inspired elements, is not just a meal; it’s a celebration of wholesome living. Join us in crafting a satisfying and low-point salad that aligns perfectly with your Weight Watchers journey.

Ingredients:

  1. 2 cups cooked chickpeas, drained and rinsed
  2. 1 cucumber, diced
  3. 1 cup cherry tomatoes, halved
  4. 1/2 red onion, finely chopped
  5. 1/2 cup Kalamata olives, sliced
  6. 1/2 cup crumbled feta cheese
  7. 1/4 cup fresh parsley, chopped
  8. 1/4 cup extra-virgin olive oil
  9. 2 tablespoons red wine vinegar
  10. 1 teaspoon dried oregano
  11. Salt and pepper to taste

Instructions: Unleash your inner chef as we explore the intricate steps to create this Mediterranean-inspired masterpiece.

  1. Prepare the Salad Base: In a large mixing bowl, combine the cooked chickpeas, diced cucumber, halved cherry tomatoes, finely chopped red onion, sliced Kalamata olives, crumbled feta cheese, and fresh parsley.
  2. Craft the Flavorful Dressing: In a separate small bowl, whisk together extra-virgin olive oil, red wine vinegar, dried oregano, and season with salt and pepper. This harmonious blend will serve as the soulful dressing for your salad.
  3. Combine and Toss: Pour the dressing over the salad ingredients, ensuring every element is gently coated with the flavors of the Mediterranean. Gently toss the salad until the dressing encapsulates each ingredient, creating a symphony of tastes.
  4. Marinate for Enhanced Flavor: Allow the salad to marinate in the refrigerator for at least 30 minutes. This step allows the flavors to meld together, transforming your salad into a refreshing and deeply satisfying culinary experience.
  5. Final Touch and Presentation: Before serving, give the salad a final toss to ensure an even distribution of flavors. Adjust the seasoning if necessary, ensuring a perfect balance that tantalizes your taste buds.

Weight Watchers (WW) Option: For those mindful of their points, revel in the fact that our Loaded Greek Chickpea Salad has been meticulously crafted to be WW-friendly. By incorporating nutrient-dense ingredients and utilizing a balanced dressing, this salad becomes a delightful addition to your Weight Watchers plan, offering a satisfying and low-point meal option.

Nutritional Information: Delve into the nutritional benefits of our Weight Watchers-Friendly Loaded Greek Chickpea Salad. Packed with fiber, vitamins, and wholesome goodness, this salad not only nourishes your body but also caters to your taste buds with each delightful bite.

Conclusion: In conclusion, our Weight Watchers-Friendly Loaded Greek Chickpea Salad redefines the concept of a nutrient-packed meal. Share this culinary masterpiece with friends and family, savoring the joy of a salad that caters to both your taste buds and your commitment to a health-conscious lifestyle. Elevate your dining experience with this wholesome creation, where each bite is a celebration of mindful indulgence and wellness.

Creamy Baked Broccoli with Tomatoes and Kale
This Creamy Baked Broccoli with Tomatoes and Kale is a delicious and nutritious dish that’s perfect for any meal. The combination of fresh broccoli, tender baby kale, and juicy tomatoes, all enveloped in a rich and creamy sauce, makes for a comforting and satisfying meal. Topped with melted mozzarella cheese, this dish is sure to be a hit with the whole family. Whether served as a main course or a side, it’s an excellent way to enjoy your vegetables.

Preparation Time
Prep Time: 20 minutes
Cook Time: 25 minutes
Total Time: 45 minutes
Ingredients
1 large broccoli, cut into florets
Olive oil
A handful of baby kale
1 small onion, diced
7 small cloves of garlic, minced
12 small tomatoes (cherry or grape tomatoes preferred), halved
A knob of butter
Salt, to taste
1 tsp thyme
150 ml cream
1 tbsp flour
Mozzarella cheese, shredded
Method
Prepare the Broccoli:
Preheat your oven to 200°C (400°F).
Wash and cut the broccoli into florets.
Place the florets in a large mixing bowl and drizzle with olive oil. Toss to coat evenly.
Sauté the Vegetables:
In a large skillet, heat a bit of olive oil over medium heat.
Add the diced onion and sauté until translucent, about 5 minutes.
Stir in the minced garlic and sauté for an additional minute until it releases its aroma.
Add Tomatoes and Kale:
Add the halved tomatoes and baby kale to the skillet.
Cook for 2-3 minutes until the tomatoes begin to soften and the kale wilts slightly.
Make the Creamy Sauce:
Push the vegetables to the sides of the skillet and add the knob of butter to the center.
Once melted, sprinkle the flour over the butter and stir to form a roux.
Gradually pour in the cream, stirring constantly, until the sauce thickens.
Season with salt and thyme.
Combine and Bake:
Add the broccoli florets to the skillet and toss to coat with the creamy sauce.
Spoon the mixture into a baking dish and distribute it evenly across the surface.
Sprinkle the shredded mozzarella cheese over the top.
Bake to Perfection:
Place the baking dish in the preheated oven and bake for 20-25 minutes, or until the broccoli is tender and the cheese is melted and golden brown.
Serve:
Once baked, remove the dish from the oven and let it cool for a few minutes before serving. Enjoy this creamy, cheesy, and nutritious dish as a main course or side.
Serving Suggestions
Serve alongside grilled chicken or fish for a complete meal.
Pair with a fresh green salad for a lighter option.
Cooking Tips
Ensure the broccoli is evenly coated with the olive oil for a consistent roast.
Add a pinch of nutmeg to the cream sauce for an extra layer of flavor.
Use freshly grated mozzarella for the best melting quality.
Nutritional Benefits
Broccoli: High in vitamins C and K, and provides dietary fiber.
Kale: Adds additional vitamins and antioxidants.
Garlic and onions: Known for their immune-boosting properties.
Dietary Information
Vegetarian
Gluten-Free Option: Use gluten-free flour for the roux.
Storage
Store leftovers in an airtight container in the refrigerator for up to 3 days.
Reheat in the oven or microwave before serving.
Why You’ll Love This Recipe
It’s a delicious way to incorporate more vegetables into your diet.
The creamy sauce and melted cheese make it a comforting and satisfying dish.
It’s versatile and can be served as a main dish or side.
Conclusion
This Creamy Baked Broccoli with Tomatoes and Kale is a wonderful addition to any meal. The combination of fresh vegetables, a rich creamy sauce, and melted mozzarella cheese creates a dish that’s both nutritious and indulgent. Enjoy this recipe with your family and friends, and savor the delightful flavors and health benefits it offers. Bon appétit!

Transform your snack game with these delightful Homemade Pizza Chips. A perfect blend of convenience and flavor, these crispy chips are not just a treat for your taste buds but also a creative twist on traditional pizza. Ideal for movie nights, game days, or any occasion where a crunchy, flavorful snack is in demand.

Ingredients:

Flour Tortillas:

Opt for whole wheat or low-carb tortillas for a healthier choice.
Olive Oil:

A drizzle of olive oil adds richness and helps achieve that perfect crispiness.
Italian Seasoning:

A classic blend of herbs to infuse the chips with authentic pizza flavors.
Garlic and Onion Powder:

These aromatic powders bring depth and complexity to the seasoning.
Red Pepper Flakes (Optional):

For those who enjoy a hint of heat, red pepper flakes can be a delightful addition.
Mozzarella and Parmesan Cheese:

Shredded mozzarella and grated Parmesan team up to create a gooey, cheesy topping.
Pizza Sauce:

A cup of pizza sauce for dipping completes the pizza experience.
Instructions:

Preheat the Oven:

Set your oven to 375°F (190°C) to ensure a perfect bake.
Prepare the Tortillas:

Lightly brush each side of the tortillas with the goodness of olive oil.
Season the Chips:

Combine Italian seasoning, garlic powder, onion powder, and red pepper flakes in a bowl. Sprinkle this flavorful blend evenly over both sides of each tortilla.
Cut Into Chips:

Stack the tortillas and get creative with your cuts – wedges, strips, or any shape you desire.
Arrange on Baking Sheet:

Lay out the tortilla pieces on a baking sheet, ensuring they don’t overlap.
Add Cheese:

Sprinkle a generous amount of shredded mozzarella and grated Parmesan over the tortilla pieces, making each chip a cheesy delight.
Bake:

Pop the baking sheet into the preheated oven for 8-10 minutes, or until the edges turn golden brown, and the cheese is melted and bubbly.
Broil (Optional):

For an extra touch, broil the chips for 1-2 minutes, but keep a close eye to prevent burning.
Serve:

Let the pizza chips cool for a few minutes before serving.
Dip and Enjoy:

Pair these homemade pizza chips with your favorite pizza sauce for a dipping experience that elevates the snack to a whole new level.
Customization:

Feel free to customize the seasoning and cheese according to your taste preferences. These pizza chips are versatile and can be enjoyed with various dipping sauces, such as marinara, ranch, or garlic aioli.

Conclusion:

Homemade Pizza Chips are more than just a snack; they’re a culinary experience. Whether you’re hosting a gathering or simply indulging in a movie night, these chips bring the joy of pizza in a convenient and shareable form. Add a dash of creativity to your snacking routine with this crispy and flavorful treat.

Home Made Pizza Chips
Ingredients:
6 small flour tortillas (whole wheat or low-carb for a healthier option)
2 tablespoons olive oil
1 teaspoon Italian seasoning
1/2 teaspoon garlic powder
1/2 teaspoon onion powder
1/4 teaspoon red pepper flakes (optional)
1 cup shredded mozzarella cheese
1/4 cup grated Parmesan cheese
1 cup pizza sauce for dipping
Instructions:
Preheat the Oven:
Preheat your oven to 375°F (190°C).
Prepare the Tortillas:
Lightly brush each side of the flour tortillas with olive oil.
Season the Chips:
In a small bowl, mix together Italian seasoning, garlic powder, onion powder, and red pepper flakes (if using).
Sprinkle the seasoning mixture evenly over both sides of each tortilla.
Cut Into Chips:
Stack the tortillas and cut them into wedges or desired chip shapes using a pizza cutter or knife.
Arrange on Baking Sheet:
Arrange the tortilla wedges in a single layer on a baking sheet. Make sure they are not overlapping.
Add Cheese:
Sprinkle shredded mozzarella and grated Parmesan evenly over the tortilla wedges.
Bake:
Bake in the preheated oven for 8-10 minutes or until the edges are golden brown, and the cheese is melted and bubbly.
Broil (Optional):
If you want the cheese to be extra bubbly and golden, you can broil the chips for an additional 1-2 minutes, but keep a close eye to prevent burning.
Serve:
Remove from the oven and let the pizza chips cool for a few minutes.
Serve with your favorite pizza sauce for dipping.
Enjoy:
Enjoy your homemade pizza chips as a snack or appetizer!
Note:
Feel free to customize the seasoning and cheese according to your taste preferences. These pizza chips are versatile and can be enjoyed with various dipping sauces, such as marinara, ranch, or garlic aioli. They’re perfect for movie nights, game days, or any time you’re craving a crunchy and flavorful snack

WW Chicken Tenders – No Breading

Ingredients:
1 pound chicken tenders (or boneless, skinless chicken breasts cut into strips)
2 tablespoons olive oil
1 teaspoon garlic powder
1 teaspoon onion powder
1 teaspoon paprika
1/2 teaspoon salt
1/4 teaspoon black pepper
Optional: fresh herbs such as parsley or thyme for garnish
Instructions:
Preheat your oven to 400°F (200°C).
In a small bowl, mix together olive oil, garlic powder, onion powder, paprika, salt, and black pepper.
Place the chicken tenders in a large mixing bowl and pour the olive oil mixture over them. Toss until the chicken tenders are evenly coated.
Arrange the chicken tenders on a baking sheet lined with parchment paper or aluminum foil, leaving space between each tender.
Bake in the preheated oven for 15-20 minutes, or until the chicken is cooked through and no longer pink in the center. The cooking time may vary depending on the thickness of your chicken tenders.
Once cooked, remove the chicken tenders from the oven and let them rest for a few minutes.
Serve the chicken tenders hot, garnished with fresh herbs if desired
WW Chicken Tenders – No Breading

In the realm of Whole30 cuisine, where flavor meets health-conscious choices, Savory Herb-Roasted Chicken Tenders stand out as a beacon of wholesome satisfaction. This recipe transcends the ordinary, offering a delightful harmony of tender chicken infused with aromatic herbs and spices, all while remaining free of breading and unnecessary additives. Embracing the principles of clean eating, these chicken tenders deliver on taste, nutrition, and simplicity, making them an ideal choice for those seeking a nourishing yet delectable meal.

Ingredients and Preparation: Crafted with simplicity in mind, the ingredients list reflects a commitment to quality and flavor. Tender chicken tenders, bathed in a blend of olive oil, garlic powder, onion powder, paprika, salt, and black pepper, undergo a transformation that elevates them to culinary excellence. Each element is meticulously selected to ensure optimal taste and adherence to the Whole30 ethos. The preparation process is straightforward, requiring only a few steps to achieve perfection.

The Culinary Process: Upon preheating the oven to a precise 400°F (200°C), the chicken tenders are coated liberally with the herb-infused olive oil mixture. This transformative blend imparts layers of complexity, infusing each tender morsel with a symphony of flavors. As the tenders grace the baking sheet, the anticipation builds, knowing that within minutes, the kitchen will be filled with the irresistible aroma of savory goodness. The oven becomes a stage, where the chicken undergoes a metamorphosis, emerging golden brown and succulent, a testament to the artistry of culinary mastery.

Nutritional Value and Health Benefits: Beyond their tantalizing taste, these Herb-Roasted Chicken Tenders boast a wealth of nutritional benefits. Rich in lean protein and essential nutrients, they serve as a cornerstone of a balanced diet. The absence of breading ensures a low-carb, Whole30-friendly option, catering to those mindful of their dietary choices. Furthermore, the use of olive oil as a primary fat source adds a touch of Mediterranean flair while contributing heart-healthy monounsaturated fats.

Presentation and Serving Suggestions: As the chicken tenders emerge from the oven, their golden hue beckons, inviting eager taste buds to indulge. Garnished with fresh herbs such as parsley or thyme, each tender morsel becomes a work of culinary art, deserving of admiration. Whether served alongside crisp greens, roasted vegetables, or as the star of a wholesome salad, these chicken tenders shine bright, adding depth and flavor to any mealtime ensemble.

Conclusion: In the realm of Whole30 cuisine, where adherence to dietary principles meets culinary innovation, Savory Herb-Roasted Chicken Tenders stand as a testament to the power of simplicity and taste. From their humble beginnings to their triumphant emergence from the oven, each bite is a journey of flavor and satisfaction. Elevate your dining experience with this delectable dish, and savor the joy of nourishing your body while delighting your palate.

Servings: 4
Prep Time: 15 minutes
Cook Time: 15 minutes
Total Time: 30 minutes
Estimated WW Points (per serving): 2–3 points (depending on your plan and if using cheese)

This recipe is calculated based on the WW Blue (formerly Freestyle), Green, and Purple plans as of 2023–2024. Always use your WW app or calculator for exact tracking.


📝 Ingredients

For the Shrimp:

  • 1 lb (450 g) large shrimp, peeled and deveined (0 points)
  • 1 tsp olive oil (1 point)
  • 3–4 cloves garlic, minced (0 points)
  • 1/4 cup fresh lemon juice (~2 lemons) (0 points)
  • Zest of 1 lemon (0 points)
  • 1 Tbsp light butter (e.g., Land O’Lakes Light Butter with Canola Oil) (2 points)
  • 1/4 cup fresh parsley, chopped (0 points)
  • Salt & pepper to taste (0 points)
  • Optional: pinch of crushed red pepper flakes for a kick (0 points)

For the “Rice”:

  • 4 cups cauliflower rice, steamed or lightly sautéed (0 points)
    • Optional: Use 1.5 cups cooked brown rice instead if preferred (3 points per serving on Blue/Green)
  • 1/4 tsp garlic powder (optional) (0 points)
  • 1/4 tsp onion powder (optional) (0 points)

Optional Toppings:

  • 1/4 cup grated Parmesan cheese (1 point per tablespoon, optional)
  • Lemon wedges for garnish (0 points)

🍽️ Instructions

Step 1: Prepare the Shrimp

  1. Pat the shrimp dry with a paper towel. Season lightly with salt, pepper, and a touch of lemon zest for added brightness.
  2. In a large nonstick skillet, heat 1 tsp olive oil over medium-high heat.
  3. Add the shrimp in a single layer. Cook for 2–3 minutes per side or until they turn pink and opaque.
  4. Remove shrimp from skillet and transfer to a plate.

Step 2: Make the Garlic Lemon Sauce

  1. In the same skillet, reduce heat to medium. Add 1 Tbsp light butter.
  2. Once melted, stir in the minced garlic. Cook for 1 minute until fragrant, being careful not to burn the garlic.
  3. Add the lemon juice, lemon zest, and chopped parsley. Stir to combine.
  4. Simmer for about 2 minutes, letting the sauce reduce slightly.

Step 3: Return Shrimp to Pan

  1. Add the shrimp back into the pan.
  2. Toss gently in the lemon garlic butter sauce until fully coated.
  3. Optional: Add a pinch of crushed red pepper flakes for a slight heat kick.

Step 4: Prepare Cauliflower Rice

  1. While the shrimp cooks, prepare your cauliflower rice.
  2. If using fresh cauliflower, pulse florets in a food processor until rice-like texture forms.
  3. In a separate nonstick skillet, sauté the cauliflower rice with a light spray of cooking spray, a sprinkle of garlic powder and onion powder, and a pinch of salt. Cook for 5–6 minutes until soft and slightly golden.

💡 Short on time? Use store-bought frozen cauliflower rice and microwave or pan-cook according to package directions.

Step 5: Assemble the Rice Stacks

  1. Divide the cauliflower rice into 4 even portions and place on plates or stack using a small bowl/mold if desired.
  2. Spoon the shrimp and sauce evenly over the rice stacks.
  3. Top each stack with optional 1 Tbsp grated Parmesan cheese (if using).
  4. Garnish with extra parsley, lemon wedges, or a drizzle of reserved lemon juice.

📊 Weight Watchers Points Summary (Per Serving)


🧠 Tips for Lower Points & Extra Flavor

  • Swap butter entirely: Use 1 extra tsp olive oil instead of light butter if preferred (same points).
  • Boost volume: Add sautéed zucchini, spinach, or mushrooms to your cauliflower rice for a more filling meal (0 points).
  • Add protein: Serve with 1/4 cup of cooked lentils or chickpeas (check point value for your plan).
  • Meal prep: Shrimp keeps well in the fridge for up to 3 days. Store sauce separately and reheat gently to preserve flavor.

🧂 Flavor Variations

  • Asian-Inspired: Add 1 tsp low-sodium soy sauce, a dash of sesame oil (1/4 tsp), and scallions.
  • Mediterranean: Mix in chopped olives, cherry tomatoes, and a crumble of feta (adjust points).
  • Spicy Cajun: Use Cajun spice mix instead of parsley and lemon zest.