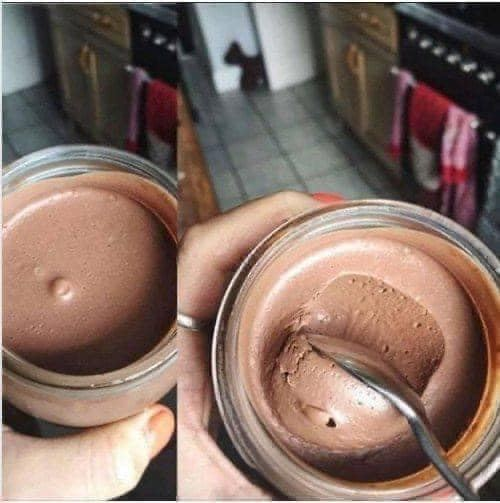
Author

Lena Blaze

Browsing

WW CHOCALATE MOUSSE

Ingredients:

  • 1 package (about 12-14 oz) silken tofu, drained and patted dry
  • 1/4 cup unsweetened cocoa powder
  • 1/4 cup powdered sugar (adjust to your desired sweetness)
  • 1 teaspoon vanilla extract
  • 1-2 tablespoons brewed coffee (optional, for extra flavor)
  • A pinch of salt
  • Fresh berries or a dollop of light whipped cream for garnish (optional)

Instructions:

  1. In a food processor or blender, combine the drained tofu, unsweetened cocoa powder, powdered sugar, vanilla extract, coffee (if using), and a pinch of salt.
  2. Blend everything together until smooth and creamy, scraping down the sides of the processor as needed to ensure everything is well incorporated.
  3. Taste the mixture and adjust the sweetness as needed by adding more powdered sugar if desired. Keep in mind that the cocoa will add bitterness, so sweeten to your preference.
  4. Once you’re satisfied with the taste and texture, transfer the chocolate mousse to serving dishes or bowls.
  5. Cover and refrigerate the mousse for at least 1-2 hours to allow it to set and chill.
  6. Before serving, you can garnish with fresh berries or a small dollop of light whipped cream if you like.

This Chocolate Mousse is a healthier alternative that’s suitable for those following Weight Watchers. It’s a great way to satisfy your sweet tooth with fewer calories. Be sure to check the SmartPoints value based on the specific ingredients you use, especially for the powdered sugar, as it will contribute to the point value. Enjoy your guilt-free chocolate mousse!

Introduction: Embark on a journey of guilt-free indulgence with our Weight Watchers Chocolate Mousse, a culinary masterpiece that seamlessly combines rich chocolate flavor with a mindful approach to wellness. This meticulously crafted recipe is designed to cater to the most discerning palates, offering a velvety and luscious dessert experience that aligns seamlessly with the Weight Watchers program. Explore the art of creating a delectable chocolate mousse without compromising your commitment to a balanced lifestyle.

Ingredients:

  1. 2 ripe avocados, peeled and pitted
  2. 1/2 cup unsweetened cocoa powder
  3. 1/2 cup non-fat Greek yogurt
  4. 1/4 cup honey or a sugar substitute
  5. 1 teaspoon vanilla extract
  6. Pinch of salt
  7. 1/4 cup almond milk (or any preferred milk)
  8. Optional garnish: Fresh berries, mint leaves, or a sprinkle of cocoa powder

Instructions:

Paragraph 1: Embark on the creation of our Weight Watchers Chocolate Mousse by ensuring your avocados are ripe and ready. Peel and pit the avocados, setting the stage for a velvety and creamy texture in the final mousse.

Paragraph 2: In a food processor or blender, combine the ripe avocados, unsweetened cocoa powder, non-fat Greek yogurt, honey or sugar substitute, vanilla extract, a pinch of salt, and almond milk. Blend the ingredients until smooth and decadent, ensuring a homogenous mixture that promises a rich chocolate flavor.

Paragraph 3: Taste the mousse mixture and adjust the sweetness to your preference. This customizable aspect allows you to tailor the dessert to your unique taste buds, ensuring a delightful and personalized experience.

Paragraph 4: Once satisfied with the flavor, transfer the chocolate mousse into individual serving glasses or bowls, creating an elegant presentation that adds to the overall indulgence.

Paragraph 5: Cover the serving glasses with plastic wrap and refrigerate the mousse for at least 2 hours, allowing it to set and reach the optimal creamy consistency. This patience is rewarded with a dessert that is both visually appealing and satisfying.

Paragraph 6: While the chocolate mousse sets, take a moment to appreciate the nutritional benefits of the chosen ingredients. Avocados contribute healthy fats, cocoa powder is rich in antioxidants, and Greek yogurt adds a protein boost, making this dessert a well-rounded treat.

Paragraph 7: Upon removal from the refrigerator, allow the chocolate mousse to sit at room temperature for a few minutes. This step ensures that the mousse is at the perfect temperature for serving—cool and creamy.

Paragraph 8: Before serving, garnish each individual portion with fresh berries, mint leaves, or a sprinkle of cocoa powder. This not only enhances the visual appeal but also adds a burst of freshness to each spoonful.

Nutritional Information:

Paragraph 9: Delight in the velvety richness of our Weight Watchers Chocolate Mousse while staying informed about its nutritional content. This dessert is thoughtfully crafted to offer a satisfying treat without compromising your commitment to a balanced and mindful diet.

Smart WW Points:

Paragraph 10: For those adhering to the Weight Watchers program, rest assured that our Chocolate Mousse is a delightful option that won’t tip the scale on your SmartPoints. We’ve meticulously calculated the points to align seamlessly with your wellness goals.

Serving Suggestions:

Paragraph 11: Elevate your chocolate experience by serving the mousse with a dollop of whipped cream, a sprinkle of crushed nuts, or a side of fresh fruit. These additions complement the richness of the mousse, creating a well-balanced and delightful dessert.

Customization Options:

Paragraph 12: Feel free to customize your Chocolate Mousse by experimenting with different flavors. Consider adding a hint of orange zest, a splash of flavored extract (such as peppermint or almond), or a drizzle of sugar-free chocolate syrup for a creative twist.

Storage Tips:

Paragraph 13: For those moments when you crave a quick and satisfying dessert, prepare the Chocolate Mousse in advance and store it in the refrigerator. It can be kept for up to 48 hours, making it a convenient option for busy days.

Garnish and Presentation:

Paragraph 14: Enhance the visual appeal of your Chocolate Mousse by serving it in elegant glassware or bowls. Consider garnishing with a dusting of cocoa powder in a decorative pattern for a sophisticated and artistic presentation.

Culinary Tips:

Paragraph 15: Achieve the optimal mousse texture by ensuring the avocados are fully ripe and well-blended. This step guarantees a smooth and velvety consistency that rivals traditional mousse recipes.

Variations:

Paragraph 16: Experiment with variations by incorporating a handful of roasted nuts into the mousse mixture or layering the mousse with a swirl of fruit compote for added complexity. These creative additions add a delightful twist to the classic chocolate indulgence.

Occasions:

Paragraph 17: Our Chocolate Mousse is a versatile dessert suitable for various occasions, from intimate dinners to festive celebrations. Its elegant presentation and rich flavor make it a show-stopping finale to any meal.

Authenticity Note:

Paragraph 18: While our Chocolate Mousse offers a health-conscious twist on traditional recipes, the combination of ingredients ensures an authentic and luxurious dessert experience. Savor the richness and revel in the joy of a guilt-free indulgence.

Community Feedback:

Paragraph 19: We invite you to share your Chocolate Mousse creations on social media using our dedicated hashtag. Join our community of dessert enthusiasts, inspire others to explore mindful indulgence, and celebrate the joy of flavorful and wholesome treats.

Conclusion:

Paragraph 20: In concluding this culinary odyssey, our Weight Watchers Chocolate Mousse stands as a testament to the art of crafting a dessert that harmonizes the richness of chocolate with the principles of a balanced lifestyle. Revel in the velvety texture, savor the decadent layers, and treat yourself to a guilt-free indulgence that delights the senses. Bon appétit!

Soft, Buttery, and Zesty — with Fewer Points and All the Flavor!

Servings: ~24 cookies
Estimated WW Points: ~2 points per cookie (depending on the exact brands used and your personal plan)
👉 Always calculate with your WW app for the most accurate results.

🌟 A Guilt-Free Treat You Can Feel Good About

Love lemon desserts but watching your points? These Weight Watchers Lemon Pound Cake Cookies are the perfect balance of bright citrus flavor and lightened-up indulgence. Soft and tender, they feel like a special treat but won’t throw off your plan.

Whether you’re celebrating a small win, hosting a brunch, or just craving something sweet, these cookies are here to support your journey — not sabotage it.


📝 Lightened-Up Ingredients

  • 1/2 cup light butter (or WW-friendly butter spread like “I Can’t Believe It’s Not Butter” light) – ~16 points
  • 1/2 cup unsweetened applesauce (replaces half the butter) – 0 points
  • 3/4 cup granulated sugar – ~24 points
    (You can use monk fruit sweetener or erythritol for a lower point version — check the WW app)
  • 2 large eggs – 0 points
  • 2 tbsp fresh lemon juice – 0 points
  • 1 tbsp lemon zest – 0 points
  • 1 tsp vanilla extract – 0 points
  • 2 cups all-purpose flour – 22 points
    (Swap 1/2 cup for whole wheat flour for extra fiber)
  • 1 tsp baking powder – 0 points
  • 1/4 tsp salt – 0 points
  • Cooking spray or parchment paper for baking

👩‍🍳 Directions

1️⃣ Cream Butter & Sugar

In a large mixing bowl, beat the light butter and sugar (or sugar substitute) until light and fluffy — about 2–3 minutes. This creates that classic soft texture without needing a full cup of butter.

2️⃣ Add Wet Ingredients

Mix in the eggs, applesauce, lemon juice, lemon zest, and vanilla extract. Stir until well combined. The applesauce adds moisture and keeps the cookies soft without the extra fat.

3️⃣ Combine Dry Ingredients

In a separate bowl, whisk together the flour, baking powder, and salt. Gradually add the dry ingredients into the wet mixture. Stir until a soft dough forms — it should be a little sticky, but manageable.

4️⃣ Scoop & Bake

Line a baking sheet with parchment paper or lightly spray with cooking spray. Use a small cookie scoop or tablespoon to portion dough onto the sheet, spacing about 2 inches apart.

Bake at 350°F (175°C) for 10–12 minutes, or until edges are lightly golden and centers are just set. Be careful not to overbake — they should be tender and soft.

5️⃣ Cool & Enjoy

Let cookies cool on the pan for 2 minutes, then transfer to a wire rack to finish cooling. Enjoy the burst of lemony goodness with a cup of tea or as a mid-afternoon pick-me-up!


🍋 Optional Glaze (Add ~0.5 point per cookie)

If you want a bakery-style finish:

Mix:

  • 1/2 cup powdered sugar (~6 points total)
  • 1–2 tsp lemon juice
  • Optional zest for extra punch

Drizzle lightly over cooled cookies. Adds minimal points but maximum zing!


💡 Tips to Make It Even More WW-Friendly:

  • Swap all the sugar with zero-point sweetener for a very low-point cookie.
  • Add a dash of almond extract for a bakery-style flavor boost.
  • Freeze extras in a ziplock bag – great for portion control and quick sweet cravings.
  • Try making mini cookies and reducing the baking time to 7–8 minutes — lower points per piece!

This soft, pillowy Turkish-inspired bread is perfect for wraps, dipping, or snacking, and it won’t blow your daily points! We’ve swapped ingredients to keep it WW-friendly without sacrificing flavor or texture.

Servings: 6 flatbreads
WW Points Estimate: 3–4 points per flatbread (check your app for accuracy based on your plan)

📝 Ingredients:

  • 2 cups (240g) all-purpose flour – 22 points
    (Swap 1 cup for whole wheat flour to increase fiber and lower points depending on your plan)
  • 3/4 cup warm water – 0 points
  • 1/4 cup unsweetened almond milk – 0 points
  • 1 tsp salt – 0 points
  • 1½ tsp instant dry yeast – 0 points
  • 1 tbsp olive oil – 4 points
  • Chopped fresh parsley – 0 points
  • Chili flakes – 0 points
  • Cooking spray (optional) – 0–1 point

👩‍🍳 Step-by-Step Instructions:

1️⃣ Activate the Dough

In a large bowl, whisk together the flour, salt, and yeast. Slowly pour in the warm water and almond milk. Mix until it forms a shaggy dough.

2️⃣ Add Olive Oil

Add 1 tbsp olive oil to the dough and knead by hand (or mixer with dough hook) for about 8–10 minutes until soft, smooth, and elastic.

3️⃣ First Rise

Shape the dough into a ball and place it in a bowl lightly sprayed with cooking spray. Cover with a towel or plastic wrap and let it rise in a warm area for about 60–90 minutes or until it has doubled in size.

4️⃣ Divide & Rest

Once risen, punch down the dough gently and divide it into 6 equal parts. Shape each into a ball and let rest for 10 minutes to make rolling easier.

5️⃣ Roll Out

Roll each ball into a flat circle or oval, about ¼ inch thick. Dust lightly with flour if it’s sticky.

6️⃣ Cook

Heat a non-stick skillet over medium-high. Lightly spray with cooking spray if needed. Cook each flatbread for about 2–3 minutes on each side until puffed and golden. They should form bubbles or pockets when flipped!

7️⃣ Garnish (Optional but Recommended!)

While still warm, lightly brush the tops with a drop of olive oil or a spritz of spray oil, then sprinkle with fresh chopped parsley and chili flakes.

💡 Extra Tips to Keep It Light & Delicious:

  • Swap half of the flour with whole wheat for added fiber.
  • Skip the oil brushing and use light spray oil for 0 points.
  • Freeze extras! These reheat beautifully and make a quick base for point-friendly pizzas or wraps.
  • Serve with 0-point dips like non-fat Greek yogurt + garlic + lemon or salsa.
  • Cut into triangles and toast for crispy low-point chips.

Weight Watchers Strawberry Cheesecake Jars

Introduction: Indulge your taste buds in the exquisite pleasure of our Weight Watchers Strawberry Cheesecake Jars — a culinary masterpiece that marries the richness of cheesecake with the freshness of strawberries. This delectable treat is not only a feast for the senses but also a guilt-free delight, coming in at just 1 Point per serving. Prepare to embark on a journey of flavor and satisfaction with this refined recipe.

Ingredients:

32oz Plain Non-Fat Greek Yogurt
1 box Small package of fat-free cheesecake pudding mix
2 lbs strawberries, diced
1.5 tsp vanilla
Instructions:

Begin by pouring the Greek yogurt into a generously sized bowl, setting the stage for the creamy foundation of our strawberry cheesecake jars.
Gradually introduce the fat-free cheesecake pudding mix into the yogurt, incorporating it meticulously. Stir between each addition until the entirety of the pudding mix has been seamlessly blended. Infuse the mixture with the delightful essence of vanilla.
Assemble the layers of lusciousness by alternately spooning 1/3 cup of the yogurt mixture and a generous portion of diced strawberries into each jar. Repeat until the jar is filled, utilizing approximately one cup of the yogurt blend per jar.


Allow the jars to bask in the cool embrace of the refrigerator for a minimum of one hour, allowing the flavors to meld and intensify.
Prior to serving, crown your culinary creation with a dollop of lite whipped topping, bearing in mind that this optional addition may slightly elevate the Point Value.
Nutritional Information: Per serving, our Weight Watchers Strawberry Cheesecake Jars boast a mere 1 Point. Packed with the goodness of non-fat Greek yogurt and the natural sweetness of strawberries, this dessert not only satisfies your sweet tooth but also aligns with your wellness goals.

Additional Tips: For an extra touch of extravagance, consider garnishing each jar with a sprig of fresh mint or a drizzle of sugar-free strawberry sauce. These additions not only elevate the visual appeal but also contribute to the overall sensorial experience of this delightful treat.

Conclusion: Our meticulously crafted Weight Watchers Strawberry Cheesecake Jars are a testament to the harmony of flavor and health-conscious choices. Treat yourself to a guilt-free indulgence that promises to tantalize your taste buds while aligning with your commitment to a balanced lifestyle. Enjoy the sweet rewards of mindful eating with this heavenly dessert.

Servings: 4
Preparation Time: 10 minutes
Cooking Time: 15 minutes
Total Time: 25 minutes


Why this recipe rocks for Weight Watchers:

This dish is a perfect low-point, high-flavor meal that’s packed with protein, veggies, and creamy goodness without the guilt. By swapping traditional pasta for spiralized zucchini noodles (“zoodles”), you drastically cut down carbs and calories, making it a satisfying yet light dinner option. Plus, shrimp provides lean protein, which helps keep you fuller longer.


Ingredients:

  • 2 medium zucchinis, spiralized into noodles (about 4 cups)
  • 1 pound (450g) raw shrimp, peeled and deveined
  • 1 tablespoon olive oil (or use a non-stick spray for fewer points)
  • 3 cloves garlic, minced
  • 1/4 cup low-fat cream cheese (can substitute with light Greek yogurt for fewer points)
  • 1/4 cup low-sodium chicken or vegetable broth
  • Juice of half a lemon
  • 1/4 teaspoon crushed red pepper flakes (optional, for a little heat)
  • Salt and freshly ground black pepper, to taste
  • Fresh parsley or basil, chopped, for garnish

Instructions:

Step 1: Prep Your Zoodles and Shrimp

  • Start by spiralizing your zucchinis using a spiralizer or a julienne peeler. If you don’t have one, you can also thinly slice zucchini into ribbons with a vegetable peeler.
  • Pat the shrimp dry with paper towels — this helps them sear better.

Step 2: Cook the Shrimp

  • Heat the olive oil in a large non-stick skillet over medium-high heat.
  • Add minced garlic and sauté for about 30 seconds until fragrant — don’t let it burn!
  • Add the shrimp to the skillet in a single layer. Cook for about 2 minutes on one side, until pink and slightly golden. Flip and cook another 1-2 minutes until fully cooked through. Shrimp should be opaque and firm.
  • Remove shrimp from the pan and set aside.

Step 3: Make the Creamy Sauce

  • In the same pan, lower heat to medium-low and add the broth to deglaze the pan, scraping up any bits stuck to the bottom for extra flavor.
  • Stir in the low-fat cream cheese (or Greek yogurt). Stir continuously until the cream cheese melts and forms a smooth sauce. If needed, add a splash more broth to loosen it up.
  • Add lemon juice, crushed red pepper flakes, salt, and pepper to taste. The lemon adds brightness that balances the creaminess.

Step 4: Toss in the Zoodles

  • Add the spiralized zucchini noodles to the sauce and gently toss to coat evenly.
  • Cook for 2-3 minutes, stirring frequently, until the zoodles are tender but still have a slight crunch (al dente). Avoid overcooking or they’ll get soggy.

Step 5: Combine and Serve

  • Return the cooked shrimp to the pan and gently toss everything together to combine and warm through.
  • Taste and adjust seasoning if needed.
  • Serve immediately, garnished with fresh parsley or basil.

WW SmartPoints:

Approximately 4 SmartPoints per serving (based on using 1 tbsp olive oil and low-fat cream cheese). Points may vary slightly depending on brands and substitutions.


Pro Tips for Weight Watchers Success:

  • Use cooking spray instead of olive oil to reduce points further.
  • Swap cream cheese for plain non-fat Greek yogurt to lower points while keeping creaminess.
  • Add extra veggies like cherry tomatoes or spinach to bulk up the dish without adding points.
  • Pair with a side salad for a balanced meal that fills you up.

Why you’ll love this recipe:

  • Ready in under 30 minutes — perfect for busy weeknights!
  • Light but satisfying with lean protein and fresh veggies.
  • Creamy texture without heavy cream or butter.
  • Easily customizable with your favorite herbs and spices.

Give it a try and let me know how you customize it! Your taste buds and your WW plan will thank you. 💙✨

Southern Sweet Potato Casserole

Southern sweet potato casserole is a beloved classic, especially during holiday gatherings and family dinners. This rich, comforting dish features creamy sweet potatoes topped with a crunchy, nutty streusel or marshmallow layer. For those watching their points, we’ve crafted a Weight Watchers-friendly version that maintains all the traditional flavors while keeping it nutritious.

Ingredients

For the Sweet Potato Filling:

  • 4 cups sweet potatoes, peeled and cubed (about 3 large sweet potatoes)
  • 1/2 cup unsweetened almond milk (or low-fat milk)
  • 1/4 cup brown sugar (or a sugar substitute for fewer points)
  • 1/4 cup maple syrup (or sugar-free syrup)
  • 2 large eggs
  • 1 teaspoon vanilla extract
  • 1 teaspoon ground cinnamon
  • 1/2 teaspoon ground nutmeg
  • 1/4 teaspoon salt

For the Topping:

  • 1 cup rolled oats
  • 1/2 cup chopped pecans or walnuts
  • 1/4 cup brown sugar (or a sugar substitute)
  • 1/4 cup whole wheat flour
  • 2 tablespoons coconut oil or unsalted butter, melted
  • 1 teaspoon ground cinnamon
  • 1/4 teaspoon salt

Cooking Instructions

Step 1: Prepare the Sweet Potatoes

Start by preheating your oven to 375°F (190°C). Peel and cube the sweet potatoes, then place them in a large pot. Cover with water and bring to a boil. Cook for about 15-20 minutes or until fork-tender. Drain and set aside to cool slightly.

Step 2: Mash the Sweet Potatoes

In a large mixing bowl, combine the cooked sweet potatoes with almond milk, brown sugar, maple syrup, eggs, vanilla extract, cinnamon, nutmeg, and salt. Using a potato masher or electric mixer, blend until the mixture is smooth and creamy. Taste the mixture and adjust sweetness as desired.

Step 3: Prepare the Topping

In a separate bowl, combine the rolled oats, chopped nuts, brown sugar, whole wheat flour, melted coconut oil, cinnamon, and salt. Mix until all ingredients are well combined and crumbly.

Step 4: Assemble the Casserole

Pour the sweet potato mixture into a greased 9×13-inch baking dish. Spread the topping evenly over the sweet potato filling, ensuring an even distribution for a nice crunch.

Step 5: Bake the Casserole

Place the assembled casserole in the preheated oven and bake for 25-30 minutes, or until the topping is golden brown and the filling is heated through.

Step 6: Let it Cool

Once baked, remove the casserole from the oven and let it cool for about 10 minutes before serving. This allows the flavors to meld and makes it easier to cut and serve.

Serving Suggestions

Serve this Southern sweet potato casserole warm, either as a side dish or a decadent dessert. It pairs beautifully with roasted meats, a fresh salad, or even as part of a festive holiday spread. For added flair, consider garnishing with extra chopped pecans or a drizzle of maple syrup.

Nutrition Information

  • Serving Size: 1/2 cup
  • Calories: Approximately 180 calories
  • Total Fat: 7g
  • Saturated Fat: 3g
  • Cholesterol: 50mg
  • Sodium: 150mg
  • Total Carbohydrates: 27g
  • Dietary Fiber: 4g
  • Sugars: 8g
  • Protein: 3g
  • Weight Watchers Points: 5 points (may vary depending on specific ingredient choices)

Tips for Success

  1. Selecting Sweet Potatoes: Choose firm sweet potatoes with smooth skin. Avoid any that have blemishes or soft spots.
  2. Make-Ahead Option: This casserole can be assembled a day in advance. Just cover it tightly with plastic wrap and refrigerate. When ready to bake, simply remove it from the fridge and bake as directed, adding a few extra minutes if necessary.
  3. Nutritional Variations: To reduce calories even further, you can substitute the eggs with flaxseed meal or unsweetened applesauce. Adjust the sweeteners to suit your taste preferences.
  4. Texture Preferences: If you prefer a creamier filling, consider blending in a tablespoon of Greek yogurt or silken tofu for added protein and creaminess.
  5. Storage: Leftovers can be stored in an airtight container in the refrigerator for up to 5 days. Reheat in the microwave or oven until warmed through.

Additional Serving Ideas

Sweet potato casserole isn’t just for Thanksgiving! Consider serving it during family gatherings, potlucks, or any occasion where comfort food is welcome. It can also serve as a delightful breakfast option when warmed and paired with a dollop of yogurt.

Conclusion

This Southern sweet potato casserole combines tradition with health-conscious ingredients, making it a delightful addition to any meal. With its creamy sweet potato filling and crunchy topping, it’s a dish that everyone will love, regardless of dietary preferences. Whether enjoyed as a side or a dessert, it embodies the spirit of Southern cooking while remaining accessible to those mindful of their points. Enjoy this classic dish and share it with friends and family, creating new traditions around your table!

Weight Watchers Chicken Bacon Ranch Potatoes
Introduction:
Elevate your culinary experience with our delectable Weight Watchers Chicken Bacon Ranch Potatoes, a flavorful fusion of crispy roasted potatoes, tender chicken, and smoky turkey bacon, all smothered in a luscious Greek yogurt ranch dressing. This wholesome creation not only caters to your taste buds but also aligns seamlessly with your wellness goals. Each bite is a harmonious blend of textures and flavors, making it a perfect addition to your Weight Watchers journey. Let’s embark on a culinary adventure to create this savory delight that’s as satisfying as it is nutritious.
Ingredients:
4 medium-sized potatoes, washed and diced
1 pound boneless, skinless chicken breast, cooked and diced
6 slices turkey bacon, cooked and crumbled
1 cup fat-free Greek yogurt
2 tablespoons light mayonnaise
2 tablespoons fresh chives, chopped
1 tablespoon dried dill
Salt and pepper to taste
Reduced-fat shredded cheddar cheese (optional, for topping)
Instructions:
Preheat the oven to 400°F (200°C).
Place the diced potatoes on a baking sheet lined with parchment paper. Sprinkle with salt and pepper. Bake for about 25-30 minutes or until the potatoes are golden and crispy.
In a large bowl, combine the cooked and diced chicken with the crumbled turkey bacon.
In a separate bowl, mix together the Greek yogurt, light mayonnaise, chopped chives, dried dill, salt, and pepper. Adjust seasonings to taste.
Add the Greek yogurt mixture to the chicken and bacon mixture. Stir until well combined.
Once the potatoes are done baking, remove them from the oven and transfer them to a serving dish.
Spoon the chicken, bacon, and Greek yogurt mixture over the roasted potatoes.
If desired, sprinkle with a small amount of reduced-fat shredded cheddar cheese.
Serve the Weight Watchers Chicken Bacon Ranch Potatoes warm and enjoy

Weight Watchers Chicken Bacon Ranch Potatoes

Ingredients: Gather premium-quality ingredients to create this culinary masterpiece:

  1. 4 medium-sized potatoes, washed and diced, providing a hearty and fiber-rich base.
  2. 1 pound boneless, skinless chicken breast, cooked and diced, offering lean protein for a balanced meal.
  3. 6 slices turkey bacon, cooked and crumbled, infusing a smoky flavor without compromising on health.
  4. 1 cup fat-free Greek yogurt, ensuring a creamy and protein-packed dressing.
  5. 2 tablespoons light mayonnaise, contributing a touch of richness without excess calories.
  6. 2 tablespoons fresh chives, chopped, providing a mild oniony note.
  7. 1 tablespoon dried dill, imparting a refreshing herbaceous flavor.
  8. Salt and pepper to taste, enhancing the overall seasoning.
  9. Reduced-fat shredded cheddar cheese (optional, for topping), adding a melty and indulgent touch.

Instructions:

  1. Preheat the oven to 400°F (200°C), setting the stage for the perfect roasting of the diced potatoes.
  2. Arrange the diced potatoes on a baking sheet lined with parchment paper, ensuring even distribution. Sprinkle with salt and pepper to enhance the flavors. Bake for approximately 25-30 minutes or until the potatoes achieve a golden and crispy perfection.
  3. In a large bowl, combine the cooked and diced chicken with the crumbled turkey bacon, creating a delightful protein-packed duo.
  4. In a separate bowl, meticulously mix together the fat-free Greek yogurt, light mayonnaise, chopped chives, dried dill, salt, and pepper. Adjust seasonings to taste, ensuring a well-balanced and flavorful dressing.
  5. Add the Greek yogurt mixture to the chicken and bacon medley, stirring until every element is generously coated in the creamy ranch dressing.
  6. Once the potatoes are done baking, remove them from the oven and transfer them to a serving dish, creating a bed for the savory topping.
  7. Spoon the chicken, bacon, and Greek yogurt mixture over the roasted potatoes, ensuring an even distribution of flavors.
  8. For those seeking an extra layer of indulgence, sprinkle a small amount of reduced-fat shredded cheddar cheese over the creation.
  9. Serve the Weight Watchers Chicken Bacon Ranch Potatoes warm, allowing the textures and flavors to meld together for an unforgettable dining experience.

Conclusion: Our Weight Watchers Chicken Bacon Ranch Potatoes redefine the notion of a wholesome and satisfying meal. With a carefully curated blend of ingredients and flavors, this dish offers a guilt-free indulgence that caters to both your palate and your wellness journey. Whether enjoyed as a family dinner or a delightful solo meal, each bite is a testament to the idea that healthy eating can be a flavorful and rewarding experience. Embrace the joy of savoring a dish that not only nourishes your body but also excites your taste buds with every mouthful.

Ingredients:

2 tablespoons butter I use salted
2 tablespoons honey
1 bag (16 oz) frozen corn
2 ounces cream cheese cut into chunks
1/4 teaspoon salt
1/4 teaspoon black pepper

Instructions:

-In a skillet pan, over medium-high heat, melt the butter and honey. Once melted add the frozen corn and cook for 5-8 minutes, stirring occasionally, until cooked through.

-Add cream cheese, salt, and pepper. Stir together and let it cook, about 3-5 minutes, while stirring occasionally.

-Serve immediately. Leftovers keep well, covered in a container, and stored in the fridge.

Here’s a revised version of the Cheesy Parmesan Mozzarella Bites recipe with Weight Watchers Smart Points and nutritional information:

Weight Watchers Cheesy Parmesan Mozzarella Bites

Ingredients:

  • 1 cup grated Parmesan cheese
  • 1 cup shredded part-skim mozzarella cheese
  • 1 large egg
  • 1 teaspoon onion powder

Directions:

  1. Preheat the Oven: Preheat your oven to 350°F (175°C). Line a baking sheet with parchment paper.
  2. Mix Ingredients:
  • In a bowl, combine Parmesan cheese, mozzarella cheese, egg, and onion powder. Mix until well combined.
  1. Bake:
  • Spread the cheese mixture evenly onto the prepared baking sheet, forming a rectangle or square shape.
  1. Bake in the preheated oven for 15 minutes, or until the edges are golden and the cheese is bubbly.
  2. Cool and Serve:
  • Remove from the oven and let cool slightly on the baking sheet before cutting into pieces or squares.

Nutrition Facts (per serving, makes 12 bites):

  • Calories: 58 kcal
  • Total Fat: 4g
  • Saturated Fat: 2g
  • Cholesterol: 29mg
  • Sodium: 180mg
  • Total Carbohydrates: 1g
  • Dietary Fiber: 0g
  • Sugars: 0g
  • Protein: 6g

Weight Watchers Smart Points (per serving): 2 Smart Points

These Cheesy Parmesan Mozzarella Bites are a delicious low-carb snack or appetizer option that fits well into a balanced diet, especially for those following Weight Watchers. Enjoy these cheesy bites guilt-free!

Weight Watchers Cheesy Parmesan Mozzarella Bites

Introduction:
Cheesy Parmesan Mozzarella Bites are a delightful combination of two cheeses and subtle seasoning, baked to golden perfection. These bites make a perfect snack or appetizer for those looking to enjoy a flavorful treat without compromising on their health goals, especially for individuals following the Weight Watchers program.

Ingredients:

  • 1 cup grated Parmesan cheese
  • 1 cup shredded part-skim mozzarella cheese
  • 1 large egg
  • 1 teaspoon onion powder

Directions:

  1. Preheat and Prepare: Begin by preheating your oven to 350°F (175°C). Line a baking sheet with parchment paper to prevent sticking.
  2. Mixing the Ingredients:
  • In a mixing bowl, combine the grated Parmesan cheese, shredded mozzarella cheese, one large egg, and onion powder. Use a spoon or spatula to thoroughly mix the ingredients until a uniform mixture is formed. This step ensures that the cheeses and egg are evenly distributed, resulting in consistent texture and flavor in each bite.
  1. Forming the Bites:
  • Transfer the cheese mixture onto the prepared baking sheet. Use the back of a spoon or your hands to spread and shape the mixture into a rectangular or square shape. Aim for an even thickness to ensure uniform baking.
  1. Baking Process:
  • Place the baking sheet in the preheated oven and bake the cheese mixture for approximately 15 minutes, or until the edges turn golden brown and the cheese becomes bubbly. Keep an eye on the bites during the last few minutes of baking to prevent over-browning.
  1. Cooling and Serving:
  • Once baked, remove the baking sheet from the oven and allow the cheesy bites to cool slightly directly on the parchment paper. This cooling period helps the cheese set and makes it easier to cut into individual pieces.
  1. Cutting and Presentation:
  • Using a sharp knife or pizza cutter, carefully cut the cooled cheese into bite-sized squares or rectangles. Arrange the Cheesy Parmesan Mozzarella Bites on a serving platter or plate, ready to be enjoyed.

Nutritional Information:
Each serving of these Cheesy Parmesan Mozzarella Bites (approximately 12 bites) provides the following nutritional values:

  • Calories: 58 kcal
  • Total Fat: 4g
  • Saturated Fat: 2g
  • Cholesterol: 29mg
  • Sodium: 180mg
  • Total Carbohydrates: 1g
  • Dietary Fiber: 0g
  • Sugars: 0g
  • Protein: 6g

Additional Tips and Variations:

  • Cheese Selection: Experiment with different types of cheeses for varied flavors. Try adding a hint of smoked paprika or dried herbs for an extra burst of taste.
  • Storage: Store any leftover bites in an airtight container in the refrigerator for up to 3 days. Reheat briefly in the oven or microwave before serving to regain their crispness.
  • Pairing Suggestions: Serve these bites alongside a fresh salad or with a side of marinara sauce for dipping. They also complement well with crisp vegetables like cucumber or celery sticks.

Conclusion:
Cheesy Parmesan Mozzarella Bites are a simple yet flavorful snack that can be enjoyed guilt-free, whether you’re on a weight loss journey or simply looking for a delicious low-carb treat. With their easy preparation and satisfying taste, they are sure to become a favorite in your household. Incorporate these bites into your next gathering or as a savory snack option for anytime enjoyment.

Stuffed Pepper Casserole

Ingredients:

1 pound extra-lean ground turkey or lean ground beef

2 bell peppers, chopped

1 onion, finely chopped

3 cloves garlic, minced

1 tablespoon Worcestershire sauce

1 (15 oz) can low-sodium beef broth

1 (15 oz) can diced tomatoes (no sugar added)

1 cup uncooked brown rice (or cauliflower rice for fewer points)

1 tablespoon Italian seasoning

1 teaspoon salt

1/2 teaspoon black pepper

3/4 cup reduced-fat Mozzarella cheese, shredded

3/4 cup reduced-fat cheddar cheese, shredded

Instructions:

In a large skillet, cook the extra-lean ground turkey or lean ground beef, breaking it apart. Once it’s mostly cooked, add in the onions and bell peppers, and cook for 5-10 minutes until they start to soften.

Add the garlic to the meat mixture and cook for a minute or two, just until you can start to smell it.

Stir in the rest of the ingredients, except the cheese, and bring the mixture to a boil.

Cover and reduce the heat to a simmer. Cook for about 20 minutes, stirring halfway through.

Once the rice is tender (or cauliflower rice is cooked), stir in about half of the reduced-fat cheese until it’s melted and incorporated with the meat and rice.

Sprinkle the remaining reduced-fat cheese over the top, put the lid back on the pan, and let the cheese melt. If your pan is oven-safe, you can put it under the broiler to melt the cheese faster.

Remove from the heat and serve immediately.

This image has an empty alt attribute; its file name is image-154.png


Title: Savory Elegance: Wholesome Stuffed Pepper Casserole

Introduction: Embark on a culinary journey with our Stuffed Pepper Casserole, a symphony of flavors that blends the richness of ground turkey or lean beef with vibrant bell peppers, onions, and a medley of seasonings. This heartwarming dish is a modern twist on classic stuffed peppers, providing a comforting and satisfying meal for any occasion. Whether served as a family dinner or at a gathering with friends, this casserole promises to delight taste buds while keeping a mindful eye on wellness, offering a Weight Watchers (WW) version for those on a points-based journey.

Ingredients:

1 pound extra-lean ground turkey or lean ground beef 2 bell peppers, chopped 1 onion, finely chopped 3 cloves garlic, minced 1 tablespoon Worcestershire sauce 1 (15 oz) can low-sodium beef broth 1 (15 oz) can diced tomatoes (no sugar added) 1 cup uncooked brown rice (or cauliflower rice for fewer points) 1 tablespoon Italian seasoning 1 teaspoon salt 1/2 teaspoon black pepper 3/4 cup reduced-fat Mozzarella cheese, shredded 3/4 cup reduced-fat cheddar cheese, shredded

Instructions:

1. Sauté and Simmer:

  • In a large skillet, cook the extra-lean ground turkey or lean ground beef, breaking it apart. Add onions and bell peppers, cooking until softened.
  • Introduce minced garlic to the mix and cook until aromatic.
  • Stir in Worcestershire sauce, low-sodium beef broth, diced tomatoes, uncooked brown rice (or cauliflower rice), Italian seasoning, salt, and black pepper. Bring the mixture to a boil.

2. Simmer to Perfection:

  • Cover the skillet and reduce heat to a simmer. Allow it to cook for about 20 minutes, stirring halfway through, until the rice is tender or cauliflower rice is cooked.

3. Cheesy Finale:

  • Once the rice is tender, stir in half of the reduced-fat cheese until melted and incorporated with the meat and rice.
  • Sprinkle the remaining reduced-fat cheese over the top. If your pan is oven-safe, consider placing it under the broiler for quicker cheese melting.

4. Serve with Gusto:

  • Remove from heat and serve this delectable Stuffed Pepper Casserole immediately, allowing the flavors to shine.

Weight Watchers (WW) Points and Nutrition: For those following the WW program, this Stuffed Pepper Casserole is crafted with a mindful approach. Adjustments like using extra-lean ground turkey or lean ground beef, incorporating cauliflower rice, and opting for reduced-fat cheeses contribute to a lower points value while ensuring a delicious dining experience.

Serving Suggestions: Pair this wholesome casserole with a crisp side salad or steamed vegetables for a well-rounded meal. The leftovers can be refrigerated and reheated for a convenient and tasty lunch the next day.

Conclusion: Our Wholesome Stuffed Pepper Casserole redefines the classic flavors of stuffed peppers in a convenient and delicious format. This modern twist caters to those mindful of their wellness journey, offering a satisfying dish without compromising on taste. Share the joy of a comforting casserole that embraces both flavor and nutrition, inviting everyone to savor the goodness of a homemade masterpiece.