Author

Chloe Harper

Browsing

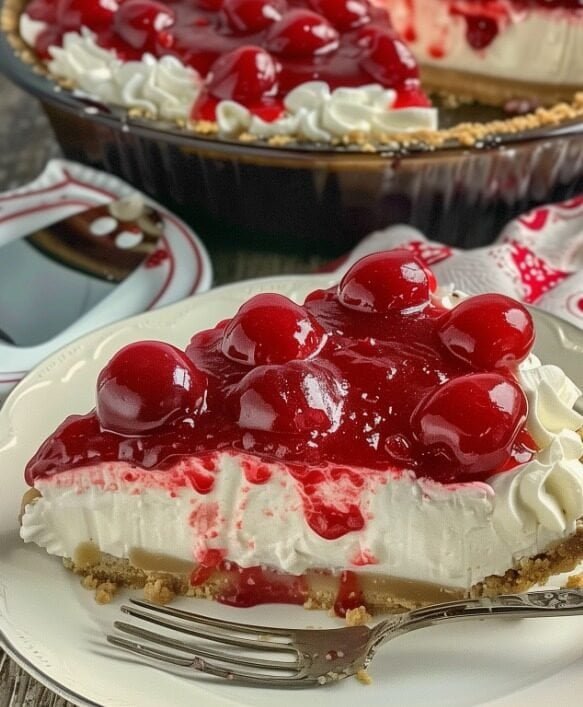
Low-Carb No-Bake Cherry Cheesecake Recipe: A Detailed Guide

Introduction

Low-carb diets have gained popularity for their potential benefits in weight management and overall health. For those adhering to such a diet, finding delectable yet compliant desserts can be challenging. This Low-Carb No-Bake Cherry Cheesecake offers a decadent treat without compromising your dietary goals. This guide provides an exhaustive breakdown of the recipe, including ingredients, step-by-step instructions, nutritional information, and Weight Watchers (WW) SmartPoints, ensuring a delightful experience with every bite.

Ingredients

For the Crust

  • 1 cup almond flour: This low-carb alternative to traditional flour creates a nutty, satisfying base.
  • 1/4 cup unsweetened shredded coconut: Adds texture and a hint of sweetness.
  • 3 tablespoons erythritol or another low-carb sweetener: Provides the necessary sweetness without added carbs.
  • 1/4 cup melted coconut oil: Binds the crust ingredients together and adds healthy fats.

For the Cheesecake Filling

  • 16 ounces cream cheese, softened: Provides the creamy base for the cheesecake.
  • 1/2 cup sour cream: Adds tanginess and helps to balance the sweetness.
  • 1/2 cup heavy cream: For a rich and smooth texture.
  • 1/2 cup erythritol or preferred low-carb sweetener: Adjust according to taste preference.
  • 1 teaspoon vanilla extract: Enhances the overall flavor.
  • 1 tablespoon lemon juice: Adds a refreshing tartness.
  • 1 teaspoon gelatin (optional): Helps to stabilize the filling if a firmer texture is desired.

For the Cherry Topping

  • 1 cup fresh or frozen cherries, pitted: Provides a burst of fruity flavor.
  • 2 tablespoons erythritol or another low-carb sweetener: To sweeten the cherries.
  • 1 teaspoon lemon juice: Enhances the flavor of the cherries.
  • 1/2 teaspoon cornstarch: Thickens the cherry topping slightly. Optional for a thicker sauce.

Free Keto Meal Plan : KETO DIET PLAN FOR BEGINNERS STEP BY STEP GUIDE

Instructions

  1. Prepare the Crust:
    • Preheat the Oven (Optional): If you prefer a slightly toasted crust, preheat your oven to 350°F (175°C). This step is optional as the crust can also be set without baking.
    • Mix Ingredients: In a medium bowl, combine the almond flour, shredded coconut, erythritol, and melted coconut oil. Stir until the mixture is well combined and has a crumbly texture.
    • Form the Crust: Press the mixture evenly into the bottom of a 9-inch springform pan or a pie dish. Use the back of a spoon to pack it down firmly.
    • Bake or Chill: If baking, place the pan in the preheated oven and bake for 8-10 minutes, or until lightly golden. If not baking, simply refrigerate the crust while preparing the filling.
  2. Prepare the Cheesecake Filling:
    • Blend Ingredients: In a large mixing bowl, beat the softened cream cheese with an electric mixer until smooth and creamy. Add the sour cream, heavy cream, erythritol, vanilla extract, and lemon juice.
    • Incorporate Gelatin (Optional): If using gelatin, dissolve it in a small amount of warm water and mix it into the cheesecake filling. This step is optional but recommended for a firmer texture.
    • Mix Well: Continue to beat the mixture until it is well combined and smooth. Ensure there are no lumps.
  3. Assemble the Cheesecake:
    • Pour Filling: Carefully pour the cheesecake filling over the prepared crust in the pan. Smooth the top with a spatula.
    • Chill: Refrigerate the cheesecake for at least 4 hours or until it is set. For best results, leave it to chill overnight.
  4. Prepare the Cherry Topping:
    • Cook the Cherries: In a small saucepan, combine the cherries, erythritol, and lemon juice. Cook over medium heat, stirring occasionally, until the cherries start to break down and release their juices, about 5-7 minutes.
    • Thicken (Optional): If using cornstarch, dissolve it in a small amount of water and add to the cherry mixture. Cook for an additional 2 minutes until the topping thickens to your desired consistency. Allow the topping to cool completely.
  5. Serve:
    • Top the Cheesecake: Once the cheesecake is fully chilled and set, spread the cherry topping evenly over the top.
    • Slice and Enjoy: Carefully remove the cheesecake from the pan and slice into wedges. Serve chilled and enjoy!

Free Keto Meal Plan : KETO DIET PLAN FOR BEGINNERS STEP BY STEP GUIDE

Nutritional Information (Per Serving, assuming 8 servings)

  • Calories: 290
  • Protein: 5g
  • Carbohydrates: 10g
  • Fat: 27g
  • Fiber: 4g
  • Sugar: 4g
  • Sodium: 200mg

Weight Watchers (WW) SmartPoints

  • Freestyle SmartPoints: 7
  • PointsPlus: 8
  • Old Points: 6

Additional Tips

  1. Gelatin Usage: If you prefer a firmer texture, using gelatin is beneficial. Dissolve it in a small amount of water according to package instructions before incorporating it into the filling.
  2. Sweetener Options: Adjust the amount of erythritol or other sweeteners based on your taste preferences. Some sweeteners have varying levels of sweetness, so start with less and add more if needed.
  3. Cherry Variations: Fresh cherries are ideal, but frozen cherries work well too. Ensure they are thawed and well-drained if using frozen.
  4. Crust Variations: For a different flavor profile, consider adding spices like cinnamon or nutmeg to the crust mixture.
  5. Serving Suggestions: This cheesecake is delicious on its own, but it can also be paired with a dollop of whipped cream or a sprinkle of chopped nuts for added texture.
  6. Storage: Store the cheesecake in an airtight container in the refrigerator for up to one week. The cherry topping can be stored separately to maintain its freshness.
  7. Freezing: This cheesecake can be frozen for up to 3 months. Ensure it is well-wrapped to prevent freezer burn. Thaw in the refrigerator before serving.

Free Keto Meal Plan : KETO DIET PLAN FOR BEGINNERS STEP BY STEP GUIDE

Conclusion

This Low-Carb No-Bake Cherry Cheesecake is a fantastic choice for those seeking a sweet treat that fits within a low-carb lifestyle. With its creamy filling, nutty crust, and tangy cherry topping, it provides a satisfying dessert experience without the guilt. By following this detailed guide, you’ll be equipped to create a dessert that not only aligns with your dietary goals but also delights your taste buds. Enjoy this delicious and nutritious treat as part of your balanced eating plan!

Caprese Chicken Skillet: A Weight Watchers Friendly Recipe

Introduction

Welcome to a light and flavorful dish that marries the freshness of a classic Caprese salad with the heartiness of chicken—Caprese Chicken Skillet. This Weight Watchers-friendly recipe brings together juicy chicken breasts, ripe tomatoes, and creamy mozzarella in a single skillet for a meal that’s both nutritious and satisfying. Ideal for those following a WW (Weight Watchers) plan, this dish is designed to be both delicious and mindful of your wellness goals. In this comprehensive guide, we will provide you with detailed instructions, nutritional information, and practical tips to help you create this delightful dish.

Ingredients

For the Chicken:

  • 4 boneless, skinless chicken breasts (about 1.5 pounds or 680 grams) – 0 SmartPoints
  • 1 tablespoon olive oil1 SmartPoint
  • Salt and pepper to taste0 SmartPoints
  • 1 teaspoon garlic powder0 SmartPoints
  • 1 teaspoon dried basil0 SmartPoints
  • 1 teaspoon dried oregano0 SmartPoints

For the Caprese Topping:

  • 2 cups cherry tomatoes, halved0 SmartPoints
  • 1 cup fresh mozzarella balls (about 4 ounces or 115 grams) – 3 SmartPoints
  • 1/4 cup balsamic vinegar0 SmartPoints
  • 2 tablespoons fresh basil, chopped0 SmartPoints
  • 1 tablespoon extra-virgin olive oil1 SmartPoint

For Garnish (Optional):

  • Additional fresh basil leaves0 SmartPoints
  • A sprinkle of sea salt0 SmartPoints

Instructions

  1. Prepare the Chicken: Begin by trimming any excess fat from the chicken breasts. Pat them dry with paper towels and season both sides generously with salt, pepper, garlic powder, dried basil, and dried oregano. This seasoning will infuse the chicken with a burst of flavor.
  2. Heat the Skillet: Place a large non-stick or cast-iron skillet over medium-high heat. Add 1 tablespoon of olive oil and allow it to heat until shimmering. The olive oil will provide a base for searing the chicken and add a touch of richness to the dish.
  3. Sear the Chicken: Once the oil is hot, carefully place the chicken breasts in the skillet. Cook for 5-6 minutes on each side, or until the chicken is golden brown and has reached an internal temperature of 165°F (74°C). This ensures the chicken is cooked through while retaining its juiciness.
  4. Remove and Rest: Transfer the cooked chicken breasts to a plate and cover loosely with aluminum foil. Allow the chicken to rest while you prepare the Caprese topping. Resting the chicken helps redistribute the juices and keeps it tender.
  5. Prepare the Caprese Topping: In the same skillet, reduce the heat to medium. Add the halved cherry tomatoes and cook for 2-3 minutes, until they start to soften and release their juices. This step builds a flavorful base for the Caprese topping.
  6. Add Balsamic Vinegar: Pour the balsamic vinegar into the skillet with the tomatoes. Stir and cook for an additional 2 minutes, allowing the vinegar to reduce slightly and mingle with the tomato juices. The balsamic vinegar adds a tangy sweetness to the dish.
  7. Incorporate Mozzarella: Scatter the fresh mozzarella balls over the tomatoes in the skillet. Cook for another 2-3 minutes, or until the mozzarella starts to melt and become slightly gooey. This creates a deliciously creamy topping for the chicken.
  8. Return the Chicken: Place the rested chicken breasts back into the skillet, nestling them among the tomatoes and mozzarella. Spoon some of the tomato and cheese mixture over the top of the chicken for added flavor.
  9. Finish with Fresh Basil: Drizzle the extra-virgin olive oil over the chicken and sprinkle with chopped fresh basil. The basil adds a fresh, aromatic quality that complements the dish perfectly.
  10. Simmer and Serve: Allow everything to simmer together for 2-3 minutes, letting the flavors meld and the mozzarella fully melt. Once done, remove from heat. Garnish with additional fresh basil leaves and a sprinkle of sea salt if desired.
  11. Serve Immediately: Transfer the chicken breasts to serving plates, spooning the tomato and mozzarella topping over each piece. This dish is best enjoyed warm, allowing you to savor the vibrant flavors and textures.
  12. Side Dish Suggestions: For a complete meal, consider serving the Caprese Chicken Skillet with a side of steamed vegetables, a mixed green salad, or a portion of quinoa or brown rice. These sides add nutritional balance and make the meal more filling.

Nutritional Information and WW Points

Per Serving (assuming 4 servings total):

  • Calories: 290
  • Total Fat: 12 grams
  • Saturated Fat: 4 grams
  • Cholesterol: 100 milligrams
  • Sodium: 400 milligrams
  • Total Carbohydrates: 15 grams
  • Dietary Fiber: 2 grams
  • Sugars: 9 grams
  • Protein: 30 grams

WW SmartPoints:

  • Chicken Breast: 0 SmartPoints
  • Olive Oil (for cooking): 1 SmartPoint per tablespoon
  • Mozzarella Balls: 3 SmartPoints per cup
  • Balsamic Vinegar: 0 SmartPoints
  • Extra-Virgin Olive Oil: 1 SmartPoint per tablespoon
  • Total WW SmartPoints per Serving: 5 SmartPoints

Useful Tips and Variations

  1. Lower the Points Further: To reduce the SmartPoints further, use part-skim mozzarella cheese or a reduced-fat cheese alternative. You can also limit the amount of olive oil used.
  2. Add Vegetables: Incorporate additional vegetables such as bell peppers, zucchini, or mushrooms for added flavor and nutrition. Be mindful of any additional points from the extra vegetables.
  3. Balsamic Glaze Substitute: If you prefer a sweeter touch, use a balsamic glaze in place of the regular balsamic vinegar. However, be aware that it may slightly increase the points value.
  4. Make Ahead: You can prepare the chicken and Caprese topping a day in advance. Store them separately in the refrigerator and reheat before serving. This makes meal prep convenient and efficient.
  5. Freeze for Later: The cooked chicken and topping can be frozen in an airtight container for up to 3 months. Thaw overnight in the refrigerator and reheat on the stove or in the oven before serving.
  6. Serving Suggestions: This dish pairs well with a side of roasted potatoes, whole grain pasta, or a fresh cucumber and tomato salad. For a low-point option, consider serving with a side of steamed broccoli or cauliflower rice.

Conclusion

The Caprese Chicken Skillet combines the classic flavors of a Caprese salad with tender, juicy chicken in a Weight Watchers-friendly meal. By focusing on lean chicken, fresh ingredients, and smart cooking techniques, this recipe offers a satisfying and nutritious option that supports your WW goals. Whether you’re preparing a weeknight dinner or a meal for special occasions, this dish is sure to impress with its vibrant flavors and elegant presentation. Enjoy the fresh, wholesome taste of the Caprese Chicken Skillet while staying true to your health and wellness objectives.

Zucchini Cornbread Casserole: A Weight Watchers Friendly Recipe

Introduction

Welcome to a wholesome and flavorful dish that aligns perfectly with your Weight Watchers journey—Zucchini Cornbread Casserole. This recipe marries the moist texture of cornbread with the freshness of zucchini, creating a comforting and nutritious casserole that’s both satisfying and low in WW (Weight Watchers) points. In this detailed guide, we’ll provide step-by-step instructions, nutritional breakdown, and tips to help you create this delicious and weight-conscious meal.

Ingredients

For the Casserole:

  • 2 medium zucchinis (approximately 2 cups grated, about 240 grams) – 0 SmartPoints
  • 1 cup yellow cornmeal – 5 SmartPoints
  • 1 cup all-purpose flour – 4 SmartPoints
  • 1/2 cup reduced-fat shredded cheddar cheese – 3 SmartPoints
  • 1/2 cup low-fat Greek yogurt – 0 SmartPoints
  • 1/2 cup unsweetened almond milk (or any low-point milk alternative) – 0 SmartPoints
  • 2 large eggs – 4 SmartPoints
  • 1 tablespoon baking powder – 0 SmartPoints
  • 1/2 teaspoon salt – 0 SmartPoints
  • 1/4 teaspoon black pepper – 0 SmartPoints
  • 1/2 teaspoon garlic powder – 0 SmartPoints
  • 1/2 teaspoon onion powder – 0 SmartPoints
  • 1 tablespoon olive oil – 1 SmartPoint

For Garnish (Optional):

  • Chopped fresh parsley – 0 SmartPoints
  • Additional reduced-fat shredded cheddar cheese – 1 SmartPoint (for sprinkling on top, if desired)

Instructions

  1. Preheat the Oven: Begin by preheating your oven to 375°F (190°C). This ensures that the oven is hot and ready for even baking.
  2. Prepare the Zucchini: Wash and trim the zucchinis. Using a grater or food processor, grate the zucchinis finely. To remove excess moisture, place the grated zucchini in a clean cloth or paper towels and squeeze out as much liquid as possible. This step helps prevent the casserole from becoming too watery.
  3. Mix Dry Ingredients: In a large mixing bowl, combine the yellow cornmeal, all-purpose flour, baking powder, salt, black pepper, garlic powder, and onion powder. Whisk together until the ingredients are evenly distributed.
  4. Combine Wet Ingredients: In a separate bowl, whisk together the eggs, low-fat Greek yogurt, and unsweetened almond milk. The Greek yogurt adds creaminess without extra fat, and the almond milk is a low-point substitute for regular milk.
  5. Incorporate the Zucchini: Add the grated zucchini to the wet ingredients mixture and stir to combine. This step ensures that the zucchini is evenly distributed throughout the batter.
  6. Combine Wet and Dry Ingredients: Gradually add the wet mixture to the dry ingredients, stirring until just combined. Be careful not to overmix, as this can result in a dense texture. The batter should be thick but spreadable.
  7. Add Cheese: Fold in the reduced-fat shredded cheddar cheese into the batter. This addition enhances the flavor and adds a touch of creaminess.
  8. Prepare the Baking Dish: Lightly grease a 9×9-inch (23×23 cm) baking dish with 1 tablespoon of olive oil or use a non-stick cooking spray. The olive oil adds a slight richness and helps the casserole brown evenly.
  9. Pour and Spread Batter: Pour the batter into the prepared baking dish. Use a spatula to spread the batter evenly and smooth the top. This ensures that the casserole cooks uniformly.
  10. Bake: Place the baking dish in the preheated oven and bake for 30-35 minutes, or until the top is golden brown and a toothpick inserted into the center comes out clean. The baking time may vary slightly based on your oven, so keep an eye on it.
  11. Cool and Serve: Allow the casserole to cool in the baking dish for about 10 minutes before cutting into squares. This helps the casserole set and makes it easier to serve.
  12. Garnish and Enjoy: If desired, sprinkle a small amount of additional reduced-fat shredded cheddar cheese on top before serving, and garnish with chopped fresh parsley for a touch of color and flavor.

Nutritional Information and WW Points

Per Serving (assuming 9 servings total):

  • Calories: 170
  • Total Fat: 5 grams
  • Saturated Fat: 2 grams
  • Cholesterol: 55 milligrams
  • Sodium: 300 milligrams
  • Total Carbohydrates: 24 grams
  • Dietary Fiber: 2 grams
  • Sugars: 3 grams
  • Protein: 8 grams

WW SmartPoints:

  • Cornmeal: 5 SmartPoints per cup
  • All-purpose Flour: 4 SmartPoints per cup
  • Reduced-Fat Shredded Cheddar Cheese: 3 SmartPoints per 1/2 cup
  • Olive Oil: 1 SmartPoint per tablespoon
  • Total WW SmartPoints per Serving: 6 SmartPoints (without additional cheese); 7 SmartPoints (with additional cheese)

Useful Tips and Variations

  1. Lower the Points Further: To reduce the points further, consider using a lower-point cheese alternative or skipping the cheese entirely. You can also use egg whites or a fat-free egg substitute to cut down on cholesterol and points.
  2. Add Vegetables: Enhance the nutritional value by adding other vegetables like diced bell peppers or onions. Be mindful of the added points if incorporating additional ingredients.
  3. Make Ahead: This casserole can be prepared in advance and stored in the refrigerator for up to 3 days. Reheat individual servings in the microwave for a quick and convenient meal.
  4. Freeze for Later: You can freeze the casserole for up to 3 months. Portion it into individual servings and store in airtight containers. To reheat, thaw overnight in the refrigerator and bake at 350°F (175°C) for about 20 minutes, or until heated through.
  5. Serving Suggestions: Pair this casserole with a fresh green salad or a side of steamed vegetables for a balanced meal. It also makes a great side dish for grilled chicken or fish.

Conclusion

The Zucchini Cornbread Casserole is a versatile and satisfying dish that fits perfectly into a Weight Watchers-friendly meal plan. With its combination of wholesome ingredients and low WW points, this casserole offers a delicious way to enjoy comfort food while staying on track with your health goals. Whether served as a main course or a side dish, this casserole delivers on taste, nutrition, and smart choices. Enjoy the process of preparing this meal and savor each bite knowing you’re making a smart and healthy choice for yourself and your family.

Certainly! Here’s a Weight Watchers-friendly version of the Pizza Casserole Recipe, complete with nutritional information and Smart Points values:

Weight Watchers Pizza Casserole

Experience the comforting flavors of Italy while staying on track with your Weight Watchers plan with our delicious Pizza Casserole! This satisfying dish combines lean proteins, whole-grain pasta, and cheesy goodness into a warm, gooey casserole. Perfect for family dinners or meal prepping, this recipe will keep you within your SmartPoints while still delivering the taste you love.

Ingredients:

  • 1 pound lean ground turkey (or extra-lean ground beef) –
  • 4 ounces turkey pepperoni
  • 2 cups part-skim mozzarella cheese, shredded
  • 1 (15 oz) can crushed tomatoes
  • 1 teaspoon garlic powder
  • 1 tablespoon Italian seasoning
  • 8 ounces whole-wheat penne pasta
  • 1/4 cup grated Parmesan cheese

Instructions:

  1. Prepare the Meat:
  • Brown the lean ground turkey in a skillet over medium heat. Drain any excess grease.
  1. Make the Sauce:
  • Stir in the crushed tomatoes, garlic powder, and Italian seasoning with the cooked meat. Let it simmer for about 5 minutes to combine the flavors.
  1. Cook the Pasta:
  • Cook the whole-wheat penne pasta according to package instructions until al dente. Drain and set aside.
  1. Assemble the Casserole:
  • In a 9×13-inch baking dish, layer half of the cooked pasta, followed by half of the meat sauce, half of the shredded mozzarella cheese, and half of the turkey pepperoni.
  • Repeat the layering process with the remaining pasta, meat sauce, cheese, and pepperoni.
  • Sprinkle the grated Parmesan cheese evenly over the top.
  1. Bake:
  • Cover the baking dish with foil and bake at 350°F (175°C) for 30 minutes.
  • Remove the foil and bake for an additional 15 minutes, or until the top is golden brown and bubbly.
  1. Cool and Serve:
  • Allow the casserole to cool for about 5 minutes before serving. Enjoy!

Nutrition Information (Per Serving):

  • Serving Size: 1/6 of the casserole
  • Calories: 290
  • Total Fat: 12g
  • Saturated Fat: 5g
  • Cholesterol: 80mg
  • Sodium: 680mg
  • Total Carbohydrates: 30g
  • Fiber: 5g
  • Sugars: 7g
  • Protein: 22g

Weight Watchers SmartPoints Values:

  • Total SmartPoints per Serving: 8

Notes:

  • Gluten-Free Option: Substitute the whole-wheat penne with gluten-free pasta if needed. Ensure all other ingredients, like pepperoni and seasoning, are gluten-free to accommodate dietary restrictions.

This Weight Watchers Pizza Casserole provides a delicious way to enjoy pizza flavors while staying on track with your Smart Points. Perfect for meal prep or a comforting family dinner, it’s a recipe that offers both taste and nutritional balance.

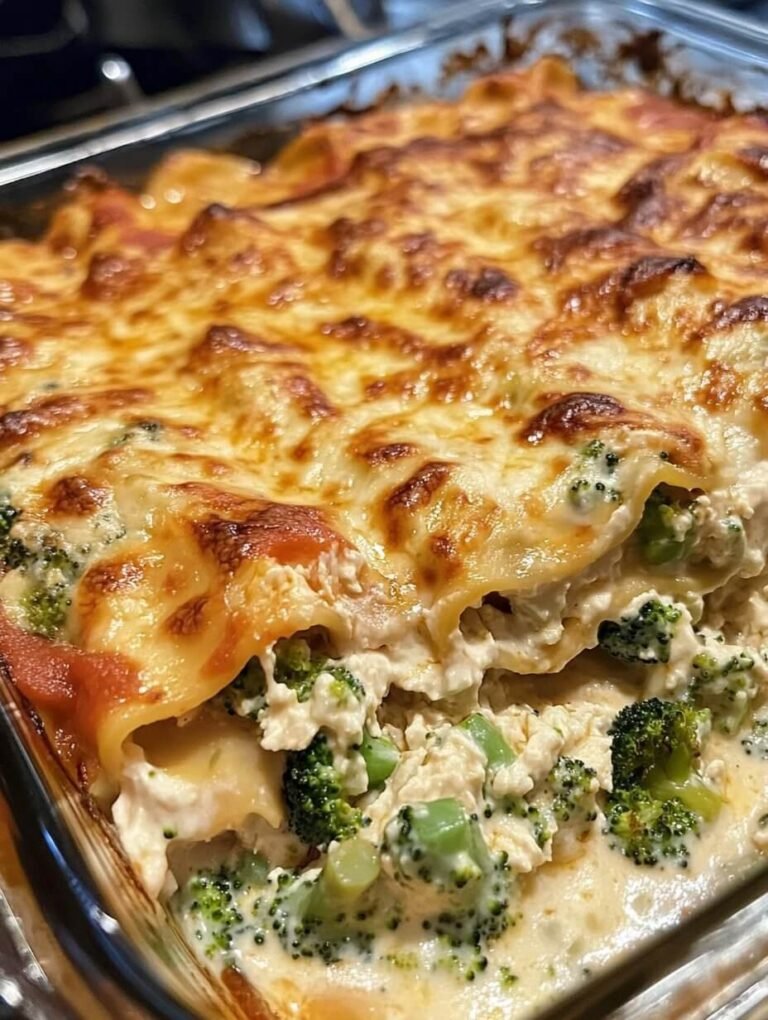
Keto Chicken and Broccoli Lasagna
Ingredients:

  • For the “Noodles”:
    • 4 large zucchini, sliced lengthwise into thin strips (or use a mandoline to create uniform slices)
  • For the Filling:
    • 2 cups cooked chicken, shredded or diced (rotisserie chicken works well)
    • 2 cups frozen broccoli florets, thawed and drained
    • 1 (15 oz) container of ricotta cheese (or use full-fat cottage cheese for fewer carbs)
    • 1 large egg
    • 1/2 cup grated Parmesan cheese
    • 2 cups shredded mozzarella cheese (divided)
    • 2 cups marinara sauce (make sure to use a low-carb/keto-friendly version)
    • Salt and pepper, to taste
    • 1 teaspoon Italian seasoning (optional)

Free Keto Meal Plan : KETO DIET PLAN FOR BEGINNERS STEP BY STEP GUIDE

Instructions:

1. Preheat Oven:

  • Preheat your oven to 350°F (180°C).

2. Prepare the Zucchini “Noodles”:

  • Slice the zucchini lengthwise into thin strips, about 1/8 inch thick.
  • Lay the zucchini slices on a paper towel and lightly salt them to draw out excess moisture. Let them sit for about 10 minutes, then pat them dry with another paper towel.

3. Make the Filling:

  • In a medium mixing bowl, combine the ricotta cheese, egg, Parmesan cheese, and Italian seasoning (if using). Mix well and season with salt and pepper to taste.
  • In a separate bowl, mix the cooked chicken with the broccoli.

Free Keto Meal Plan : KETO DIET PLAN FOR BEGINNERS STEP BY STEP GUIDE

4. Assemble the Lasagna:

  • In a 9×13-inch baking dish, spread a thin layer of marinara sauce on the bottom to prevent sticking.
  • Place a layer of zucchini slices on top of the sauce, overlapping them slightly.
  • Spread half of the ricotta mixture evenly over the zucchini.
  • Evenly distribute half of the chicken and broccoli mixture on top of the ricotta layer.
  • Sprinkle 1/3 of the mozzarella cheese over the chicken and broccoli layer.
  • Pour half of the remaining marinara sauce over the cheese.
  • Repeat the layers: zucchini slices, remaining ricotta mixture, remaining chicken and broccoli, 1/3 of the mozzarella cheese, and the rest of the marinara sauce.
  • Finish with a final layer of zucchini slices and top with the remaining mozzarella cheese.

5. Bake the Lasagna:

  • Cover the dish with aluminum foil and bake for 30 minutes.
  • After 30 minutes, remove the foil and bake for an additional 15-20 minutes, or until the cheese is melted and bubbly.

6. Serve:

  • Remove from the oven and let the lasagna rest for about 10 minutes before cutting and serving.

Free Keto Meal Plan : KETO DIET PLAN FOR BEGINNERS STEP BY STEP GUIDE

Nutrition Information (per serving, based on 8 servings):

  • Calories: ~280 kcal
  • Carbs: ~6g net carbs
  • Protein: ~23g
  • Fat: ~18g
  • Fiber: ~2g

Tips:

  • Zucchini Noodles: If you prefer, you can use store-bought keto-friendly lasagna noodles instead of zucchini.
  • Ricotta Substitution: Cottage cheese is a good alternative if you want a creamier texture with slightly fewer carbs.
  • Marinara Sauce: Use a marinara sauce that has no added sugars to keep the carb count low.
  • Storage: Store leftovers in an airtight container in the fridge for up to 3 days. The lasagna can also be frozen for longer storage.

Free Keto Meal Plan : KETO DIET PLAN FOR BEGINNERS STEP BY STEP GUIDE

This keto version of Chicken and Broccoli Lasagna is not only delicious but also packed with protein and healthy fats, making it a perfect low-carb meal for any day of the week!

Keto Cream Cheese Pudding Cups
Ingredients:

  • 8 oz block cream cheese, softened
  • 1 small package sugar-free pudding mix (cheesecake, vanilla, or chocolate flavor)
  • 1 cup heavy cream
  • 1 cup water (added slowly to avoid splashing)
  • Optional toppings:
    • Redi Whip (sugar-free)
    • 1 strawberry, chopped

Free Keto Meal Plan : KETO DIET PLAN FOR BEGINNERS STEP BY STEP GUIDE

Instructions:

  1. Soften the Cream Cheese:
    • Ensure the cream cheese is softened at room temperature for easier mixing. This will help achieve a smooth, creamy texture.
  2. Blend Ingredients:
    • In a mixing bowl, combine the softened cream cheese and sugar-free pudding mix.
    • Gradually add the heavy cream while mixing with a hand mixer until well combined.
    • Slowly add the water while continuing to blend to avoid splashing. Mix for several minutes until the mixture is smooth and creamy.
  3. Divide into Cups:
    • Divide the mixture evenly among 6 dessert cups.
  4. Add Toppings:
    • Top each serving with Redi Whip and a few pieces of chopped strawberry if desired. This will add about 2 extra carbs per serving but also balance the richness of the dessert with a touch of sweetness.
  5. Chill and Serve:
    • For the best texture, chill the dessert cups in the refrigerator for at least an hour before serving.

Free Keto Meal Plan : KETO DIET PLAN FOR BEGINNERS STEP BY STEP GUIDE

Nutrition Information (per serving, based on 6 servings):

  • Calories: ~294 kcal
  • Fat: ~27g
  • Carbs: ~7g net carbs (+2g with Redi Whip and strawberry)
  • Protein: ~4g

Tips:

  • Flavor Variations: Experiment with different sugar-free pudding flavors to keep things interesting. Cheesecake, vanilla, and chocolate are all excellent choices.
  • Extra Richness: For an even richer dessert, consider using a combination of cream cheese and mascarpone cheese.
  • Texture: If you prefer a lighter texture, fold in some whipped heavy cream after blending the main ingredients.
  • Storage: Store the dessert cups in the refrigerator, covered, for up to 3 days.

Free Keto Meal Plan : KETO DIET PLAN FOR BEGINNERS STEP BY STEP GUIDE

This keto-friendly dessert is rich, creamy, and versatile, making it a perfect treat for satisfying your cravings while sticking to your low-carb lifestyle!

Keto Stuffed Cabbage Rolls
Ingredients:

  • 1 cup cauliflower rice (substitute for cooked long-grain rice)
  • 1.5 pounds ground beef (lean or extra lean)
  • 1.5 tablespoons Worcestershire sauce
  • 1 large egg
  • 1 yellow onion, minced
  • ⅓ cup parsley, roughly chopped
  • 3 cloves garlic, minced
  • 1.5 teaspoons salt
  • ½ teaspoon black pepper
  • ½ teaspoon dried dill
  • ½ teaspoon onion powder
  • ½ to 1 teaspoon red chili flakes (optional)
  • 42 ounces tomato sauce (sugar-free or low-carb, divided)
  • 1 medium head green cabbage (you’ll need about 18 leaves for the rolls and another 8 to 10 or so for the bottom of the dish and over top.)
  • ½ cup water (leftover from boiling cabbage)
  • Fresh dill, chopped (garnish, optional)

Free Keto Meal Plan : KETO DIET PLAN FOR BEGINNERS STEP BY STEP GUIDE

Instructions:

  1. Prepare the Cauliflower Rice:
    • If using fresh cauliflower, pulse florets in a food processor until they resemble rice grains. If using frozen, simply thaw and drain excess water.
    • Sauté cauliflower rice in a pan with a little olive oil until tender, about 5-7 minutes. Set aside.
  2. Mix the Filling:
    • In a large bowl, combine ground beef with Worcestershire sauce, egg, minced onion, parsley, garlic, salt, pepper, dill, onion powder, red chili flakes (if using), ½ cup of tomato sauce, and the prepared cauliflower rice. Mix until well combined.
  3. Prepare the Cabbage Leaves:
    • Bring a large pot of water to a boil. Add the whole head of cabbage and boil for 8-10 minutes, carefully turning it over halfway through.
    • Remove the cabbage and allow it to cool slightly. Carefully peel off about 18 large leaves, cutting out the thick core from each leaf. If needed, return the cabbage to the boiling water to soften more leaves.
  4. Assemble the Cabbage Rolls:
    • Line the bottom of a deep 9×13-inch baking dish or roasting pan with some cabbage leaves.
    • Place about ¼ cup of the beef mixture on each cabbage leaf, fold in the sides, and roll up tightly. Place each roll seam-side down in the prepared dish.
    • Continue with the remaining beef mixture and cabbage leaves.
  5. Prepare the Sauce:
    • In a bowl, whisk together the remaining tomato sauce and ½ cup of the reserved cabbage water.
    • Pour the sauce evenly over the cabbage rolls.
  6. Bake the Cabbage Rolls:
    • Cover the baking dish with aluminum foil and bake in a preheated oven at 350°F (180°C) for 1.5 to 2 hours, or until the cabbage is tender and the filling is cooked through.
  7. Serve:
    • Garnish with fresh chopped dill, if desired, and serve hot.

Free Keto Meal Plan : KETO DIET PLAN FOR BEGINNERS STEP BY STEP GUIDE

Nutrition Information (per serving, based on 8 servings):

  • Calories: ~250 kcal
  • Fat: ~15g
  • Carbs: ~6g net carbs
  • Protein: ~20g

Tips:

  • Tomato Sauce: Ensure the tomato sauce is sugar-free to keep it low-carb.
  • Ground Meat: Feel free to use a combination of ground beef and ground pork for added flavor.
  • Storage: These cabbage rolls freeze well. Store leftovers in an airtight container in the freezer for up to 3 months. Reheat in the oven or microwave when ready to eat.

This keto version of stuffed cabbage rolls offers a comforting and hearty meal without the high carb content of traditional recipes. Enjoy!

Free Keto Meal Plan : KETO DIET PLAN FOR BEGINNERS STEP BY STEP GUIDE

Low-Carb No-Bake Cherry Cheesecake
Ingredients

Crust
  • 1 1/2 cups almond flour
  • 1/4 cup butter, melted
  • 2 tablespoons granulated erythritol (or any low-carb sweetener)
  • 1/2 teaspoon cinnamon (optional)
Filling
  • 1 (8 oz.) package cream cheese, softened
  • 1/2 cup powdered erythritol (or another keto-friendly sweetener)
  • 1 teaspoon vanilla extract
  • 1 can (14 oz.) sweetened condensed milk substitute (see below)
  • 1/4 cup lemon juice
Topping
  • 1 cup fresh or frozen cherries, pitted (for a low-carb option, use a smaller amount or use a no-sugar-added cherry pie filling)

Instructions

Prepare the Crust
  1. Mix Ingredients: In a medium bowl, combine the almond flour, melted butter, granulated erythritol, and cinnamon. Stir until the mixture resembles wet sand.
  2. Form the Crust: Press the mixture evenly into the bottom of a 9-inch springform pan or pie dish. Use the back of a spoon or a flat-bottomed cup to press it firmly.
  3. Chill: Place the crust in the refrigerator to set while you prepare the filling.
Prepare the Filling
  1. Cream Cheese Mixture: In a large mixing bowl, beat the softened cream cheese until smooth and creamy.
  2. Add Sweetener: Gradually add the powdered erythritol and continue to beat until fully incorporated and smooth.
  3. Add Vanilla and Lemon Juice: Mix in the vanilla extract and lemon juice until well combined.
  4. Add Sweetened Condensed Milk Substitute: Slowly pour in the keto sweetened condensed milk, mixing continuously until the filling is smooth and creamy.
Assemble the Cheesecake
  1. Pour Filling: Pour the cream cheese filling over the chilled crust, smoothing the top with a spatula.
  2. Chill: Refrigerate the cheesecake for at least 4 hours, or until fully set. For best results, chill overnight.
Prepare the Topping
  1. Cherries: If using fresh or frozen cherries, pit them and chop if desired. If using a sugar-free cherry pie filling, spread a thin layer over the top of the chilled cheesecake.
  2. Optional: If using fresh or frozen cherries, you can create a simple syrup by simmering them with a small amount of water and sweetener until thickened.
Serve
  1. Slice and Enjoy: Once the cheesecake is set, slice and serve. Store leftovers in the refrigerator for up to 3-4 days.

Low-Carb Sweetened Condensed Milk Substitute

Ingredients:

  • 1 cup heavy cream
  • 1/2 cup powdered erythritol (or another low-carb sweetener)
  • 1/4 cup unsalted butter

Instructions:

  1. Combine Ingredients: In a medium saucepan, combine heavy cream, erythritol, and butter.
  2. Heat: Bring to a simmer over medium heat, stirring frequently.
  3. Thicken: Reduce heat to low and simmer gently for about 30-40 minutes, stirring occasionally, until the mixture thickens and reduces by half.
  4. Cool: Let it cool before using in the cheesecake recipe.

Nutritional Information (Per Serving, Approximate)

  • Calories: 200
  • Total Fat: 18g
  • Saturated Fat: 9g
  • Carbohydrates: 5g
    • Net Carbohydrates: 4g
    • Fiber: 1g
    • Sugars: 2g
  • Protein: 5g

This low-carb no-bake cherry cheesecake is a delightful and creamy dessert that fits into a keto or low-carb diet. The use of almond flour in the crust and a low-carb sweetener in the filling helps reduce the carb content while still providing that classic cheesecake flavor. Enjoy!

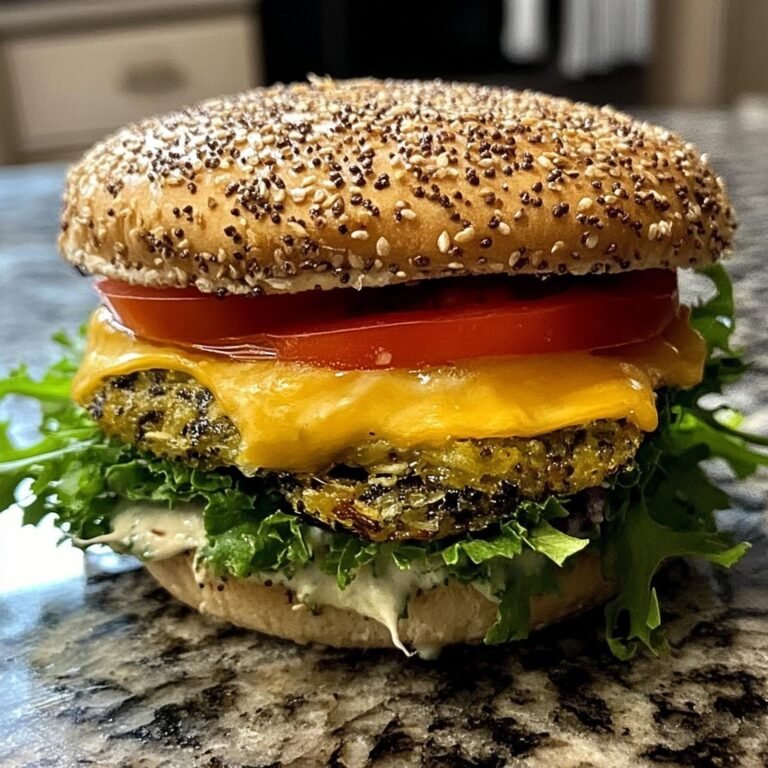
Protein-Packed Vegan Breakfast Sandwich

Ingredients

For the Chickpea/Flax Omelette:

  • 1/2 cup chickpea flour
  • 2 tablespoons flax meal
  • 1 tablespoon nutritional yeast
  • 1/2 cup water (adjust as needed for desired consistency)
  • Salt and pepper to taste

For the Sautéed Veggies:

  • 1 small onion, finely chopped
  • 2 cloves garlic, minced
  • 1 bell pepper, diced
  • 1 tomato, diced
  • A handful of spinach, roughly chopped
  • 1 tablespoon olive oil

For the Sandwich:

  • Gluten-free bread or English muffins
  • Avocado slices (optional)
  • Vegan cheese (optional)
  • Hot sauce or condiment of your choice (optional)

Instructions

1. Prepare the Omelette Mixture:

  • In a mixing bowl, combine chickpea flour, flax meal, nutritional yeast, salt, and pepper.
  • Gradually add water while stirring until the mixture reaches a creamy, smooth consistency. Adjust the amount of water as needed to achieve the right texture.

2. Sauté the Veggies:

  • Heat olive oil in a non-stick pan over medium heat.
  • Add the chopped onion and minced garlic, sautéing until they become translucent and fragrant.
  • Add the diced bell pepper and tomato, cooking until they soften.
  • Stir in the chopped spinach and cook until wilted. Remove the veggies from the pan and set aside.

3. Cook the Omelette:

  • In the same pan, pour the chickpea/flax mixture, spreading it out evenly.
  • Allow the omelette to cook for a few minutes until the edges start to set.
  • Add the sautéed veggies on one half of the omelette, then fold the other half over the veggies.
  • Cook for another couple of minutes until the omelette is fully cooked and slightly golden. Remove from the pan.

4. Assemble the Sandwich:

  • Toast the gluten-free bread or English muffins if desired.
  • Place the omelette on one slice of bread or muffin half.
  • Add avocado slices and vegan cheese if using.
  • Top with the other slice of bread or muffin half.

5. Serve:

  • Cut the sandwich in half and serve warm. Add hot sauce or your favorite condiment for an extra kick.

Additional Tips

  • Texture of the Omelette: The amount of water can be adjusted to make the omelette thicker or thinner, depending on your preference.
  • Veggie Variations: Feel free to experiment with different vegetables like mushrooms, zucchini, or kale.
  • Storage: The omelette mixture can be prepared ahead of time and stored in the refrigerator for a quick breakfast option.

This gluten-free breakfast sandwich with a chickpea/flax omelette is a great way to start your day with a boost of protein and plenty of flavor. Enjoy it as a hearty breakfast or brunch option!

Nutritional Information (Per Serving)

  • Calories: 350-400 kcal
  • Total Fat: 15-18g
    • Saturated Fat: 1.5-2g
  • Cholesterol: 0mg (vegan recipe)
  • Sodium: 300-400mg
  • Total Carbohydrates: 40-45g
    • Dietary Fiber: 6-8g
    • Sugars: 5-7g
  • Protein: 10-12g

Key Nutrients

  • Vitamin A: Provided by spinach and bell pepper.
  • Vitamin C: Provided by bell pepper and tomato.
  • Calcium: From nutritional yeast and plant-based ingredients.
  • Iron: From chickpea flour, spinach, and nutritional yeast.

These values are estimates and can vary. Adding additional toppings like avocado or vegan cheese may alter the nutritional content. This sandwich offers a good balance of macronutrients and is a great source of plant-based protein and fiber.

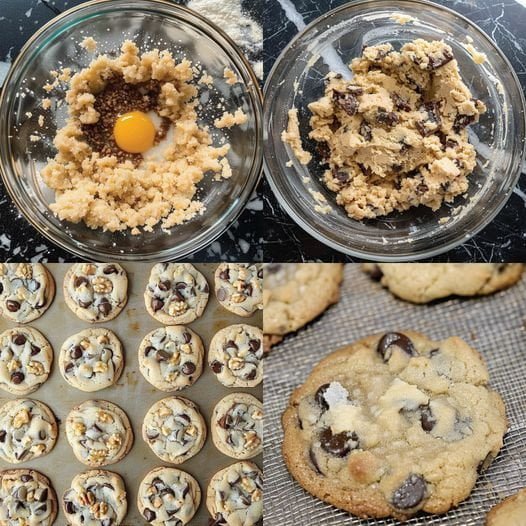
These are one of my favorite keto cookies. Keto Chocolate Chip Cookies are the perfect recipe for any occasion; make them for a sneaky healthy treat for the kids, a sneaky treat for yourself, or keto workplace treats. A yummy treat for all.
Keto cookies are just like any other chocolate chip cookie recipe as they are made with almond flour, instead of using wheat flour. One net carb each!

What Are Keto Cookies?
Instead of using wheat flour, low carb cookies are just like any other chocolate chip cookie recipe, they are made with almond flour. Erythritol is a keto friendly sweetener, regular sugar is substituted with. I recommend using 100% erythritol which in the recipe ingredients, you can find. In this recipe, do not use liquid stevia/liquid monkfruit.

Where Can I Purchase Sugar-Free Chocolate Chips?
Lily’s do a great quality sugar-free chocolate chip which in this recipe, works great. However, you can always just use, if you don’t have access to those specific chocolate chips for the best keto chocolate chip cookies:

90% Lindt chocolate Chopped up
100% bakers chocolate

To Bake Keto Chocolate Chip Cookies, Can You Use Coconut Flour?
As they will not flatten out during baking, I wouldn’t use coconut flour for these cookies.
Ingredients
1 1/4 cups almond flour
1/2 teaspoon baking soda
1/2 teaspoon salt
1/4 teaspoon baking powder
1/2 cup (1 stick) unsalted butter, softened
3/4 cup packed brown sugar (golden monkfruit)
One teaspoon vanilla extract
1 large egg
1 cup Lilly’s chocolate chips
1/2 cup chopped pecans

Instructions
Preheat oven to 350 degrees.
Take a bowl and combine the salt, baking soda, baking powder and almond flour in it, put it aside.
Next, in stand mixer bowl, beat vanilla extract, golden monkfruit sweetener and butter until it gets creamy.
Beating the mixture on low, add the egg,.
Gradually pour in the almond flour mixture and until it gets combined, beat on low speed.
Mix in chopped nuts and Lilly’s Dark Chocolate Chips.
Until the butter is solid, chill the mixture for 20-30 mins.
Onto a silicone lined baking sheet, using a One inch cookie drop the cookies, baking sheet evenly spaced.
Bake for 7-9 minutes until it gets lightly set and golden brown. (DON’T OVERBAKE) Optional, top with sea salt.
Before moving from the pan, let cookies cool completely.
Notes
Chilling the mixture is essential.
before moving from the pan, COOL COMPLETELY.
Nutrition Information:
Amount Per Serving:
CALORIES: 82
TOTAL FAT: 6.4g
CHOLESTEROL: 16.5mg
SODIUM: 3.2mg
CARBOHYDRATES: 1.6g
FIBER: 0.5g
SUGAR: 0.3g
PROTEIN: 1.2g