Author

Chloe Harper

Browsing

Keto Zucchini Egg Muffins
Ingredients:

  • 2 medium zucchinis, shredded (about 2 cups)
  • ¼ cup red onion, diced
  • ½ cup feta cheese, crumbled
  • 1 large egg, lightly beaten
  • 1 tablespoon olive oil (optional, for greasing muffin tin)
  • Salt and pepper to taste
  • Optional: 1 teaspoon dried herbs (like oregano or thyme) for added flavor

Free Keto Meal Plan : KETO DIET PLAN FOR BEGINNERS STEP BY STEP GUIDE

Instructions:

  1. Prepare the Zucchini:
    • Shred the zucchini using a grater or food processor. Place the shredded zucchini in a clean towel or cheesecloth and squeeze out excess moisture to prevent the muffins from being soggy.
  2. Preheat Oven:
    • Preheat your oven to 375°F (190°C). If using a muffin tin, lightly grease it with olive oil or line with paper liners.
  3. Mix Ingredients:
    • In a large mixing bowl, combine the shredded zucchini, diced red onion, crumbled feta cheese, and the beaten egg. Season with salt and pepper to taste. If using, add the dried herbs.
  4. Fill Muffin Tin:
    • Spoon the mixture evenly into the muffin tin cups, filling each about ¾ full.
  5. Bake:
    • Bake in the preheated oven for 20-25 minutes, or until the muffins are set in the center and the tops are golden brown.
  6. Cool and Serve:
    • Allow the muffins to cool in the tin for a few minutes before transferring to a wire rack to cool completely. Serve warm or at room temperature.

Free Keto Meal Plan : KETO DIET PLAN FOR BEGINNERS STEP BY STEP GUIDE

Nutritional Information (approximate per muffin, assuming 6 muffins):

  • Calories: ~80
  • Fat: ~6g
  • Protein: ~5g
  • Carbs: ~3g

Free Keto Meal Plan : KETO DIET PLAN FOR BEGINNERS STEP BY STEP GUIDE

Tips:

  • Variations: You can customize these muffins by adding cooked bacon bits, sausage, or other low-carb vegetables.
  • Storage: Store leftovers in an airtight container in the refrigerator for up to 5 days. Reheat in the microwave or oven before serving.
  • Freezing: These muffins freeze well. Let them cool completely, then store in a freezer-safe bag or container for up to 3 months. Reheat in the microwave or oven.

Enjoy your keto zucchini egg muffins!

KETO KIELBASA SOUP WITH CAULIFLOWER
Ingredients:
1 pound kielbasa sausage, sliced
2 minced garlic cloves
1 tsp olive oil
1 small yellow onion
1/2 cup of celery, finely chopped
2 large carrots, peeled and cut into cubes
4 cups chicken broth
1 pound cauliflower, cut into small florets
1/4 cup grated parmesan
2 cups heavy cream
2 cups grated cheddar cheese
1/4 cup coarsely chopped parsley
Salt and pepper to taste

How to make keto kielbasa soup with cauliflower:
The first step:
In a Dutch oven or soup pot, heat olive oil on medium-high heat.
Add sliced sausage and cook for 5 to 6 minutes.
Remove the sausage from the Dutch oven and place it on a plate.
The second step:
In the same pan, add onions, garlic, carrots and celery and cook for 2 minutes.
Add chicken broth and cauliflower.
Bring to a boil, then reduce the heat to low, cover and cook for 15 minutes.
The third step:
Return the kielbasa to the pan and add the heavy cream, parmesan and cheddar cheese. Season with salt and pepper.
Stir well and cook for another 10 minutes over medium-low heat until the cheese melts.
Remove from heat and garnish with chopped parsley.
Serve immediately or store in an airtight container in the refrigerator for up to 3 days.
Enjoy!
Nutrition Facts (per serving, makes 6 servings):
Calories: 614
Fat: 50 g
Carbohydrates: 12 g
Fiber: 3 g
Net Carbs: 9 g
Protein: 28 g

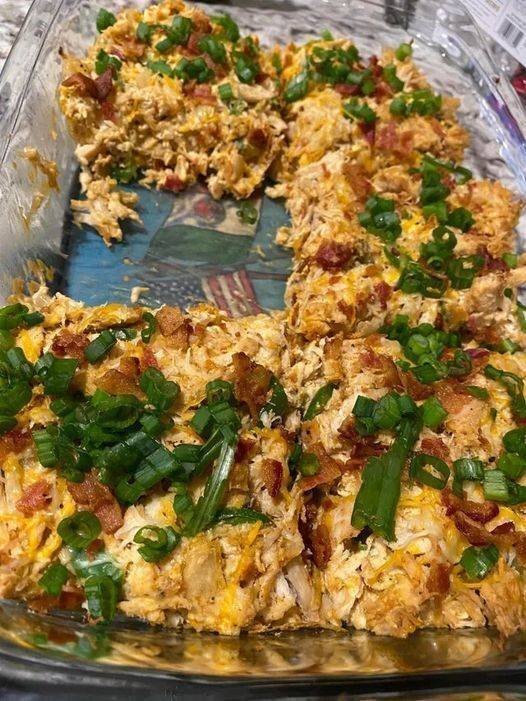
Jalapeño Popper Chicken Casserole 🌶
Ingredients
2lbs cooked/shredded chicken breast
6oz shredded Mexican blend cheese
3oz diced yellow onion
4 jalapeños (sliced, about 3oz total)
7oz Philadelphia Jalapeño cream cheese
1 tablespoon chili powder
An undetermined (plentiful) amount of sea salt and garlic powder
Crispy bacon pieces (I used 3 slices, use more if you dig on bacon more than I do)
A bunch of fresh green onion to sprinkle on top before serving!
Whippin’ it up

Preheat the oven to 350.
Sautée the onion and jalapeño on the stovetop with a small splash of the oil of your choice until they are cooked and soft
Mix onion and jalapeño in a huge bowl with the chicken, cheese, cream cheese, and spices until it is thoroughly mixed (it takes a bit of you don’t let the cream cheese soften).
Add this mixture to a greased 9×11 casserole dish and sprinkle the crispy bacon pieces all over the top.
Pop it in the oven and let it cook for 25-30 minutes.
Take it out, sprinkle with diced green onion (optional), serve.
It is excellent with ranch or blue cheese drizzled on top.
I got 6 servings out of it, it is about 400 calories (high protein 🤘🏻❤️🐓) and 5g net carbs a serving.

Keto Taco Pizza
This keto taco pizza is a delicious way to enjoy the flavors of tacos on a low carb pizza crust. It has a cheesy and crispy crust made with almond flour and mozzarella, and a spicy and meaty topping with ground beef, salsa, cheese, and veggies. You can customize it with your favorite taco toppings, such as sour cream, avocado, lettuce, tomatoes, and more. This recipe makes 10 slices, each with only 5 grams of net carbs.
Prep Time: 20 minutes
Cook Time: 20 minutes
Total Time: 40 minutes
Ingredients
For the Crust:
•1 1/2 cups of shredded mozzarella cheese
•2 ounces of cream cheese
•1 large egg
•1 cup of almond flour
•1/4 teaspoon of salt
•1/4 teaspoon of garlic powder
For the Topping:
•1/2 pound of ground beef or turkey
•2 tablespoons of taco seasoning (homemade or store-bought)
•1/4 cup of water
•1/4 cup of salsa
•1 cup of shredded Mexican cheese blend
•1/4 cup of chopped tomatoes
•1/4 cup of sliced black olives
•2 tablespoons of chopped green onions
•Optional: sour cream, lettuce, avocado, jalapeños, etc.

Instructions

Preheat oven to 350°F (177°C) and line a baking sheet with parchment paper.

In a microwave-safe bowl, combine the mozzarella and cream cheese. Heat for 30 seconds and stir, then repeat until the cheeses are melted and smooth.

Add the egg, almond flour, salt, and garlic powder to the cheese mixture and stir well to form a dough.

Place the dough on the prepared baking sheet and press it into a thin rectangle, about 10 by 14 inches in size.

Bake the crust for 12 to 15 minutes or until golden and firm.

In a skillet over medium-high heat, cook the ground beef or turkey, breaking it up with a spatula, until browned and cooked through. Drain the excess fat if needed.

Add the taco seasoning and water to the meat and simmer until the sauce is thickened, about 10 minutes.

Spread the salsa evenly over the baked crust, leaving a small border around the edges.

Sprinkle half of the Mexican cheese blend over the salsa layer.

Spoon the taco meat over the cheese layer and spread it evenly.

Sprinkle the remaining cheese over the meat layer.

Top with tomatoes, olives, green onions, and any other toppings you like.

Bake for another 5 to 10 minutes or until the cheese is melted and bubbly.

Cut into 10 slices and serve with sour cream or other optional toppings if desired.

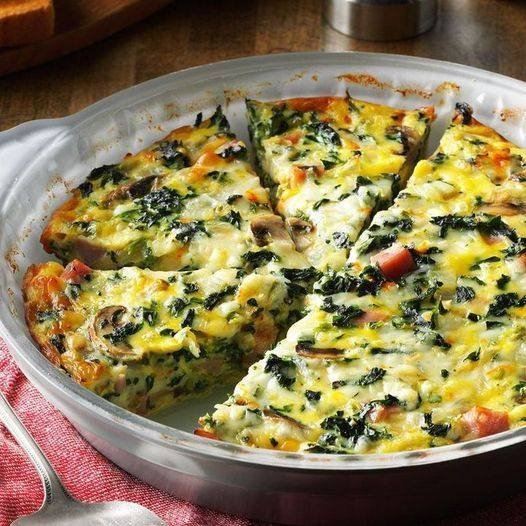
Weight Watchers-Friendly Crustless Spinach Quiche: A Nutritious and Delicious Option

Introduction:

Elevate your meal planning with our Weight Watchers-Friendly Crustless Spinach Quiche, a delightful dish that balances nutrition and flavor without compromising your SmartPoints goals. This recipe is designed for those who crave a satisfying quiche while adhering to Weight Watchers (WW) guidelines. Perfect for breakfast, brunch, or a light dinner, this crustless quiche is loaded with spinach, eggs, and a blend of cheeses, all baked to golden perfection. This comprehensive guide will walk you through the preparation of this healthy and delicious dish, ensuring every detail is covered to meet your dietary needs.

Ingredients:

For the Quiche Filling:

  • 2 cups (150 g) fresh spinach, chopped (or use frozen spinach, thawed and well-drained)
  • 1/2 cup (120 ml) non-fat milk (or a plant-based alternative, such as unsweetened almond milk)
  • 4 large eggs
  • 1/2 cup (60 g) shredded reduced-fat cheddar cheese
  • 1/2 cup (60 g) shredded reduced-fat mozzarella cheese
  • 1/4 cup (30 g) finely chopped onion
  • 2 cloves garlic, minced
  • 1/2 teaspoon dried basil
  • 1/2 teaspoon dried oregano
  • 1/4 teaspoon black pepper
  • 1/4 teaspoon salt

For Cooking:

  • Cooking spray (to lightly coat the baking dish)

Optional Garnishes:

  • Fresh herbs (such as parsley or chives, chopped)
  • Sliced tomatoes (for added freshness)
  • A sprinkle of extra cheese (if desired, ensure it fits within your SmartPoints budget)

Instructions:

  1. Preheat the Oven:
    • Begin by preheating your oven to 375°F (190°C). This ensures that the oven reaches the desired temperature for an even and consistent bake.
  2. Prepare the Spinach:
    • If using fresh spinach, wash it thoroughly and chop it finely. For frozen spinach, ensure it is fully thawed and drained of excess moisture. This step is crucial to prevent excess liquid in the quiche.
  3. Sauté the Aromatics:
    • In a medium skillet, heat a small amount of cooking spray over medium heat. Add the finely chopped onion and minced garlic. Sauté for 3-4 minutes, or until the onion becomes translucent and the garlic is fragrant. This step enhances the flavor profile of the quiche.
  4. Combine the Quiche Ingredients:
    • In a large mixing bowl, whisk together 4 large eggs and 1/2 cup of non-fat milk until well combined. This mixture serves as the base for your quiche.
    • Add 1/2 cup of shredded reduced-fat cheddar cheese and 1/2 cup of shredded reduced-fat mozzarella cheese to the egg mixture. Stir until the cheeses are evenly distributed.
    • Incorporate the chopped spinach, sautéed onion, and garlic into the mixture. Add 1/2 teaspoon each of dried basil and dried oregano, 1/4 teaspoon of black pepper, and 1/4 teaspoon of salt. Mix well to combine all ingredients.
  5. Prepare the Baking Dish:
    • Lightly coat a 9-inch (23 cm) pie dish or a similar baking dish with cooking spray. This will help prevent the quiche from sticking and make for easier cleanup.
  6. Pour and Spread:
    • Pour the quiche mixture into the prepared baking dish. Use a spatula to spread the mixture evenly, ensuring that the spinach and cheese are well distributed throughout.
  7. Bake the Quiche:
    • Place the baking dish in the preheated oven and bake for 35-40 minutes, or until the quiche is set in the center and the top is lightly golden brown. To check for doneness, insert a knife or toothpick into the center of the quiche; it should come out clean.
  8. Cool and Serve:
    • Allow the quiche to cool for at least 10 minutes before slicing. This cooling period helps the quiche to set properly and makes it easier to slice into clean pieces.
  9. Optional Garnishes:
    • Garnish the quiche with freshly chopped herbs such as parsley or chives for added flavor and visual appeal. You can also add a few slices of fresh tomato on top or a light sprinkle of extra cheese if it fits within your SmartPoints budget.
  10. Storage:
    • Store any leftover quiche in an airtight container in the refrigerator for up to 5 days. This quiche can also be frozen for up to 3 months. To reheat, thaw in the refrigerator overnight and warm in the oven at 350°F (175°C) until heated through.

Nutritional Information (Per Serving, Based on 8 Servings):

  • Calories: 130 kcal
  • Fat: 6 g
  • Carbohydrates: 6 g
  • Fiber: 2 g
  • Net Carbs: 4 g
  • Protein: 12 g

SmartPoints (WW): Approximately 4 SmartPoints per serving (This estimate is based on using reduced-fat cheeses and non-fat milk. SmartPoints may vary based on specific products and brands.)

Additional Tips:

  1. Low-Carb Variations: For a lower-carb option, consider using a low-carb milk substitute and adding more non-starchy vegetables to the filling, such as bell peppers or mushrooms.
  2. Cheese Choices: Adjust the types and amounts of cheese according to your taste preferences and SmartPoints budget. Reduced-fat or fat-free cheese options help keep the SmartPoints lower.
  3. Vegetable Add-Ins: Feel free to customize the quiche by adding other vegetables such as diced tomatoes, bell peppers, or mushrooms. Ensure these additions align with your SmartPoints goals.
  4. Flavor Enhancements: To add extra flavor, you can include a pinch of cayenne pepper or a dash of hot sauce to the egg mixture. Just be mindful of any additional SmartPoints.
  5. Meal Prep: This quiche is a great option for meal prep. Prepare a larger batch and portion it out into individual servings for quick and easy meals throughout the week.
  6. Serving Suggestions: Pair the quiche with a fresh side salad or some fruit for a well-rounded meal. A light vinaigrette or a simple lemon juice drizzle can enhance the salad’s flavor.

Conclusion:

Our Weight Watchers-Friendly Crustless Spinach Quiche is a nutritious and delicious option that fits seamlessly into your WW plan. By utilizing reduced-fat ingredients and skipping the crust, this quiche delivers all the flavor and satisfaction of a traditional quiche while keeping your SmartPoints in check. Ideal for any meal of the day, this recipe offers versatility and ease, making it a valuable addition to your healthy eating repertoire. Enjoy the simplicity and taste of this delightful quiche, knowing it supports your wellness goals.

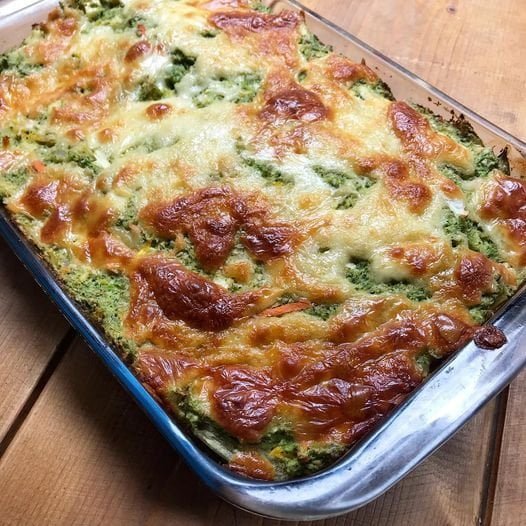
Broccoli Quiche with Palmito
Ingredients:

Dough:

  • 1 large bunch of broccoli
  • 3 eggs
  • 1 1/2 cups oats (flakes, flour, or buckwheat)
  • 4 tablespoons olive oil
  • Cheese for topping (as desired)

Free Keto Meal Plan : KETO DIET PLAN FOR BEGINNERS STEP BY STEP GUIDE

Stuffing:

  • 1 glass of palm hearts (500g), chopped
  • Onion, to taste
  • Seasoning (salt, pepper, etc.) to taste
  • Additional vegetables (optional), chopped

Free Keto Meal Plan : KETO DIET PLAN FOR BEGINNERS STEP BY STEP GUIDE

Preparation:

  1. Prepare the Palmito:
    • In a skillet, sauté the chopped palm hearts with onions and your chosen seasonings. Add any additional vegetables if desired. Cook for about 8 minutes or until the vegetables are tender. Set aside.
  2. Prepare the Broccoli:
    • Boil the broccoli in water for about 10 minutes, or until tender. Drain and let it cool slightly.
  3. Prepare the Dough:
    • In a blender, combine the cooked broccoli, eggs, oats, and olive oil. Blend until smooth. If the mixture is too thick, add a bit of milk to achieve a smoother consistency.
  4. Combine and Fill:
    • Manually mix the palmito stuffing into the broccoli dough. Spread the mixture evenly in a baking dish.
  5. Add Cheese and Bake:
    • Sprinkle cheese over the top of the mixture. Bake in a preheated oven at 230°C (450°F) for about 30 minutes, or until the top is golden and the quiche is set.
  6. Serve:
    • Allow the quiche to cool slightly before serving. Enjoy!

Free Keto Meal Plan : KETO DIET PLAN FOR BEGINNERS STEP BY STEP GUIDE

Nutritional Information (approximate per serving, assuming 6 servings):

  • Calories: ~180
  • Fat: ~10g
  • Protein: ~10g
  • Carbs: ~15g

Tips:

Texture: For a creamier texture, you can blend a bit of Greek yogurt or sour cream into the dough.

Cheese Options: You can use any type of cheese you prefer, such as cheddar, mozzarella, or feta, for the topping.

Add-ins: Feel free to add more vegetables like bell peppers or mushrooms for extra flavor and nutrients.

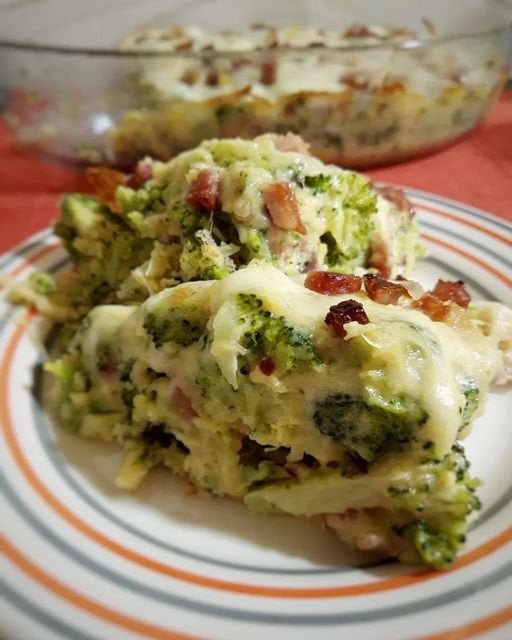
Bacon and Broccoli Cheese Pie!!!!!!

A quick and budget-friendly recipe that’s both practical and delicious!

Free Keto Meal Plan : KETO DIET PLAN FOR BEGINNERS STEP BY STEP GUIDE

Ingredients:

  • 3 eggs
  • 1 tablespoon olive oil
  • 450 grams (about 1 pound) broccoli
  • 200 grams (about 7 ounces) bacon, cut into cubes
  • 100 grams (about 1 cup) mozzarella cheese, shredded
  • 1 clove garlic, minced
  • 1/2 onion, chopped
  • Salt, to taste
  • Black pepper, to taste
  • 1/4 cup oatmeal or oat flour
  • 1 teaspoon baking powder
  • Parmesan cheese, for topping (to taste)

Free Keto Meal Plan : KETO DIET PLAN FOR BEGINNERS STEP BY STEP GUIDE

Instructions:

  1. Prepare the Broccoli:
    • Cut the broccoli into florets and cook in boiling water for about 3-4 minutes until al dente. Drain and set aside.
  2. Cook the Bacon and Vegetables:
    • In a skillet, heat a bit of olive oil and fry the bacon cubes until crispy. Remove and set aside.
    • In the same skillet, add the chopped onion and minced garlic. Cook until softened and aromatic, about 2 minutes.
    • Add the cooked broccoli to the skillet with the onion and garlic. Stir to combine and cook for an additional 2 minutes. Season with salt and black pepper to taste.
  3. Prepare the Egg Mixture:
    • In a mixing bowl, beat the eggs with the tablespoon of olive oil. Stir in the shredded mozzarella cheese (reserve a small amount for topping) and the cooked bacon mixture.
  4. Add Dry Ingredients:
    • Stir in the oatmeal (or oat flour) and baking powder. Mix well. Taste and adjust the salt if needed.
  5. Assemble the Pie:
    • Grease a baking dish with butter and flour. Pour the mixture into the prepared dish.
    • Sprinkle the reserved mozzarella cheese and Parmesan cheese on top.
  6. Bake:
    • Preheat your oven to 180°C (350°F). Bake for about 30 minutes, or until the top is golden and the pie is set.
  7. Serve:
    • Allow the pie to cool slightly before slicing. Enjoy warm!

Free Keto Meal Plan : KETO DIET PLAN FOR BEGINNERS STEP BY STEP GUIDE

Nutritional Information (approximate per serving, assuming 6 servings):

  • Calories: ~300
  • Fat: ~20g
  • Protein: ~18g
  • Carbs: ~10g

Tips:

  • Cheese Choices: You can use any cheese you like, such as cheddar or feta, for different flavors.
  • Vegetable Variations: Feel free to add other vegetables like bell peppers or mushrooms for extra nutrition.
  • Crust Option: For a crisper crust, you can pre-bake the base of the pie for about 10 minutes before adding the filling.

Spinach or Saffron Pancakes
A quick, healthy, and versatile pancake recipe that’s perfect for any meal of the day!

Ingredients:

  • 2 eggs
  • 3 tablespoons grated Parmesan cheese
  • 2 tablespoons chickpea flour (or oat flour or olive flour)
  • 2 tablespoons olive oil
  • 1 cup spinach leaves (or 1 teaspoon saffron, kale, or beetroot)
  • Salt and spices to taste (such as black pepper, paprika, or garlic powder)

Instructions:

  1. Prepare the Ingredients:
    • Wash and dry the spinach leaves. If using saffron, soak it in a small amount of warm water to release its color and flavor.
  2. Blend the Batter:
    • In a blender, combine the eggs, Parmesan cheese, chickpea flour, olive oil, and spinach (or saffron). Blend until smooth and well combined.
  3. Cook the Pancakes:
    • Heat a non-stick pan over medium-low heat. If needed, add a little butter or olive oil to the pan.
    • Pour a portion of the batter into the pan to form a pancake. Spread it out to your desired thickness.
    • Cover the pan and cook for 2-3 minutes, or until bubbles form on the surface and the edges look set.
    • Flip the pancake carefully and cook for another 1-2 minutes until golden brown.
  4. Serve:
    • Remove the pancake from the pan and keep warm. Repeat with the remaining batter.
  5. Add Toppings:
    • Top with your choice of fillings like minced meat sauce, shredded chicken, or cheese. For a simple option, you can also serve with a dollop of Greek yogurt or a sprinkle of fresh herbs.

Makes: 4 pancakes

Nutritional Information (approximate per pancake):

  • Calories: ~150
  • Fat: ~10g
  • Protein: ~8g
  • Carbs: ~5g

Tips:

  • Flour Alternatives: Chickpea flour adds a nice flavor and texture, but you can use oat flour for a milder taste or olive flour for a gluten-free option.
  • Flavor Variations: Experiment with different greens like kale or beetroot for various flavors and colors.
  • Cooking Tip: Keep the heat low to ensure the pancakes cook through without burning.

Enjoy these delicious and nutritious pancakes for a quick meal or snack! 💖

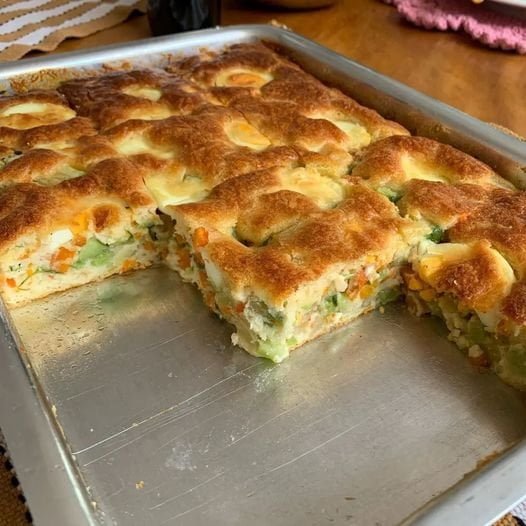
Keto Vegetable Pie
Ingredients:

For the Filling:

  • 1 medium potato (optional, as potatoes are high in carbs; consider substituting with turnips or cauliflower)
  • 1 large carrot (optional; consider substituting with a smaller amount of grated carrot or leave out)
  • 1 medium chayote (chuchu), peeled and chopped
  • 1 medium zucchini (without seeds), chopped
  • 1 cup peas (use sparingly, as they have some carbs; or substitute with spinach or other low-carb vegetables)
  • 1 can (15 oz) corn (optional; you can use a low-carb vegetable like bell pepper instead)
  • 3 boiled eggs, sliced
  • 2 cloves garlic, minced
  • 2 tablespoons chopped fresh chives
  • Salt and black pepper to taste

Free Keto Meal Plan : KETO DIET PLAN FOR BEGINNERS STEP BY STEP GUIDE

For the Dough:

  • 3 large eggs
  • 1/2 cup coconut oil or melted butter
  • 1 cup unsweetened almond milk
  • 1 cup almond flour
  • 1/2 cup shredded cheese (optional; use keto-friendly cheese like mozzarella or cheddar)
  • 2 cloves garlic, minced
  • 1 teaspoon baking powder (or 1 pack of yeast, if preferred)

Instructions:

  1. Prepare the Vegetables:
    • Boil or steam the vegetables until tender (about 5-10 minutes). Drain well and season with salt, black pepper, minced garlic, and chives.
  2. Preheat Oven:
    • Preheat your oven to 375°F (190°C).
  3. Make the Dough:
    • In a blender or mixing bowl, combine the eggs, coconut oil, almond milk, almond flour, shredded cheese (if using), minced garlic, and baking powder. Blend or mix until smooth. If using yeast, add it last and mix just to combine.
  4. Assemble the Pie:
    • Grease a baking dish (30×20 cm) with butter or oil.
    • Spread half of the dough mixture on the bottom of the dish.
    • Evenly distribute the seasoned vegetables over the dough.
    • Arrange the sliced boiled eggs on top of the vegetables.
    • Spread the remaining dough mixture over the vegetables and eggs, smoothing it out.
  5. Bake:
    • Bake in the preheated oven for about 30 minutes, or until the top is golden brown and the pie is set.
  6. Cool and Serve:
    • Allow the pie to cool slightly before cutting. This helps it set and makes it easier to serve.

Free Keto Meal Plan : KETO DIET PLAN FOR BEGINNERS STEP BY STEP GUIDE

Nutritional Information (approximate per serving, assuming 8 servings):

  • Calories: ~200
  • Fat: ~15g
  • Protein: ~10g
  • Carbs: ~6g (depends on the vegetables used)

Tips:

  • Vegetable Substitutes: Use low-carb vegetables like spinach, bell peppers, or mushrooms to keep the pie keto-friendly.
  • Cheese: Adding cheese to the dough adds flavor and helps with texture. Use keto-friendly cheese and adjust the amount to your preference.
  • Storage: Store leftovers in an airtight container in the refrigerator for up to 4 days. Reheat in the oven or microwave before serving.

Free Keto Meal Plan : KETO DIET PLAN FOR BEGINNERS STEP BY STEP GUIDE

Enjoy your keto vegetable pie! 🥳

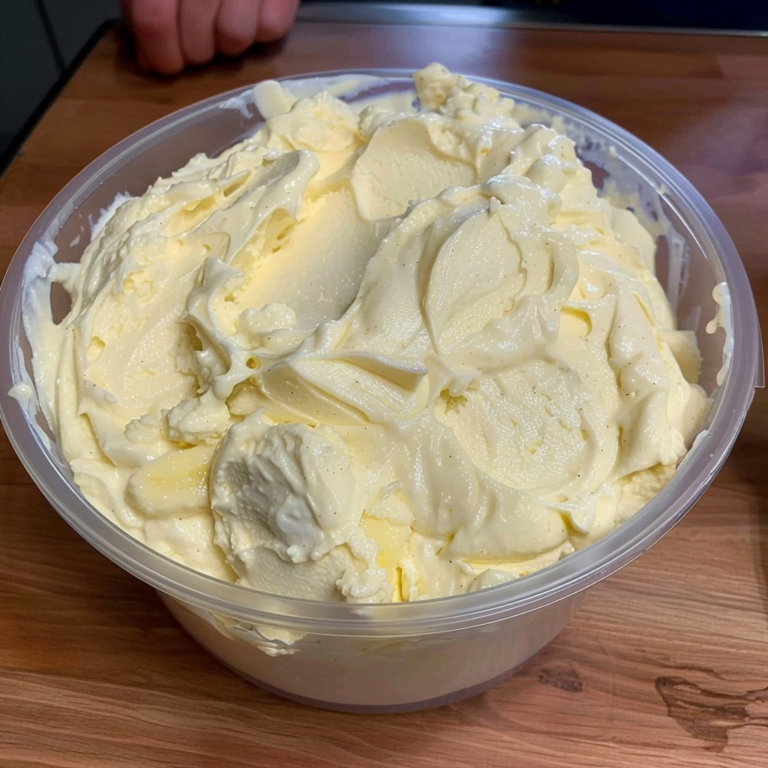
Banana Pudding Cheesecake Fluff: A Weight Watchers-Friendly Delight

Introduction: Welcome to a delectable and guilt-free indulgence with our Banana Pudding Cheesecake Fluff. This Weight Watchers (WW) low-point recipe combines the creamy richness of cheesecake with the nostalgic flavor of banana pudding, all while keeping your SmartPoints in check. Perfect for satisfying your sweet tooth while sticking to your wellness goals, this dessert is both delightful and diet-friendly. Follow this comprehensive guide to make a dessert that fits seamlessly into your WW plan.

Ingredients:

For the Cheesecake Base:

  • 8 oz (226 g) reduced-fat cream cheese, softened
  • 1 cup (240 ml) fat-free Greek yogurt (plain)
  • 1/2 cup (120 ml) unsweetened almond milk
  • 1/4 cup (50 g) granulated Stevia (or other WW-friendly sweetener)
  • 1 teaspoon vanilla extract
  • 1/4 teaspoon salt

For the Banana Flavor:

  • 1 medium-sized ripe banana, mashed
  • 1 teaspoon banana extract (for enhanced banana flavor)

For the Pudding Mixture:

  • 1/2 cup (120 ml) unsweetened almond milk
  • 2 tablespoons (16 g) sugar-free vanilla pudding mix (check for WW-friendly options)
  • 1 tablespoon (8 g) chia seeds (optional, for added texture and thickening)

For Garnishing:

  • 2 tablespoons (30 ml) fat-free whipped topping (store-bought or homemade)
  • A few slices of fresh banana (for decoration, optional)
  • A sprinkle of cinnamon (for extra flavor, optional)

Instructions:

  1. Prepare the Cream Cheese Mixture:
    • Start by ensuring that your reduced-fat cream cheese is softened. This will help in blending it smoothly. Place the softened cream cheese in a large mixing bowl.
  2. Combine Ingredients for Cheesecake Base:
    • To the bowl with cream cheese, add 1 cup of fat-free Greek yogurt, 1/2 cup of unsweetened almond milk, 1/4 cup granulated Stevia, 1 teaspoon of vanilla extract, and 1/4 teaspoon of salt.
    • Using an electric mixer on medium speed, beat the mixture until it becomes smooth and creamy. This process should take around 2-3 minutes. Make sure to scrape down the sides of the bowl to incorporate all ingredients evenly.
  3. Add Banana Flavor:
    • Incorporate the mashed banana into the cream cheese mixture. Stir gently to combine. If you prefer a stronger banana flavor without adding extra carbs, include 1 teaspoon of banana extract.
  4. Prepare the Pudding Mixture:
    • In a separate bowl, whisk together 1/2 cup of unsweetened almond milk with 2 tablespoons of sugar-free vanilla pudding mix. Continue whisking until the mixture begins to thicken, which should take about 1-2 minutes. If desired, mix in 1 tablespoon of chia seeds to enhance the texture and consistency of the pudding.
  5. Combine Mixtures:
    • Gently fold the pudding mixture into the cheesecake base. Ensure that the mixture is combined thoroughly but handled delicately to maintain a light, fluffy texture.
  6. Chill the Fluff:
    • Transfer the combined mixture into a large serving bowl or individual dessert dishes. Cover with plastic wrap or a lid and refrigerate for at least 2-3 hours, allowing it to set and develop its fluffy texture.
  7. Prepare Whipped Topping:
    • If you are making your own whipped topping, use a chilled mixing bowl and beat 1/2 cup of fat-free whipped topping until light and fluffy. Alternatively, use store-bought fat-free whipped topping for convenience.
  8. Serve the Dessert:
    • Once the fluff has set, remove it from the refrigerator. Top with a dollop of fat-free whipped topping. Garnish with fresh banana slices and a sprinkle of cinnamon if desired.
  9. Enjoy:
    • Serve immediately or keep refrigerated until ready to serve. The dessert can be stored in an airtight container in the refrigerator for up to 5 days.

Nutritional Information (Per Serving, Based on 8 Servings):

  • Calories: 120 kcal
  • Fat: 3 g
  • Carbohydrates: 20 g
  • Fiber: 2 g
  • Net Carbs: 18 g
  • Protein: 6 g

SmartPoints (WW): Approximately 4 SmartPoints per serving (This estimate is based on using WW-friendly sweeteners and fat-free ingredients. Variations in brands may affect the total SmartPoints.)

Additional Tips:

  1. Sweetener Alternatives: Adjust the amount of Stevia or other WW-friendly sweeteners according to your taste preferences. Other options like monk fruit sweetener can also be used.
  2. Texture Adjustment: If you prefer a thicker fluff, consider increasing the amount of chia seeds or letting the dessert chill for a longer period.
  3. Flavor Variations: Experiment with other extracts such as vanilla or almond, or add a touch of cocoa powder for a chocolate twist. Ensure that any additional flavorings align with WW guidelines.
  4. Banana Extract vs. Real Banana: Using banana extract will lower the carb count significantly compared to using fresh bananas. Choose based on your dietary preferences and WW points.
  5. Whipped Topping: Opt for fat-free whipped topping to keep the recipe within WW guidelines. Homemade options with fat-free ingredients are also a great choice.
  6. Serving Suggestions: This fluff pairs well with fresh berries or a sprinkle of cinnamon. Both options can add flavor while keeping the SmartPoints low.

Conclusion: Our Banana Pudding Cheesecake Fluff is a superb choice for anyone on the Weight Watchers program who wants to enjoy a sweet and satisfying dessert. By combining low-point ingredients with careful preparation, this recipe delivers a creamy, flavorful treat that aligns with your dietary goals. Whether you’re serving it at a gathering or enjoying it as a personal indulgence, this dessert provides a delightful way to enjoy your favorite flavors while staying on track with your WW plan.