Author

Chloe Harper

Browsing

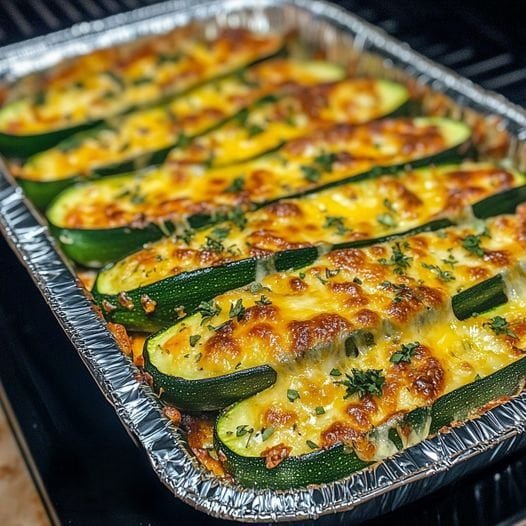
Keto Cheesy Garlic Zucchini Steaks are a low-carb and high-fat dish that keeps you full for a long day. it just has a few ingredients and some easy steps to follow and we have a nutritious and classical dish ready. Keto Cheesy Garlic Zucchini Steaks have 4 grams of Carbohydrates and 1 g of Dietary Fiber which comes up to 3 grams of Net Carbohydrates per Serving
EQUIPMENT:
An Oven
A Skillet.
INGREDIENTS:
2 Zucchini, Medium
Finely chopped or grated Garlic, 4 cloves.
Kosher salt To Taste.
1/2 cup of finely shredded Parmesan, Around 28 grams
57 grams of Shredded Mozzarella Cheese, About Half Cup.
A Quarter tsp + some additional Red pepper flakes, Crushed.
2 Tablespoon of torn Basil, Fresh.
Two+ Two tablespoons of Olive oil, Extra-Virgin
INSTRUCTIONS:
Take the Zucchini and cut them length-wise in half, making four out of two.
Take a Sharp Knife and make diagonal cuts half an inch apart which should be a quarter inch deep.
Next, Rotate it Diagonally and repeat the process to make a cross pattern.
Now Sprinkle salt on the flesh side of the scored Zucchini and allow it to rest for a quarter of an hour.
This releases the moisture from Zucchinis.
Set the oven to heat at 425 F while placing the rack in the centre of the Oven.
Place a little saucepan on the medium heat. Add two tablespoons of Olive Oil, Garlic, and Red Pepper flakes.
Cook until you smell the roasted garlic fragrance. Dish out the Garlic oil in a little bowl.

Take a skillet, heat one tbsp of Olive Oil, and keep two Zucchini steaks with flesh sides down and leave it for a couple of minutes or until the flesh sides turn golden brown.
Repeat the process with the remaining Zucchinis.
Take these golden-brown Zucchinis and place them on the Baking sheet with the flesh side up. Apply the pre-made Garlic Oil on the flesh side of all four Zucchini steaks.
Allow them to bake for around a dozen minutes in the already-heated oven.
Then cover the flesh side with Parmesan and Mozzarella Cheese and again bake till the cheese melts and becomes golden brown.
Then dish out the Baked Zucchini Steaks on a platter.
Garnish with Basil and more red pepper flakes.
TIPS:
Be careful when making Garlic Oil, Garlic should not be burned or it will destroy the classic taste and fragrance of Garlic.
STORAGE INFORMATION:
It is recommended to enjoy this dish as soon as it comes out of the Oven. If there are any of the Zucchini steaks left behind then you can place them in any tightly closed utensil in the fridge and consume them within three days.
Reheat them in a Microwave or Wrap in an Aluminium Foil to heat them in the Oven when going to eat it.
FAQs:
Why it is important to apply Salt to the Zucchinis?
Salt is applied to Zucchini before frying, so it takes excess moisture out and makes it easy to fry crispy.

NUTRITIONAL FACTS per Serving:
Total Servings: 4 Servings

Calories: 256 kcal
Total Carbohydrates: 4 grams.
Net Carbohydrates: 3g
Fats: 22 grams.
Proteins: 11 g
Fiber: 1 gram
Sugar: 3 g

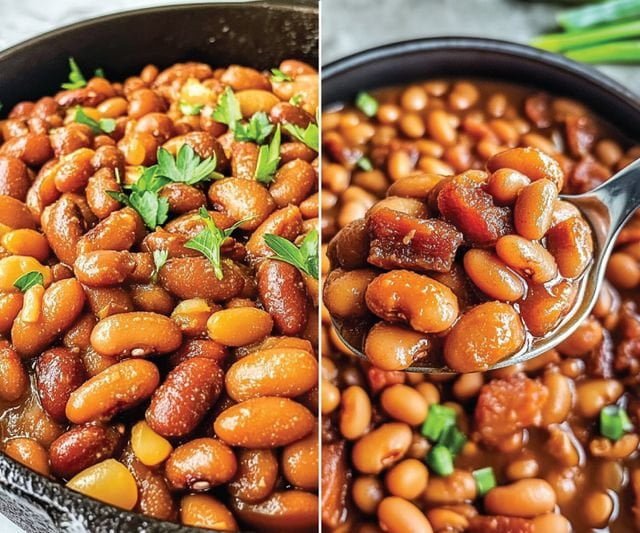
The easy and quick recipe for lunch and dinner is the Keto instant pot pinto beans. This recipe is also low in carbs and good for the health. The taste of the pinto beans is very good and delicious. The taste of the pinto bean is very good and creamy. The pinto beans are perfect to eat, and their taste is very delicious. You can quickly make them for dinner and lunch also. Make this keto recipe for your dinner and make a happy meal for your family, you can also serve pinto beans with boiled rice. Follow the given directions below and then make it accordingly. It will help in saving time also
Tips:
Use the multifunctional instant pot.
If you have much time to cook then you can also cook them into the slow cooker.
Serve the pinto beans with the rice gives a great and delicious taste.
Equipment:
Multifunctional Instant pot
Spatula
Ingredients:
3 cups of the pinto beans
3-4 cups of the chicken broth
3 garlic cloves (minced)
1 teaspoon paprika
3 tbsp. Onion powder
Salt according to taste
1 large onion (chopped)
2 tomatoes (paste)
4 slices bacon (chopped)
½ tablespoon chilli powder
2 cups water
Ingredients notes:
Use the pinto beans fresh and healthy.
Add the taste of the spices as you want to eat.
Add the water as required in the pinto beans.

Instructions:
Firstly put the instant pot on medium to low flame.
Then add the little amount of the oil and put the chopped onion into the oil.
When the onion is light brown then add the bacon and minced garlic in it.
Let it cook until its colour becomes golden.
After that add the spices like salt, paprika, onion powder, and chilli powder, and also add the chicken broth then cook for 3-4 minutes.
Additionally, add the tomato paste and cook it for 3 minutes.
Furthermore, add the water and then put the fresh pinto beans.
Tightly place the lid of the pot and rest it for 50 minutes.
After the 50 minutes, remove the lid of the instant pot.
Now cook it for more than 5 minutes and then serve it!
Storage information:
Place the cooked pinto beans into the fridge for 2-3 days.
You can also freeze the pinto beans for 1 month in a box.

Frequently asked questions:
Can we cook the pinto beans in the slow cooker? Yes, you can make the pinto beans if you have 8-10 hours.
Is these pinto beans low in carbs? Yes, these pinto beans are low in carbs and also keto-friendly.
Can we soak the pinto beans before use? Yes, you soak the pinto beans before making it.

Nutritional facts:
Per serving1:

Calories 236 kcal
Carbohydrates 15 g
Fat 3 g
Fiber 0g
Protein 7 g
Sugar 10 g

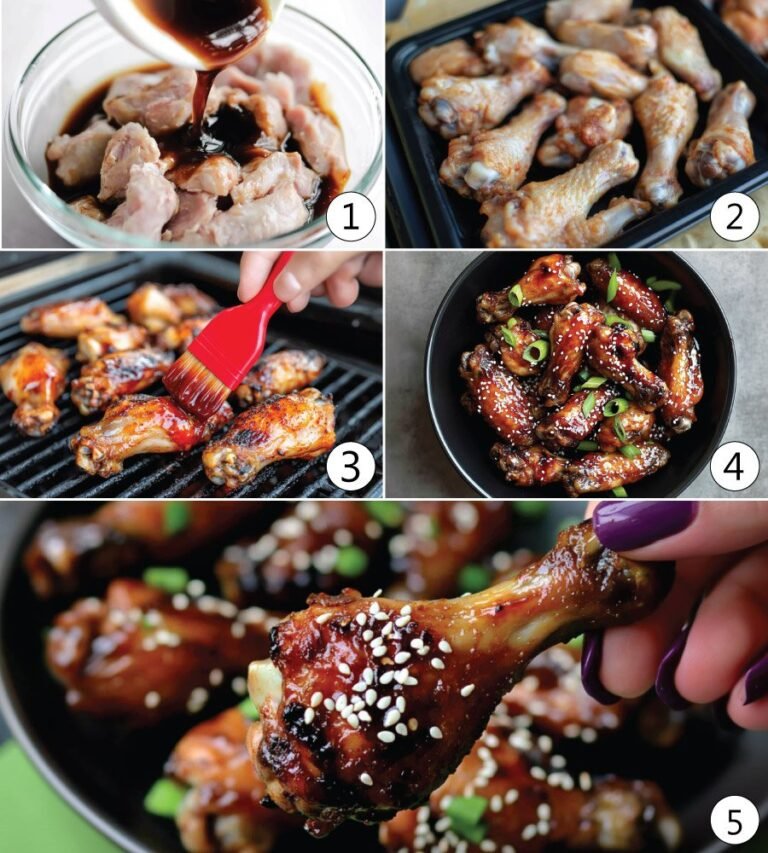
If you are a Chicken lover then must try KETO TERIYAKI CHICKEN WINGS. Because their taste is unbelievable and awesome. Make it with the keto diet plan and enjoy this recipe. The chicken is also the favorite of the children, young and the aged people. Everyone loves the recipes of the chicken. So you have a mood to eat something crunchy and juicy bites yes it’s the time to make the teriyaki wings. You can them on any occasion such as a family lunch or dinner. Your family and friends will like these wings a lot. Their taste is very good and unique. The crunchy bites are perfect to eat and also have a very great taste. The making process of the wings is also very easy and simple. So you can easily get these wings and enjoy them. They can also be served as appetizers.
Tips:
Take the very fresh and healthy wings. Make sure to follow all the steps to make a good recipe.
Ingredients:
To Make the Teriyaki chicken wings:
Olive oil / Avocado oil
2-pound chicken wings
½ pepper 1 tablespoon Crystal kosher salt
For marinate:

1 tablespoon garlic paste
2 tablespoon corn-starch
3-4 spoon soy sauce
1 tablespoon grated or minced ginger root
4 tablespoons dry white wine
2 tablespoons honey
Ingredients Notes:
Take all the ingredients fresh and healthy.
You can avoid the use of white vinegar with 2 tablespoons of cold water.
Instructions:
Preheat or warm up the oven to 370-400 F.
Take the pan in which we cook the chicken wings.
Additionally, put the baking sheet into the baking pan.
After that, add the chicken wings into the pan and drizzle some olive oil into the pan.
After that drizzle it with the salt and pepper.

Now place the pan into the preheated oven and rest it to cook for 20-25 minutes.
Let’s start to make the teriyaki sauce:
For this take the pan and on the flame at low, Then add all the sauce ingredients like garlic, ginger, soy sauce, cornstarch, and all the other ingredients.
Cook it for 4-5 min in a low flame and whisk it until or unless it becomes too thick.
When it starts getting thick take care of it carefully because there is a chance of burning.
After the cooking of 5 min off the flame set the sauce on the side. To become it at room temperature.
Now check the chicken wings that are placed in the oven. When they become golden brown take them out and let them cool!
When the sauce is at room temperature top it in the teriyaki wings.
Eat it with your siblings and enjoy!
Notes:
Make the sauce properly until it looks like syrup. Cook the chicken’s wings completely.

Storage Information:
The chicken wings can be stored in the freezer for 1-2 months.
The teriyaki wings will be stored in the freezer in nearly raw condition.
When you can eat again than last night take the wings out from the freezer and put them in the fridge and then take out them the next day.
After that cook them into the oven for 15-20 minutes at the temperature of about 300-350 F.

Frequently Asked Questions:

Can we store the teriyaki wings? Yes, the steps are given in the storage information. Follow the steps to store your wings.

Can we also store the sauce? Yes, we can store it in the fridge for 4-5 days and can also freeze it for the month.

Nutritional Facts:
Serving per 0.25 g

Calories 300kcal
Carbohydrates 3g
Fiber 0 g
Fat 17 g
Proteins 25 g
Sugar 9 g

[cooked-nutrition]

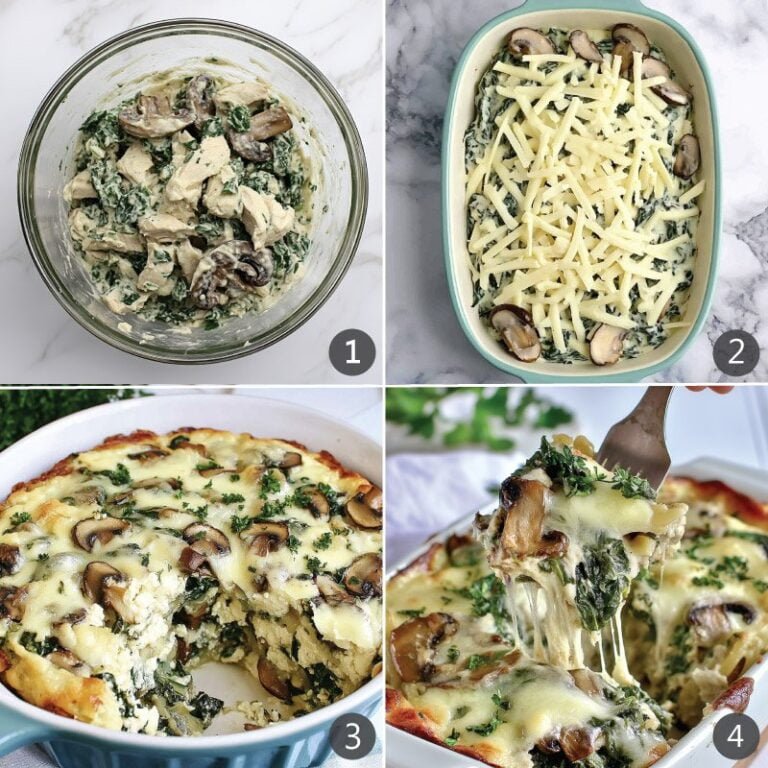
KETO CHICKEN FLORENTINE CASSEROLE. Shredded chicken, mushrooms and spinach baked in an Alfredo type sauce and topped with gooey mozzarella cheese make this casserole hearty and satisfying!

To make, this is one of my very favorite casseroles! This Chicken Florentine casserole can be made with ingredients you might already have on hand if you need a last minute Low Carb dinner recipe!

They are typically very easy to put together and often have a fair amount of servings, is one of the best things about casseroles. For anyone who struggles with meal prepping and having enough Keto meals on hand, this is great .

Your kitchen is going to smell amazing when you bake this chicken florentine!! You will find yourself making this one again and again! Don’t let your leftovers go to waste as it also freezes perfectly!

WHAT’S IN KETO CHICKEN FLORENTINE CASSEROLE
Chicken
Mushrooms
Frozen spinach
Heavy cream
Mascarpone cheese
Parmesan cheese
Mozzarella cheese
Garlic
Grass-fed butter
Salt and pepper

Prep Time
5 mins
Cook Time
35 mins
Total Time
40 mins
Author:Julianne
Course:Main Course
Calories:412

INGREDIENTS
▢14 ounces shredded chicken
▢8 ounces chopped mushrooms,
▢9 ounces frozen spinach, thawed
▢1 cup heavy cream
▢½ cup mascarpone cheese
▢1 cup parmesan cheese, grated
▢1 ½ cups shredded mozzarella cheese, divided
▢2 garlic cloves, minced
▢2 tablespoons grass-fed butter
▢salt and pepper to taste

INSTRUCTIONS
Preheat oven to 375F. To a large bowl, add the shredded chicken . Add in the mushrooms. Out of the spinach, squeeze all the water, then with the chicken and mushrooms, add to the bowl .
To medium, heat a saucepan and melt the butter. Add in the garlic and for about TWENTY seconds, sauté , careful not to brown! Put heavy cream, stir. Remove heat and stir.
Over the bowl, pour the sauce with the chicken, mushrooms and spinach. Mix, then stir until it gets well combined and add ½ cup of the mozzarella cheese.
That has been sprayed with nonstick spray, pour into a casserole dish. Over the top, sprinkle the remaining 1 cup of mozzarella cheese and bake for TWENTY FIVE minutes.
Up to 425F, turn the temperature and for an additional 10 minutes, bake or until the cheese is golden and melted. Before serving, allow to cool slightly. For a few days, store leftovers in the fridge or freeze.
Nutrition Facts
Keto Chicken Florentine Casserole
Amount Per Serving
Calories 412Calories from Fat 297
% Daily Value*
Fat 33g51%
Saturated Fat 21g131%
Carbohydrates 4g1%
Fiber 1g4%
Sugar 2g2%
Protein 26g

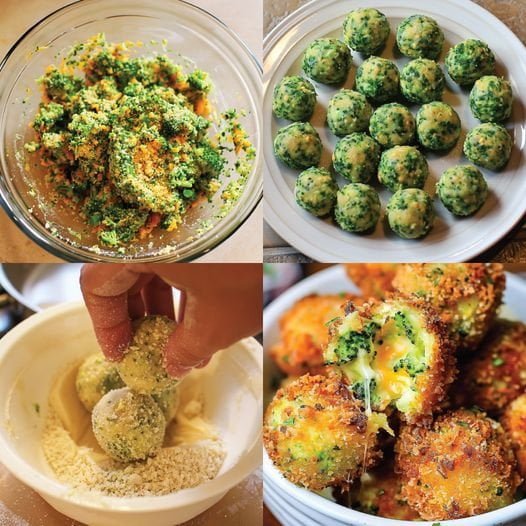
Packed with broccoli, these little Keto Broccoli Cheese Bites are served with a keto-friendly ranch dipping sauce. Pair with your favorite protein for a full meal or perfect on their own.
Level: Easy
Total: 50 min
Active: 50 min
Yield: about 28 bites and 1 cup of dressing
Ingredients
Broccoli Cheese Bites:
(about 12 ounces) 2 medium broccoli crowns, cut into medium florets(any excess stalks)
(about 4 heaping cups) sliced 1/4-inch thick
2 cloves garlic, lightly smashed
(about 2 tablespoons) 1 small scallion, thinly sliced
1/4 cup fresh flat-leaf parsley leaves
1 large egg plus 1 large egg yolk
1/4 teaspoon cayenne pepper, optional
1 teaspoon paprika
Kosher salt and freshly ground black pepper
3/4 cup almond flour (about 3 ounces)
1 cup finely shredded sharp Cheddar (about 3 1/2 ounces)
Nonstick extra-virgin olive oil cooking spray
Ranch Dipping Sauce:
1/2 cup sour cream
1/3 cup keto-friendly mayonnaise
2 tablespoons distilled white vinegar
1/2 teaspoon garlic powder
1/2 teaspoon onion powder
Kosher salt and freshly ground black pepper
1 tablespoon fresh dill, finely chopped
1/4 cup fresh flat-leaf parsley leaves, finely chopped

Instructions

Into a medium heat-safe glass bowl, put the broccoli, garlic, and 1/4 cup water. (First, wet a paper towel) layover the broccoli. Microwave for about THREE minutes, depending on your microwave, until bright green and crisp-tender. Remove(Carefully) the paper towel, (leaving any water behind in the bowl)transfer the mixture to a food processor and for FIVE minutes, allow to cool. Clean out the glass bowl and put it aside.
Meanwhile, in the center of the oven, position a rack and preheat to 400 degrees F. With parchment, line a baking sheet and put it aside.
To the food processor, add the scallion and parsley. Until the broccoli mixture is finely chopped, pulse(similar to the texture of rice). Along with the 3/4 cup of the Cheddar, egg yolk, cayenne (if using), paprika, 1 1/2 teaspoons salt, a couple of grinds of black pepper, almond flour, and whole egg, transfer to the reserved bowl. To mix everything together, use your hands until it gets well combined.
Onto the prepared baking sheet, scoop heaping tablespoons of the mixture, for about 28 total, spacing them evenly apart. Lightly wet your hands, then into a round ball, roll each mound, re-wetting your hands(as needed). This makes rolling the mix much easier to do and helps keep your hands from becoming sticky. With the cooking spray, spray the balls, and with the remaining 1 cup of Cheddar, sprinkle the tops, to help it adhere, pressing it gently onto the tops.
Until the bites are light golden brown and cooked through, bake in the oven, about TWENTY
FIVE minutes, rotating the baking sheet once halfway through the cooking time.
For the ranch dipping sauce:
Meanwhile, in a small bowl, combine the parsley, mayonnaise, a large pinch of salt, garlic powder, onion powder, vinegar, several grinds of black pepper, dill, and sour cream. Whisk to combine and as desired, season with more pepper and salt.
To a platter, transfer the broccoli cheese bites, and alongside, serve the ranch dipping sauce.
Notes
Nutrition:
Calories 270
Total Fat 28 grams
Cholesterol 90mg
Carbs 7g
Protein 10g
Sugar 1g

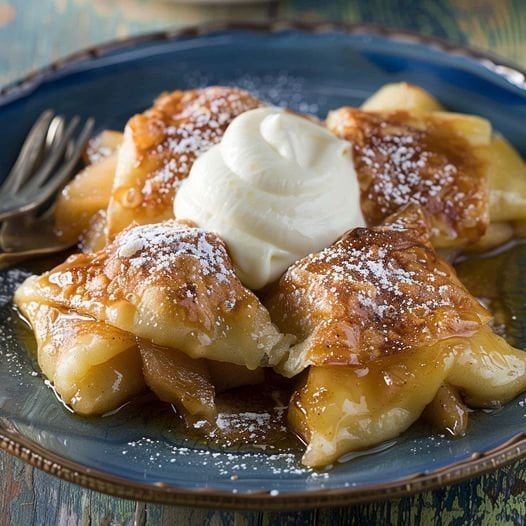
Keto Baked Apple Dumplings
Ingredients:

  • 2 small Granny Smith apples (use sparingly, as apples are higher in carbs; or substitute with chayote squash or zucchini for even lower carbs)
  • 1 cup almond flour (for dough)
  • 1/4 cup coconut flour (for dough)
  • 1/2 cup butter, melted
  • 1/4 cup granulated erythritol (or other keto-friendly sweeteners like monk fruit or stevia)
  • 1 tsp vanilla extract
  • 1 tsp ground cinnamon (for sprinkling)
  • 1/2 tsp xanthan gum (optional, for dough structure)
  • 1/2 tsp baking powder
  • 1/4 cup heavy cream
  • 1/4 cup water (or diet lemon-lime soda like Diet Sprite)
  • Optional: Low-carb vanilla ice cream for serving

Free Keto Meal Plan : KETO DIET PLAN FOR BEGINNERS STEP BY STEP GUIDE

Instructions:

  1. Preheat the Oven:
    • Preheat your oven to 350°F (175°C). Grease a 9×13 baking dish with butter or non-stick spray.
  2. Prepare the Apples (or Substitutes):
    • If using Granny Smith apples, peel and core the apples. Cut each apple into 8 slices. For a lower-carb option, peel and core chayote squash or zucchini, then slice them into apple-sized pieces.
  3. Make the Dough:
    • In a mixing bowl, combine almond flour, coconut flour, baking powder, and xanthan gum. Mix in the melted butter, vanilla extract, and heavy cream. Knead until a dough forms. Divide the dough into 8 portions.
  4. Wrap the “Apples”:
    • Flatten each dough portion and wrap it around an apple slice (or substitute). Place the wrapped slices in the prepared baking dish.
  5. Make the Sauce:
    • In a small bowl, mix the remaining melted butter with erythritol. Pour this mixture evenly over the wrapped apple slices.
  6. Add Liquid and Cinnamon:
    • Pour the water (or diet soda) around the edges of the pan, being careful not to wash away the butter mixture. Sprinkle cinnamon generously over the top.
  7. Bake:
    • Bake for 30-35 minutes, or until the dumplings are golden brown and the dough is cooked through.
  8. Serve:
    • Enjoy the dumplings warm with a scoop of keto-friendly vanilla ice cream if desired. Spoon some of the sauce from the pan over the top.

Free Keto Meal Plan : KETO DIET PLAN FOR BEGINNERS STEP BY STEP GUIDE

Nutritional Information (per serving, assuming 8 servings):

  • Calories: ~200
  • Fat: ~18g
  • Protein: ~4g
  • Net Carbs: ~4g (using chayote squash or zucchini) or ~8g (using Granny Smith apples)

Tips:

  • Apple Substitutes: Using chayote squash or zucchini helps reduce carbs significantly while still providing a texture similar to apples.
  • Sweetener: Adjust the amount of sweetener to taste. Erythritol or monk fruit sweeteners are great keto-friendly options.
  • Dough: The almond and coconut flour combination mimics the texture of traditional dough but with fewer carbs.

Free Keto Meal Plan : KETO DIET PLAN FOR BEGINNERS STEP BY STEP GUIDE

This keto version of Baked Apple Dumplings provides a delicious way to enjoy the classic dessert while staying within your low-carb goals!

Keto Pasta Pie with Chicken and Cheese
Ingredients:

For the Dough:

  • 3 large eggs
  • 9 tablespoons almond flour (instead of oat flour)
  • 1 tablespoon saffron (optional, for color and flavor)
  • 1 tablespoon olive oil
  • Salt, to taste
  • 3 tablespoons water
  • 1 teaspoon baking powder (instead of yeast for a better keto-friendly rise)

Free Keto Meal Plan : KETO DIET PLAN FOR BEGINNERS STEP BY STEP GUIDE

For the Filling:

  • 80g shredded chicken breast (cooked and seasoned)
  • 30g mozzarella cheese (shredded)
  • 3 tablespoons full-fat cream cheese (instead of light curd cheese for keto-friendly fats)
  • Optional: additional shredded cheese for topping

Instructions:

  1. Prepare the Dough:
    • In a mixing bowl, combine the eggs, almond flour, olive oil, saffron (if using), salt, and water. Stir the mixture with a spoon until it forms a smooth batter.
    • Add the baking powder last and stir gently to incorporate it into the batter.
  2. Prepare the Filling:
    • Mix the shredded chicken, mozzarella cheese, and cream cheese in a separate bowl until well combined.
  3. Assemble the Pie:
    • Preheat your oven to 350°F (175°C). Grease a baking dish or pie dish with olive oil.
    • Pour half of the dough mixture into the greased dish, spreading it evenly across the bottom.
    • Spoon the chicken and cheese filling over the dough.
    • Pour the remaining dough mixture over the top of the filling, spreading it evenly to cover.
    • Optional: Sprinkle additional shredded cheese on top.
  4. Bake:
    • Bake in the preheated oven for 20-25 minutes, or until the top is golden brown and the pie is set.
  5. Serve:
    • Allow the pie to cool slightly before slicing and serving. Enjoy warm.

Free Keto Meal Plan : KETO DIET PLAN FOR BEGINNERS STEP BY STEP GUIDE

Nutritional Information (per serving, assuming 4 servings):

  • Calories: ~350
  • Fat: ~28g
  • Protein: ~20g
  • Net Carbs: ~3g (due to the almond flour and cream cheese)

Tips:

  • Almond Flour: A great low-carb alternative to oat flour, providing the necessary structure for the dough.
  • Full-Fat Dairy: Using full-fat cream cheese ensures that the recipe remains keto-friendly by keeping the carb count low and increasing healthy fats.
  • Baking Powder: This helps give the dough a light, fluffy texture without adding carbs.

Free Keto Meal Plan : KETO DIET PLAN FOR BEGINNERS STEP BY STEP GUIDE

This keto version of your pasta pie is deliciously low in carbs while being high in healthy fats and protein, making it perfect for a keto diet.

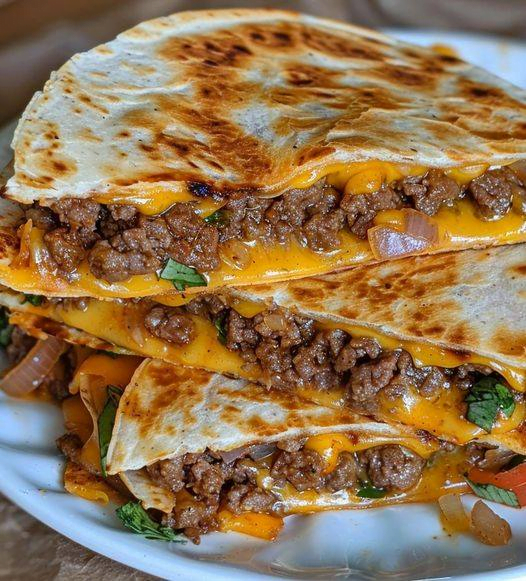
Keto Cheeseburger Quesadillas: A Comprehensive Recipe Guide

If you’re on a keto diet but craving a classic cheeseburger with a cheesy, crispy twist, Keto Cheeseburger Quesadillas are the perfect solution. Combining the savory flavors of a cheeseburger with the convenient, delicious form of a quesadilla, this recipe provides a low-carb, high-fat alternative that aligns with ketogenic dietary principles. This detailed guide will walk you through every step of preparing this scrumptious dish, offering insights into the ingredients, preparation methods, nutritional information, and more.

Ingredients

For the Quesadilla Filling:

  • Ground Beef: 1 lb (450 g) – Opt for grass-fed beef for higher nutritional value.
  • Cheddar Cheese: 1 cup (100 g), shredded – A rich source of fat and protein.
  • Cream Cheese: 2 oz (60 g) – Adds creaminess and binds the ingredients together.
  • Mustard: 1 tbsp – Adds tanginess to mimic classic cheeseburger flavors.
  • Pickles: ¼ cup (30 g), finely chopped – For a crunchy texture and extra flavor.
  • Diced Onion: ¼ cup (30 g) – Optional, for added taste.
  • Garlic Powder: ½ tsp – Enhances the overall flavor profile.
  • Salt and Pepper: To taste – Essential for seasoning.

For the Quesadilla Shell:

  • Almond Flour: 1 cup (96 g) – A low-carb alternative to regular flour.
  • Egg: 1 large – Helps to bind the flour into a dough.
  • Shredded Cheese: 1 cup (100 g) – Used in the dough for added richness and texture.
  • Baking Powder: 1 tsp – Helps the dough rise slightly.
  • Salt: ¼ tsp – Enhances flavor.
  • Butter or Oil: 2 tbsp – For cooking and adding fat.

Free Keto Meal Plan : KETO DIET PLAN FOR BEGINNERS STEP BY STEP GUIDE

Instructions

  1. Prepare the Quesadilla Filling: 1.1. In a medium skillet over medium heat, add the ground beef. Cook until browned, breaking it apart with a spatula to ensure even cooking. 1.2. Drain any excess fat, if necessary. Reduce heat to low. 1.3. Stir in the cream cheese until fully melted and incorporated. 1.4. Add the shredded cheddar cheese, mustard, and pickles to the skillet. Mix well until the cheese is fully melted and the mixture is combined. 1.5. Season with garlic powder, salt, and pepper to taste. Remove from heat and set aside.
  2. Prepare the Quesadilla Shell: 2.1. Preheat your oven to 350°F (175°C) or heat a non-stick skillet over medium heat if you prefer stovetop cooking. 2.2. In a large bowl, combine the almond flour, shredded cheese, baking powder, and salt. 2.3. Add the egg and mix until a dough forms. If the dough is too sticky, you can add a little more almond flour. 2.4. Divide the dough into two equal portions. Place each portion between two sheets of parchment paper. Use a rolling pin to roll out the dough into thin, even circles, about 6-8 inches in diameter. 2.5. Heat butter or oil in a skillet over medium heat. Cook each dough circle for 2-3 minutes on each side, or until golden brown and crispy. Remove from the skillet and set aside.
  3. Assemble the Quesadillas: 3.1. Place one cooked dough circle back in the skillet or on a baking sheet. Spread half of the cheeseburger filling evenly over the dough. 3.2. Top with the second dough circle. If baking, place in the preheated oven for 5-7 minutes, or until the cheese inside is melted and the quesadilla is heated through. 3.3. If using a skillet, cook for an additional 2-3 minutes on each side to ensure the cheese is melted and the quesadilla is crispy. 3.4. Remove from heat and let cool slightly before slicing into wedges.

Nutritional Information

  • Serving Size: 1 quesadilla (½ of the total recipe)
  • Calories: 500 kcal
  • Total Fat: 38 g
  • Saturated Fat: 16 g
  • Cholesterol: 105 mg
  • Sodium: 750 mg
  • Total Carbohydrates: 10 g
  • Dietary Fiber: 4 g
  • Net Carbs: 6 g
  • Protein: 35 g

Free Keto Meal Plan : KETO DIET PLAN FOR BEGINNERS STEP BY STEP GUIDE

Weight Watchers SmartPoints

For those following the Weight Watchers program, each quesadilla has approximately 6 SmartPoints. This low SmartPoints value makes it an excellent choice for those adhering to the program while maintaining a keto lifestyle.

Tips for Success

  1. Quality of Ingredients: Use high-quality ground beef and cheese to enhance the flavor and texture of your quesadillas.
  2. Consistency of Dough: Ensure that the almond flour dough is well-mixed and slightly pliable. It should not be too dry or too sticky.
  3. Crispiness: For extra crispiness, ensure that your skillet is preheated properly before adding the dough.
  4. Customization: Feel free to add additional toppings like sautéed mushrooms or bacon bits to the filling for extra flavor.

Free Keto Meal Plan : KETO DIET PLAN FOR BEGINNERS STEP BY STEP GUIDE

Conclusion

Keto Cheeseburger Quesadillas offer a delectable and satisfying way to enjoy the flavors of a cheeseburger while sticking to your ketogenic goals. With a crispy, cheesy shell and a flavorful beef filling, this recipe is both delicious and low in carbs. Perfect for a quick lunch, dinner, or even a hearty snack, these quesadillas are a versatile and enjoyable addition to your keto meal repertoire.

For best results, make sure to follow the instructions carefully and adjust seasonings to your taste. Enjoy your Keto Cheeseburger Quesadillas with a side of keto-friendly dipping sauce or a fresh green salad for a complete, balanced meal.

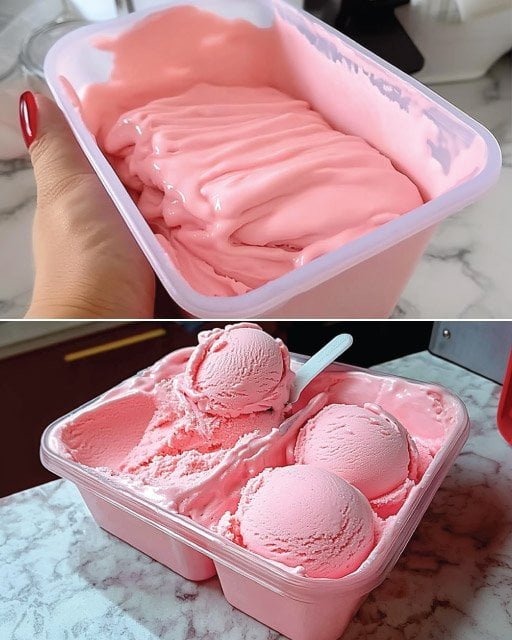
Keto Raspberry Frosty Ice Cream. You’ve got to try this low carb, no bake, keto-friendly treat made with just 3 ingredients if you’re looking for something quick and sweet to whip up with very little guilt: frozen fruit, heavy whipping cream, and the sweetener of your choice like Swerve, Stevia, Monk Fruit, or if you’re not watching your carbs, even regular sugar. Super versatile!

If you’re following a keto diet I’d recommend raspberries, blueberries or strawberries for this recipe, berries are one of the lowest carb fruits, but it can also be made with frozen mango, peaches, melon, pineapple or cherries. The kids will love it, too!

Perfect for the hot summer months, this quick and easy cold keto dessert but since frozen fruit is always available, can be enjoyed any time of the year .

Simply by placing it in the freezer for about 30 minutes after it’s blended, you can adjust the consistency and make it more like ice cream , but as a thick and creamy frosty, I enjoy it straight out of the food processor.

Perfect serving for one, this quick and easy keto dessert recipe! It’s only takes a few minutes to blend together in your food processor , and it incredibly simple to make with just 3 ingredients. This low carb treat always hits the spot, anytime you’re craving something sweet in a hurry.

Course: Dessert

Servings: 1
Ingredients
(or fruit of choice)1 cup frozen raspberries
1/2 cup COLD heavy whipping cream
(or any low carb sweetener)1/8 tsp monk fruit powder
Instructions
Place the heavy whipping cream in your freezer for 10-15 minutes before getting started so that it gets super cold.
To a small food processor, add the frozen fruit and blend until (only takes a few seconds)the fruit is broken up into small pieces .
Add the low carb sweetener and cold whipping cream; process until the mixture is smooth and nice. With a spoon in-between mixing, you may have to scrape the sides .
Enjoy immediately. Yum!

Recipe Notes
I’d recommend berries if you’re watching your carbs but just about any fruit can be used for this recipe . With the sugar of your choice, you can also replace the low carb sweetener. This recipe has about 5 net carbs, 22 grams of fat, 2 grams of protein and 240 calories if using raspberries.
Use slightly less heavy cream and then place the mixture in your freezer for about 30 minutes before eating if you’d prefer more of an ice cream consistency.

Nutrition Information:
YIELD: 1
SERVING SIZE: 1
Amount Per Serving:
CALORIES: 658
TOTAL FAT: 51g
SATURATED FAT: 25g
TRANS FAT: 1g
UNSATURATED FAT: 21g
CHOLESTEROL: 495mg
SODIUM: 1356mg
CARBOHYDRATES: 6g
FIBER: 0g
SUGAR: 2g
PROTEIN: 43g

Keto Mexican Chimichangas. Hers(my mother) was essentially the same, except she would fry them in unhealthy oil and use tortillas that were off-plan and high in carbohydrates. However other than using healthier ingredients, this is still the same great thing!
How Do Beef Chimichangas Taste?
Chimichangas and burritos have a lot in common. Up until cooking, both are prepared similarly. Stuffing that has been heated and warmed tortillas are used to make burritos. Chimichangas are similar to burritos in this regard, but after being stuffed, the tortilla is deep-fried to give it more flavor and crispiness.
Deep frying increases the amount of oil in the dish, which increases the calorie content. Hence, shallow oil pan frying greatly improves the health of the food while maintaining its deliciousness.

The Chimichangas’ Beef’s Frying Oil
The pan-frying method I use for my beef chimichanga recipe asks for avocado oil. You can substitute another fat for butter, bacon fat, or olive oil, but those have a lower smoke point. The temperature at which an oil or fat begins to smoke and subsequently turns rancid is known as the “smoke point.” Since it creates harmful free radicals in the body, rancid oil or fat is bad.
Avocado oil has a very high smoke point (500+ degrees Fahrenheit), however in my recipe, this temperature is never reached as long as you don’t turn up the heat above what I recommend. The end result is pan-fried beef chimichangas that are properly brown and crispy without turning the oil sour!

Top Concepts
There are a lot of different topping options for these beef chimichangas. These pickled red onions are great piled high. They increase the flavor and the crunch factor.
Other options include sour cream, salsa, lettuce, cilantro, tomatoes, jalapenos, ranch dressing, beans (up to 1/4 cup are allowed on Trim Healthy Mama’s S setting), beans, and so forth. Even adding bacon pieces would be unconventional!

List of Side Dishes
The only vegetables in this dish are the toppings, which may or may not be vegetables (but not much). This dish is high in beef.
As a result, I advise eating it with some non-starchy green vegetables on the side, such as asparagus, broccoli, or brussels sprouts. It would go well with a side salad or some cauliflower rice seasoned with Mexican spices.
Ingredients

for Beef
a teaspoon of avocado oil
3 lbs. of boneless beef roast with extra fat removed
1/2 teaspoon of black pepper, ground
ONE tsp. of ground cumin, TWO tsp. of mineral salt
Oregano, dried, two tablespoons

10 grammes of chilli powder
lime juice, 2 tablespoons
1 can (approximately 4 ounces) (about 4 ounces) green chilies, diced
1/4 cup of tomato paste
1 cup of beef stock or broth
Other Substances
8 low-carb tortillas, two tablespoons of avocado oil, and optional toppings
Instructions

For Beef
1 tablespoon of avocado oil has been heated in a skillet over medium heat. The meat should be seared on all sides with tongs. Although optional, this step adds a lot of flavor. Save this pan for a future use.
In a slow cooker’s crock, add the seared steak and the additional meat ingredients. Cook(low heat) for EIGHT-TWELVE hours.
Creating a chimi-hanga
On a plate, arrange a few paper towels; keep them aside.
Add an additional 2 tablespoons of avocado oil to the skillet you used to sear the beef, and heat it over medium-low heat. When the oil bubbles when the handle of a wooden spoon is inserted, it is ready.
Microwave the tortillas for about a minute while the oil is getting hot (if you have a tortilla warmer, use that).
Shake off any leftover liquid before adding 1/4 to 1/2 cup of the meat to each warm tortilla. Then, fold the tortilla in half.
As many chimichangas as will fit should be placed seam-side down in the hot oil. To prevent oil from spilling everywhere, cover with a splatter screen.
Use tongs to turn the chimichangas to the top and continue pan frying for an additional 2 or 3 minutes, or until the desired level of golden brownness is reached. The sides and ends can also be pan-fried by either holding them in the oil or leaning them on the skillet’s side. Please keep in mind that any juice that spills into the oil will cause it to splutter.
Take Chinchilla out of the oil. Put on a plate covered with paper towels. Till they are all cooked, keep cooking the remaining chimichangas.
Serve with desired garnishes and take pleasure in!
Notes
NUTRITION
1 chimichanga per servingEnergy: 380 kcal6g carbs34g of proteinFat: 25g3g of fibreNet 3g carbs